Assign Roles via select menu
In this guide, we will create a select menu on a message that will give a role when someone selects a option in the select and sends a message about which role they got.
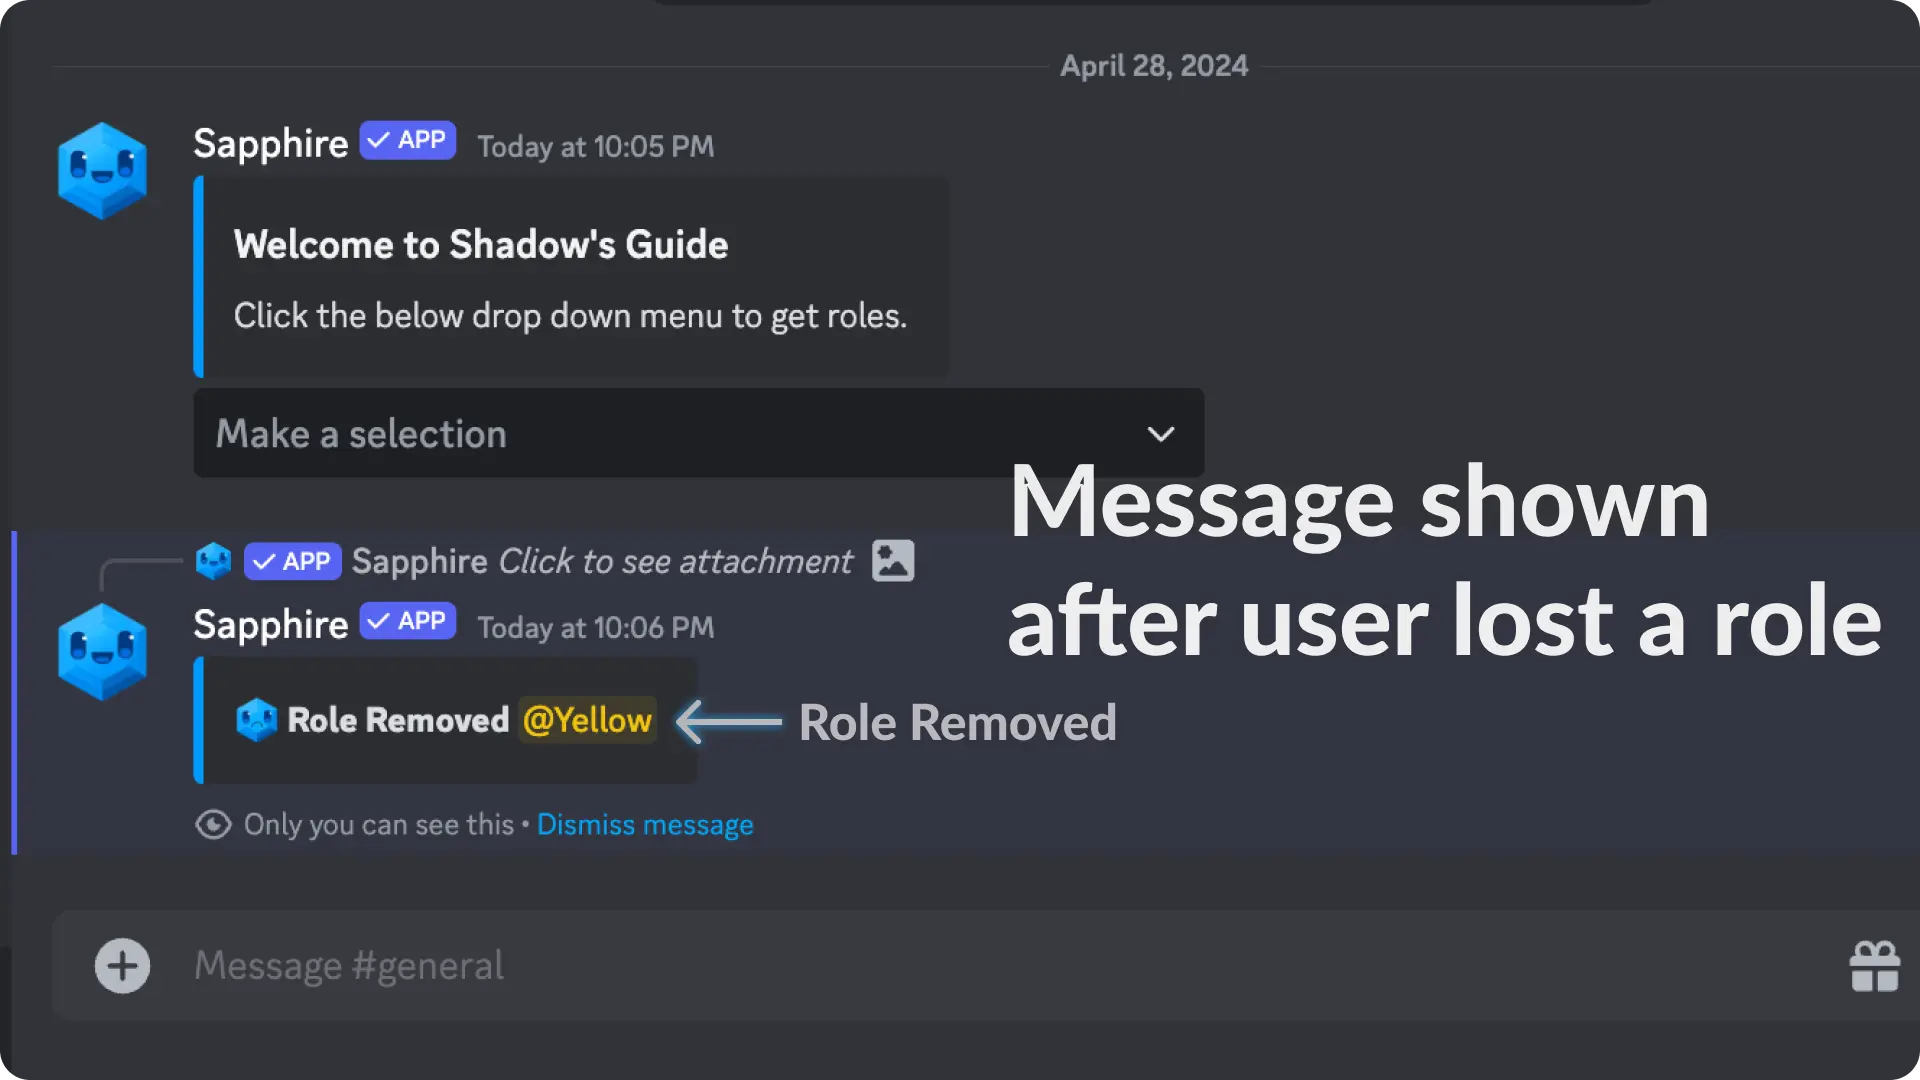
Selecting the option again will remove their role and sends a message about which role got removed from them


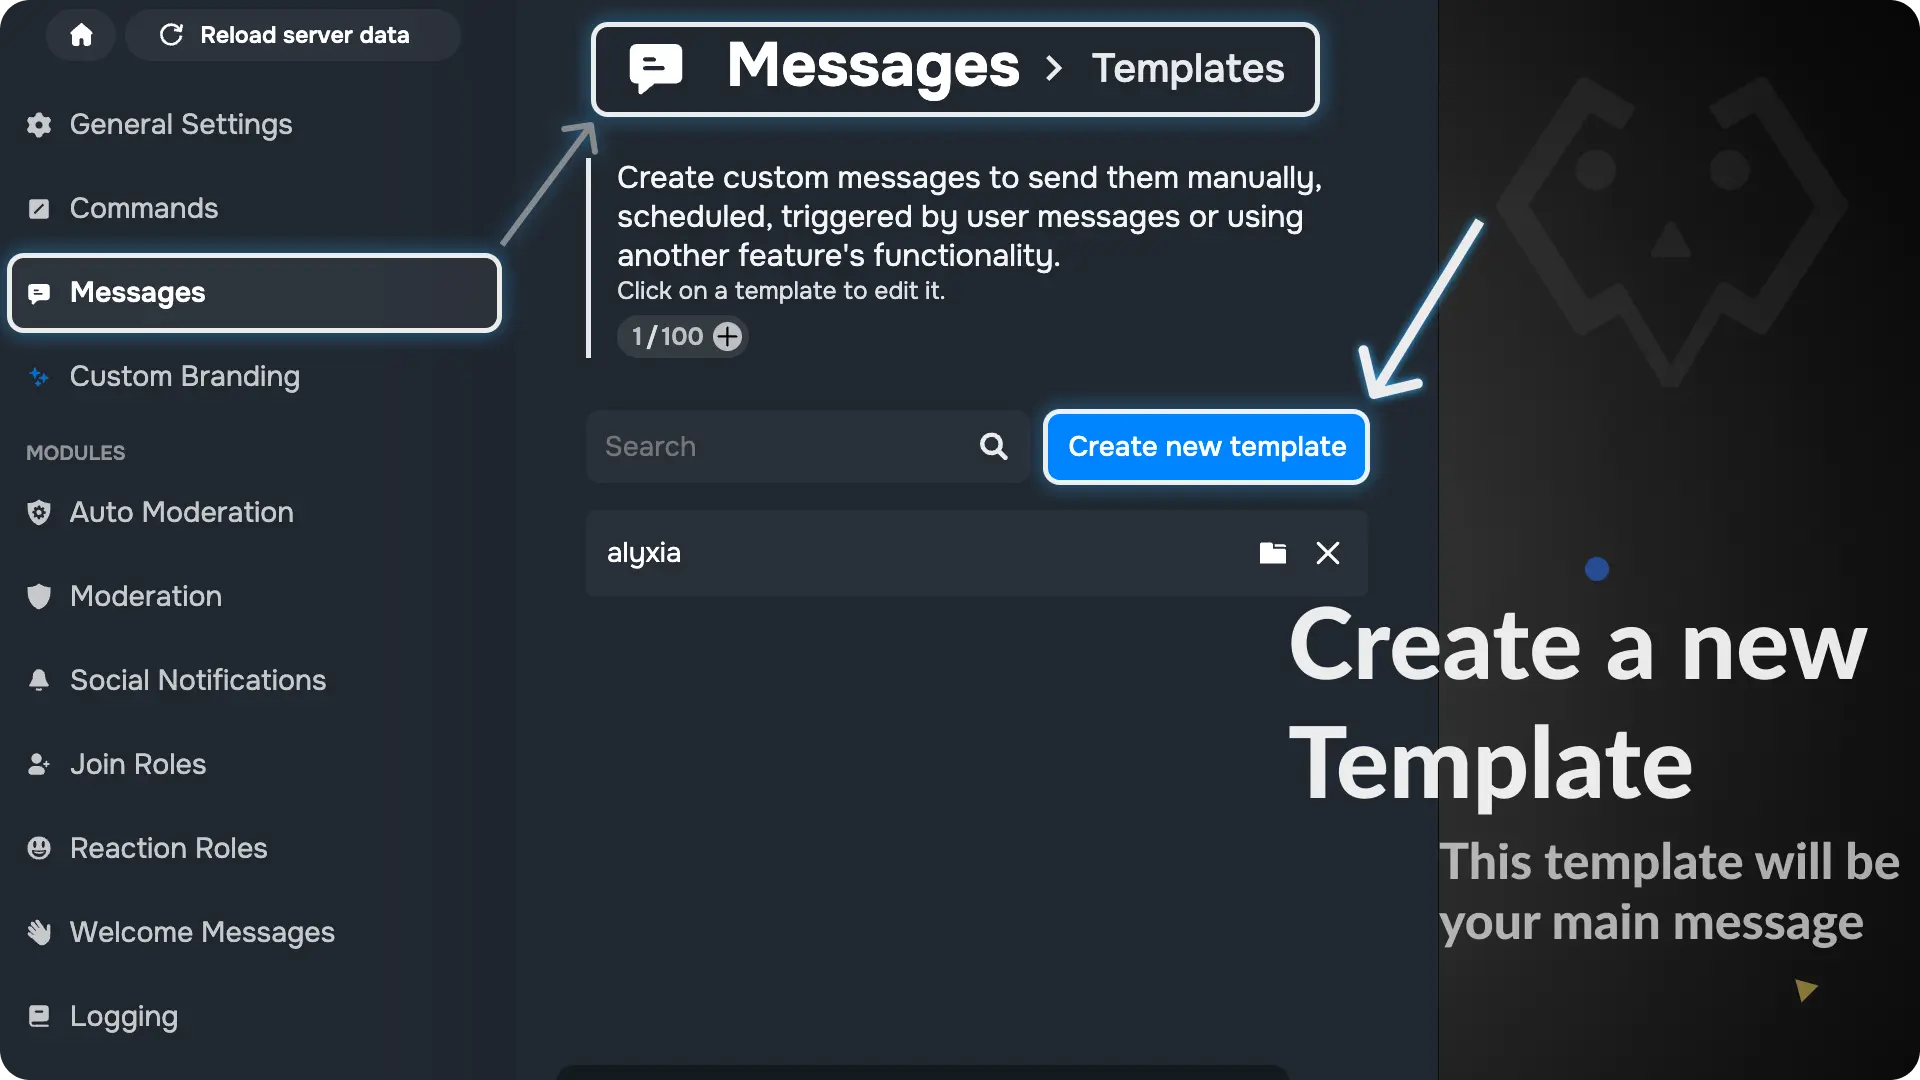
1) Create a message template
Go to the Message Template page from the messages menu on Sapphire dashboard and create a new template by clicking the "Create new template" Select Menu.
Note
We will call this template as "Main Message" because it's the one that has select menu. When someone clicks the option in select menu, it gives a role and sends a message which is only visible to that user.
2) Design your Main Message
For this guide, we will design a simple server welcome message which will have a select menu with two option "Yellow Role" & "Pink Role"
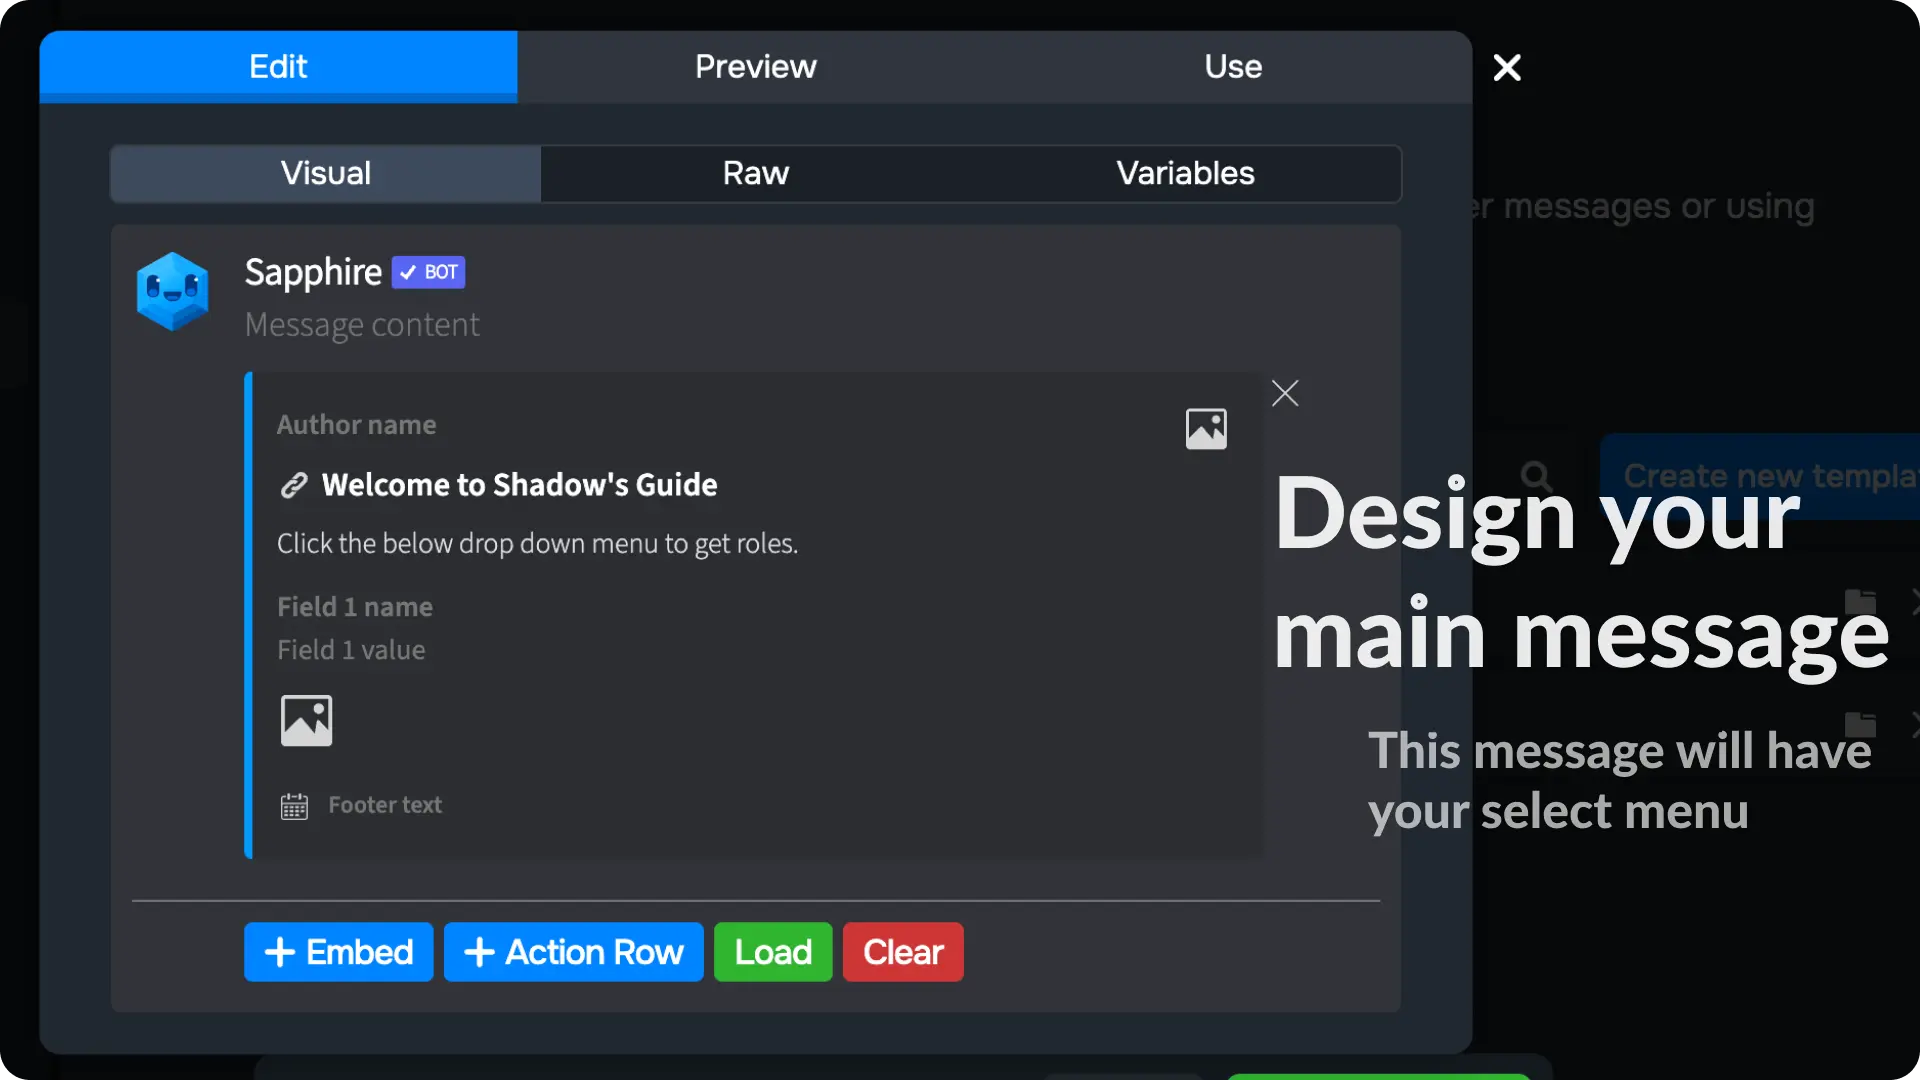
3) Add the Select Menu to the Main Message
Click the "+ Action Row" to add an action row in the message template. Then click the "+ Select Menu" to add a Select Menu.

4) Configure the Select Menu on Message Template
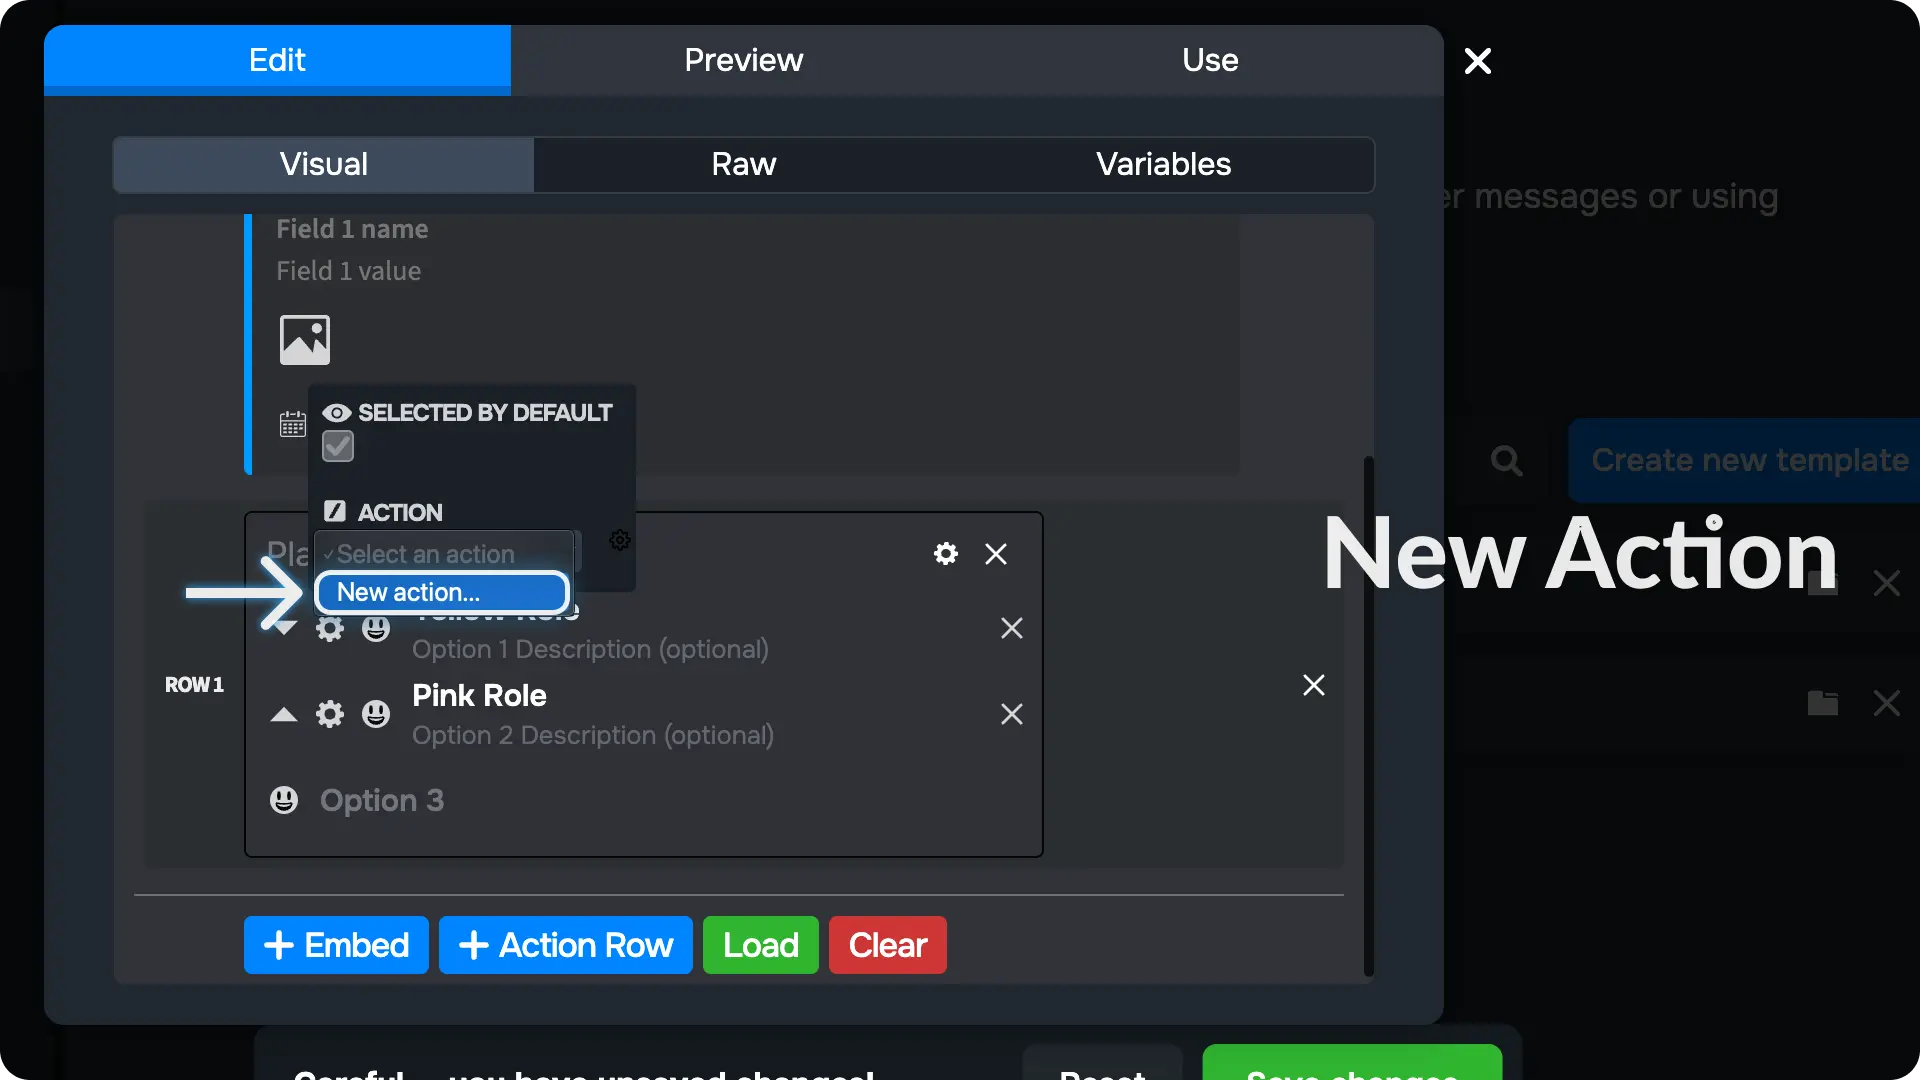
Click the ⚙ on the Select Menu, then click "Select an action".
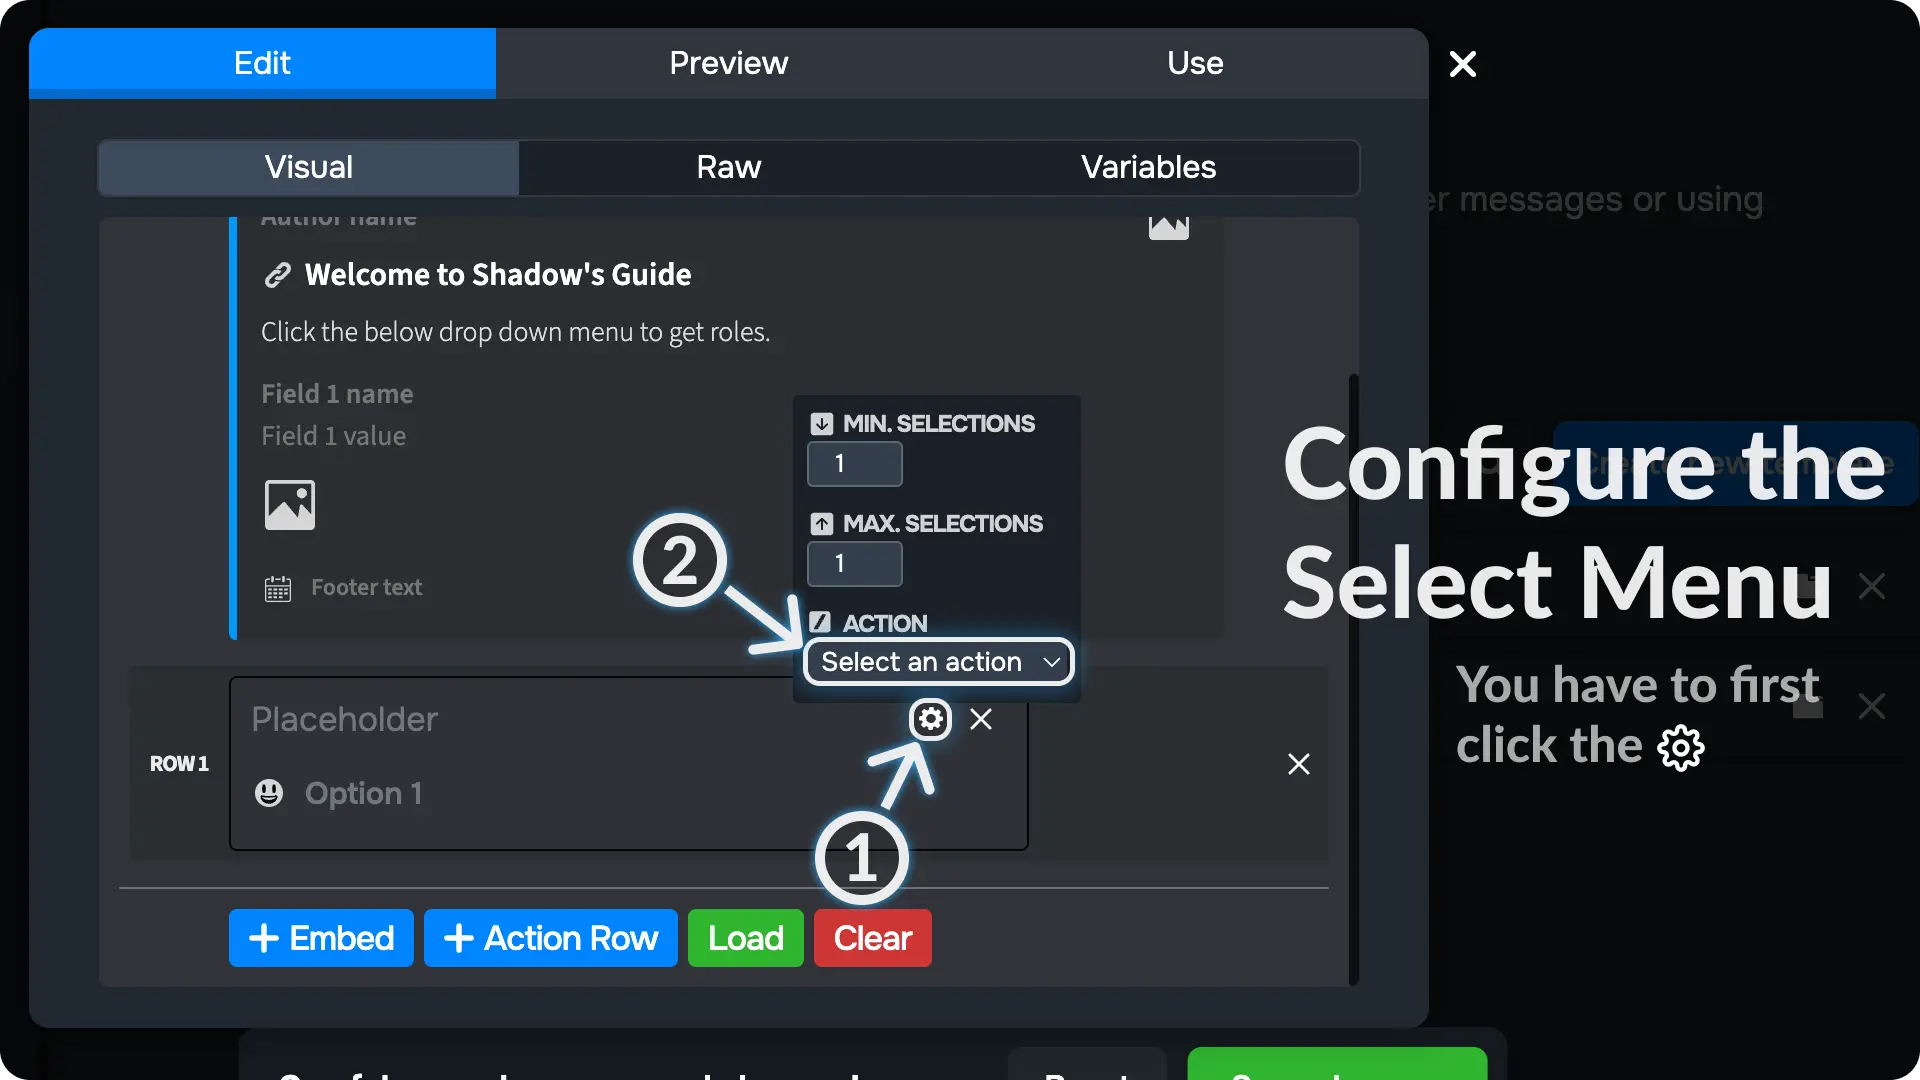
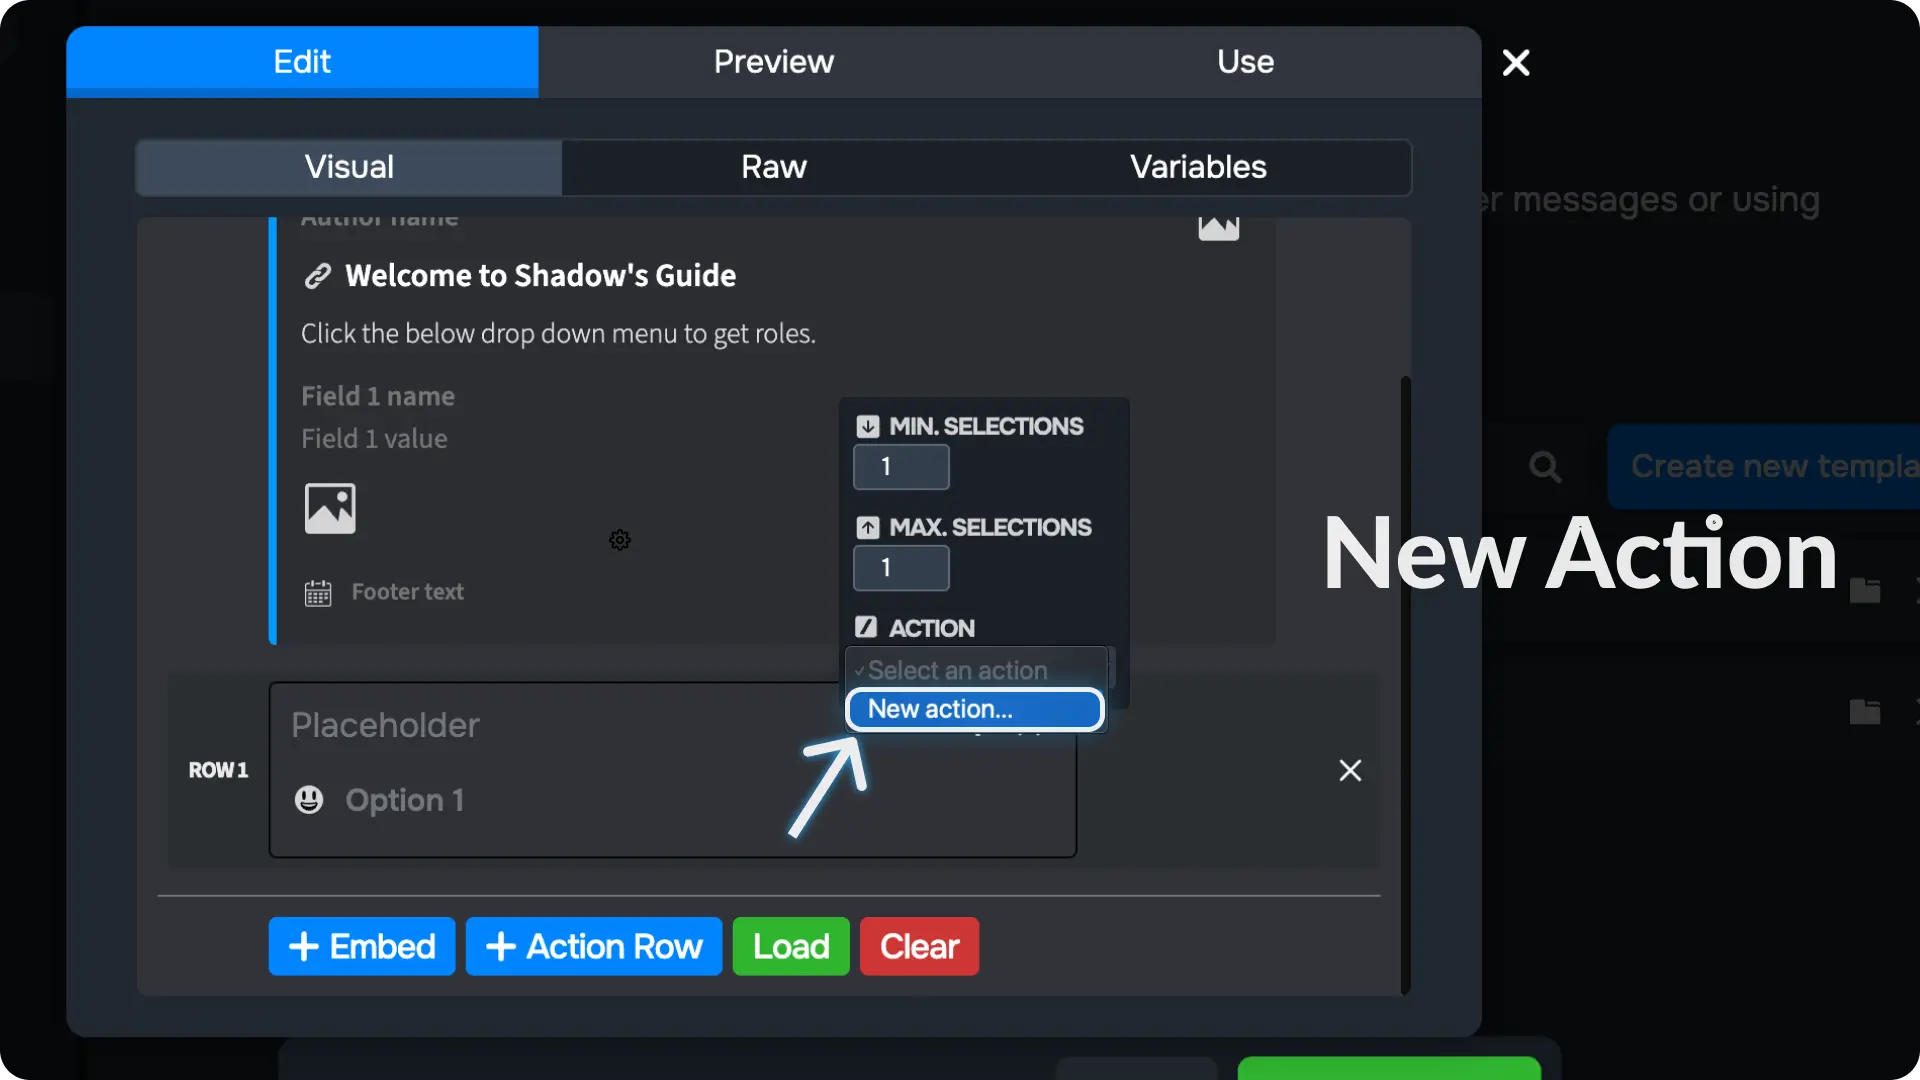
5) Create a New Action
If you've already created any Select Menu components, they'll appear in the actions list. Since we haven't created any components yet, we'll see an option to create a new Select Menu component.
Click on "New action" to create a new Select Menu component.
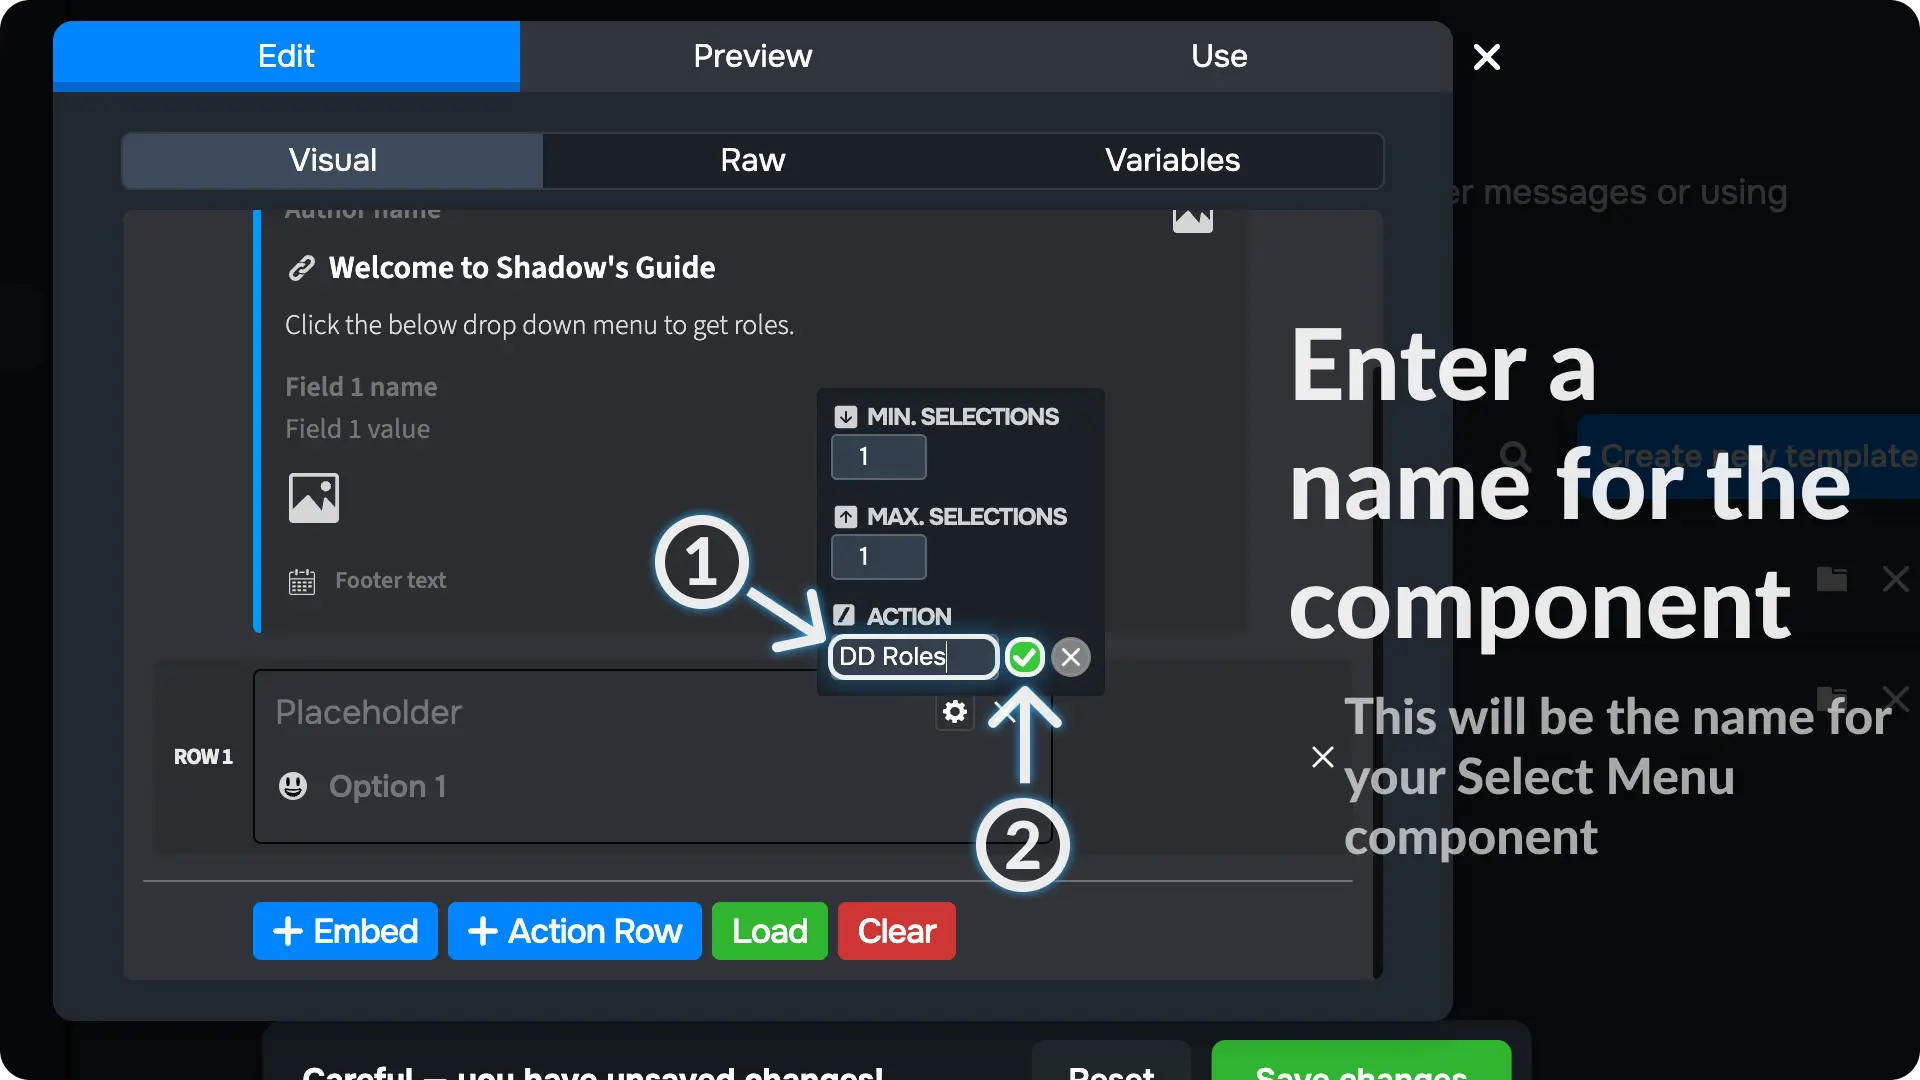
6) Enter a name for your Select Menu Component
Type in a name for your Select Menu component and click the ✅. This will make a new Select Menu component and link it to this Select Menu.
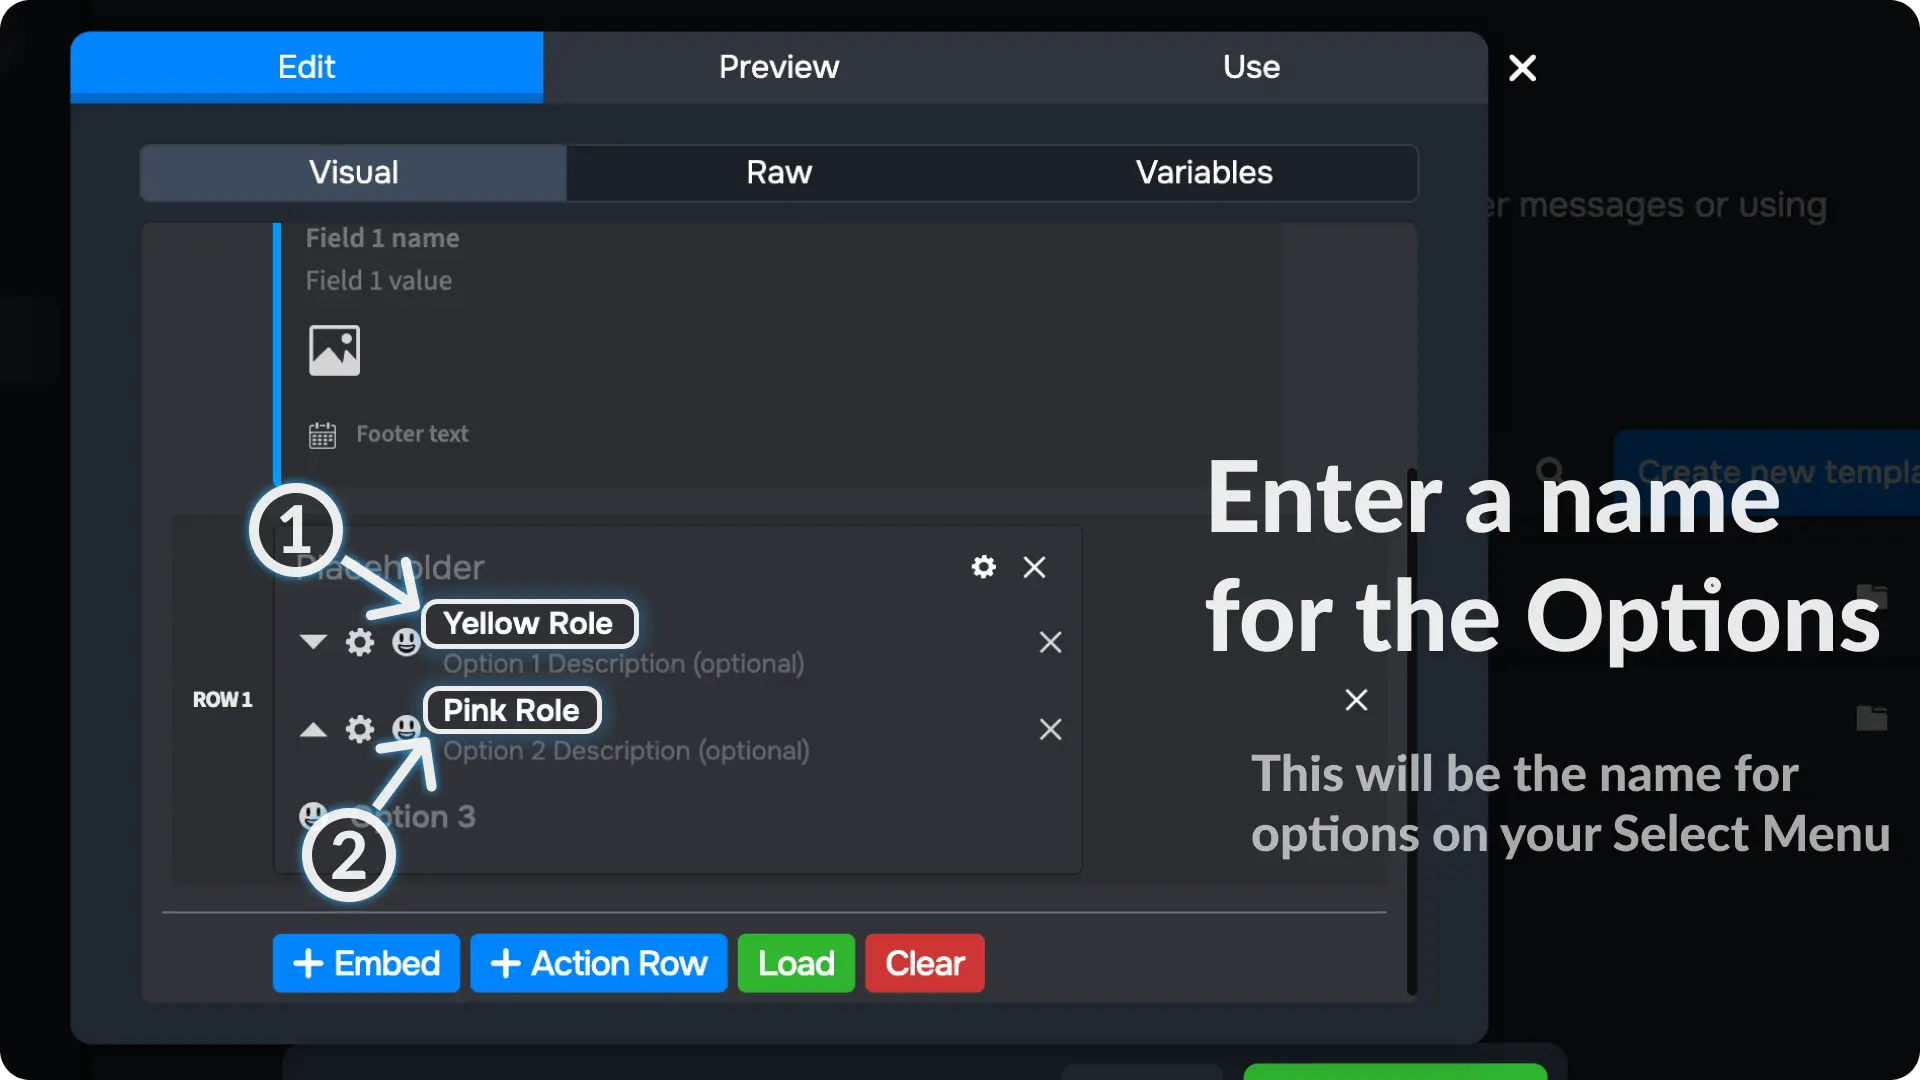
7) Enter a name for the options
Type a name for the options you want to have on your select menu.
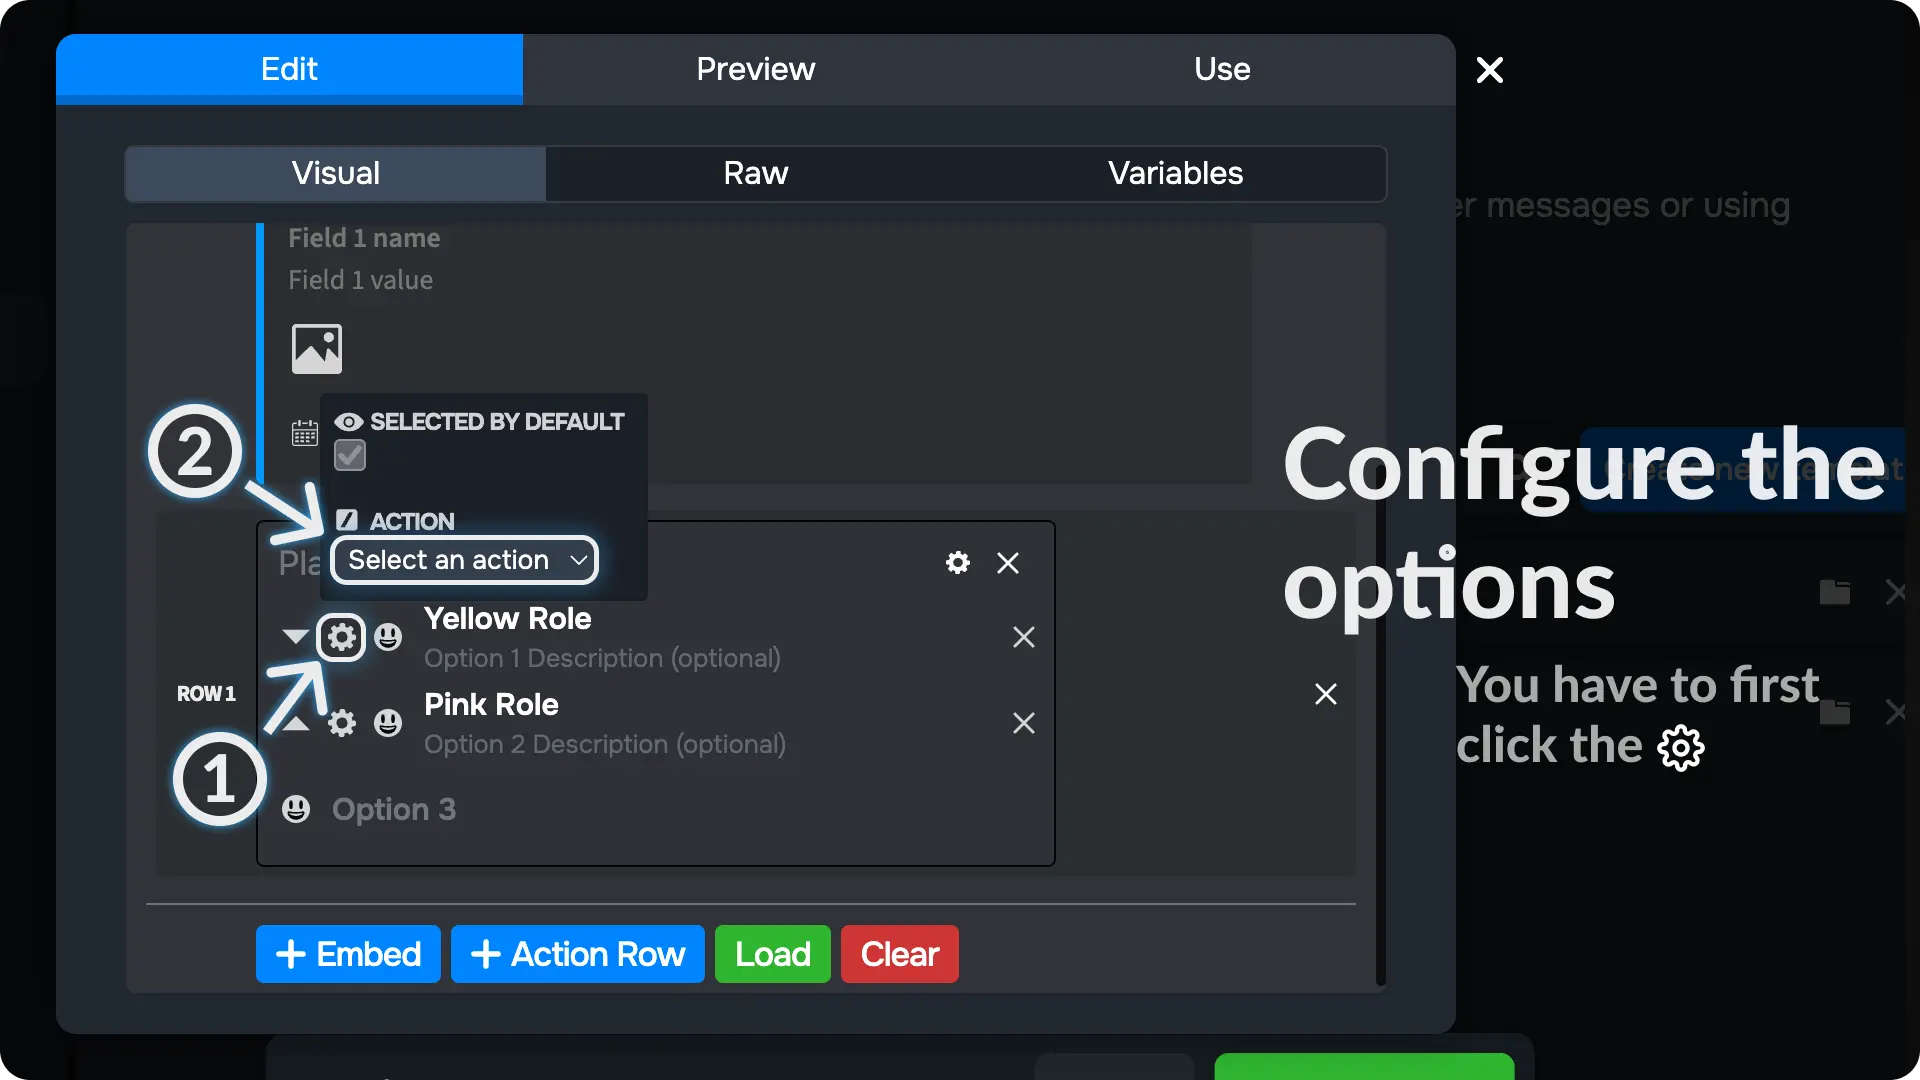
8) Configure the select menu options
Click the ⚙ near the options and click on "Select an action"
9) Create a New Action for the option
If you've already created any action for the select component, they'll appear in the actions list. Since we haven't created any actions yet, we'll see an option to create a new action.
Click on "New action" to create a new action.
10) Enter a name for the action on the option
Type a name for the action on the options and click the ✅. This will create a new action on select menu component and link it to this option.

Note
Repeat this process for other options you have on your select menu
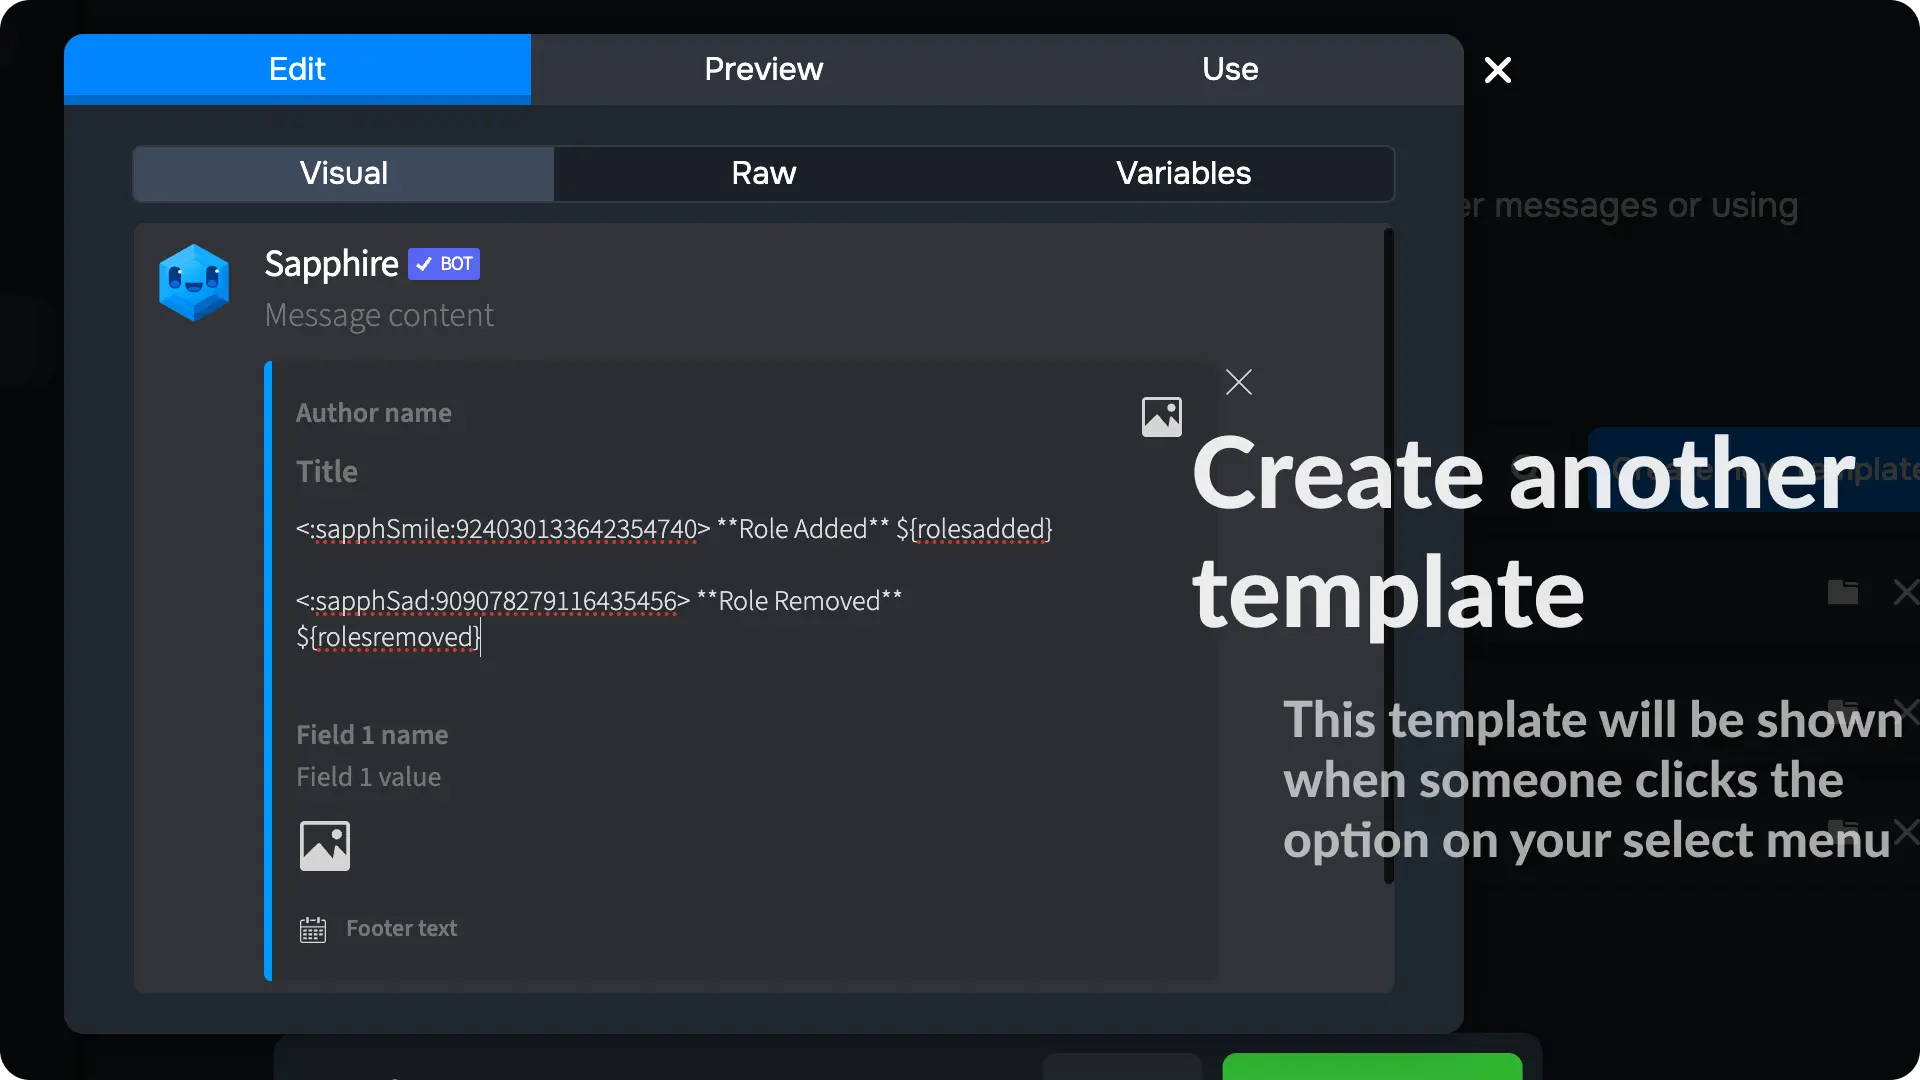
11) Create another message template
Create a new message template, just like we did in step 1. Sapphire will send this template when someone clicks the Select Menu.
For this guide, we will create a Select Menu to give user a role and send a confirmation message. So, I have created a new message template and entered some variables and text.
I have given this message content below so you can copy and paste it into your message template.
Note
Explanation for the message give above:
<:sapphSmile:924030133642354740> this is a sapphire emoji id which will show sapphire emoji on the message
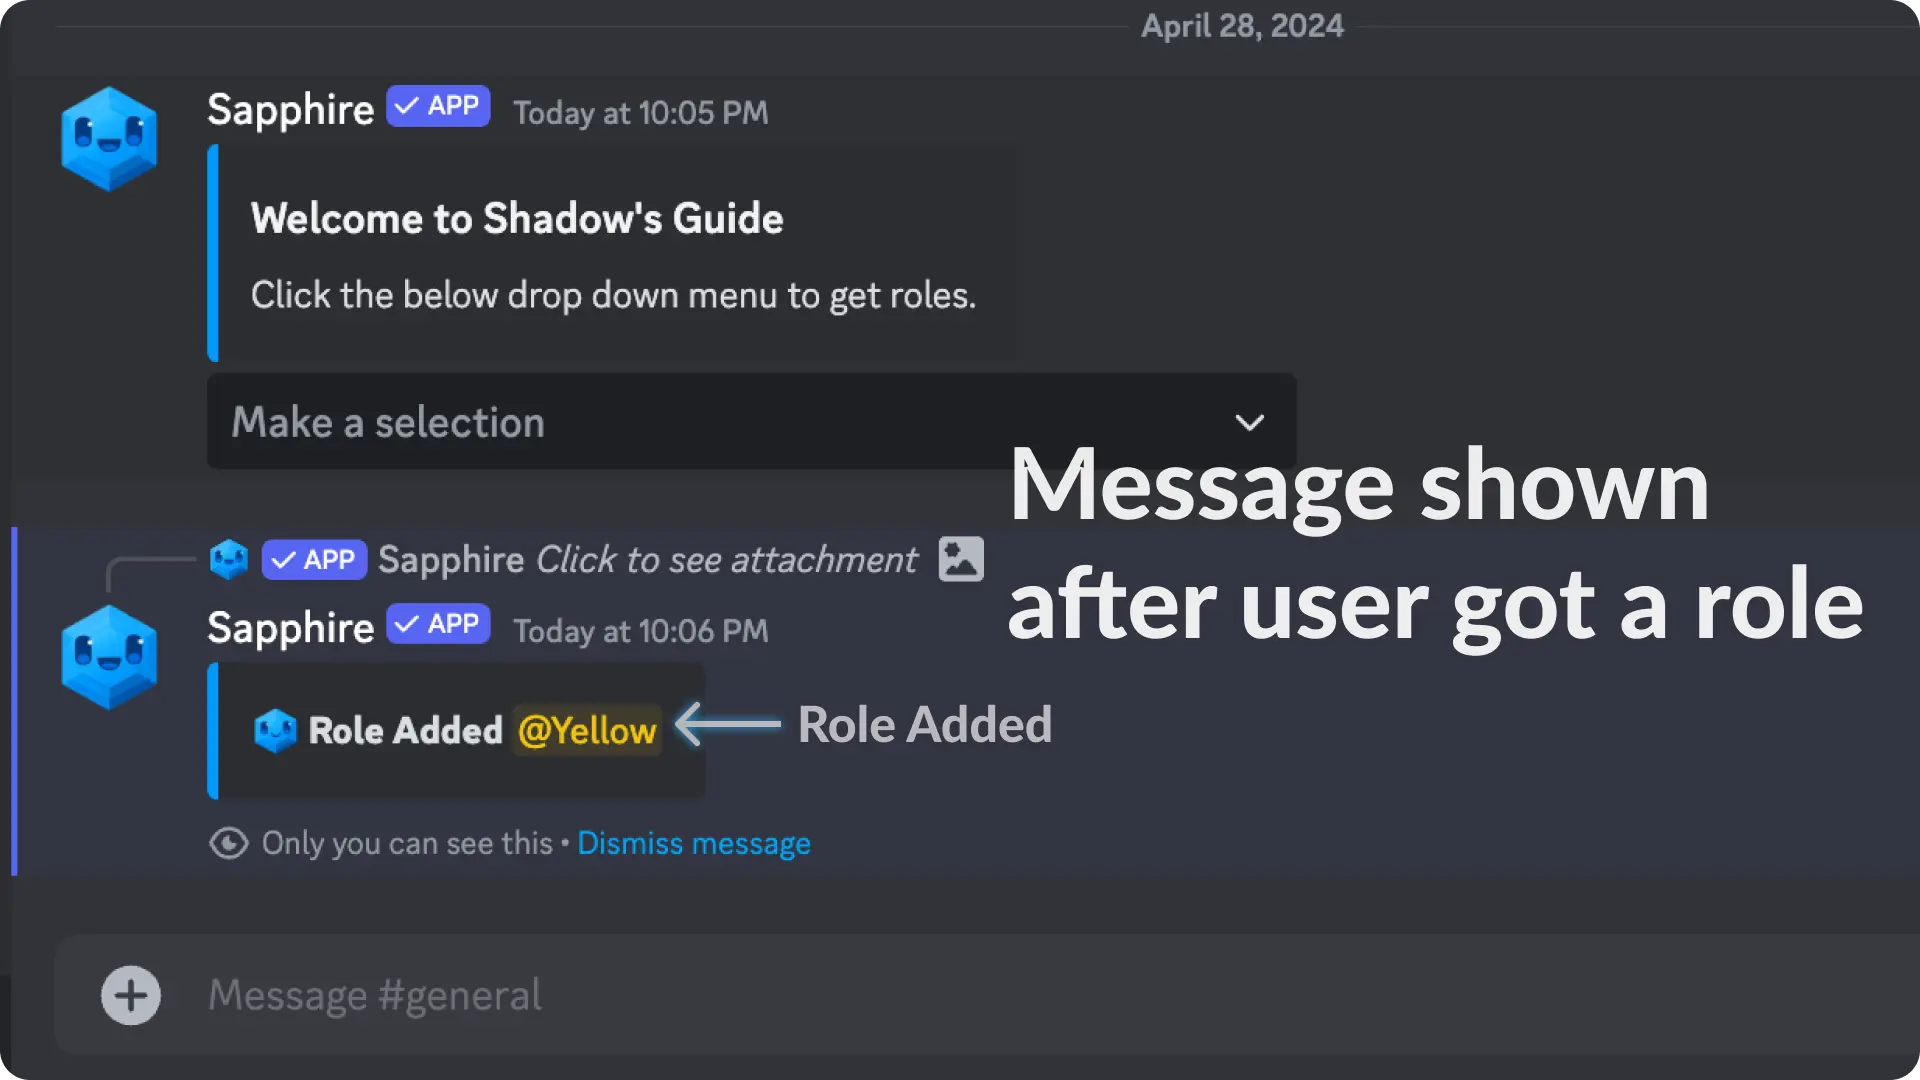
**Role Added** - Bold text
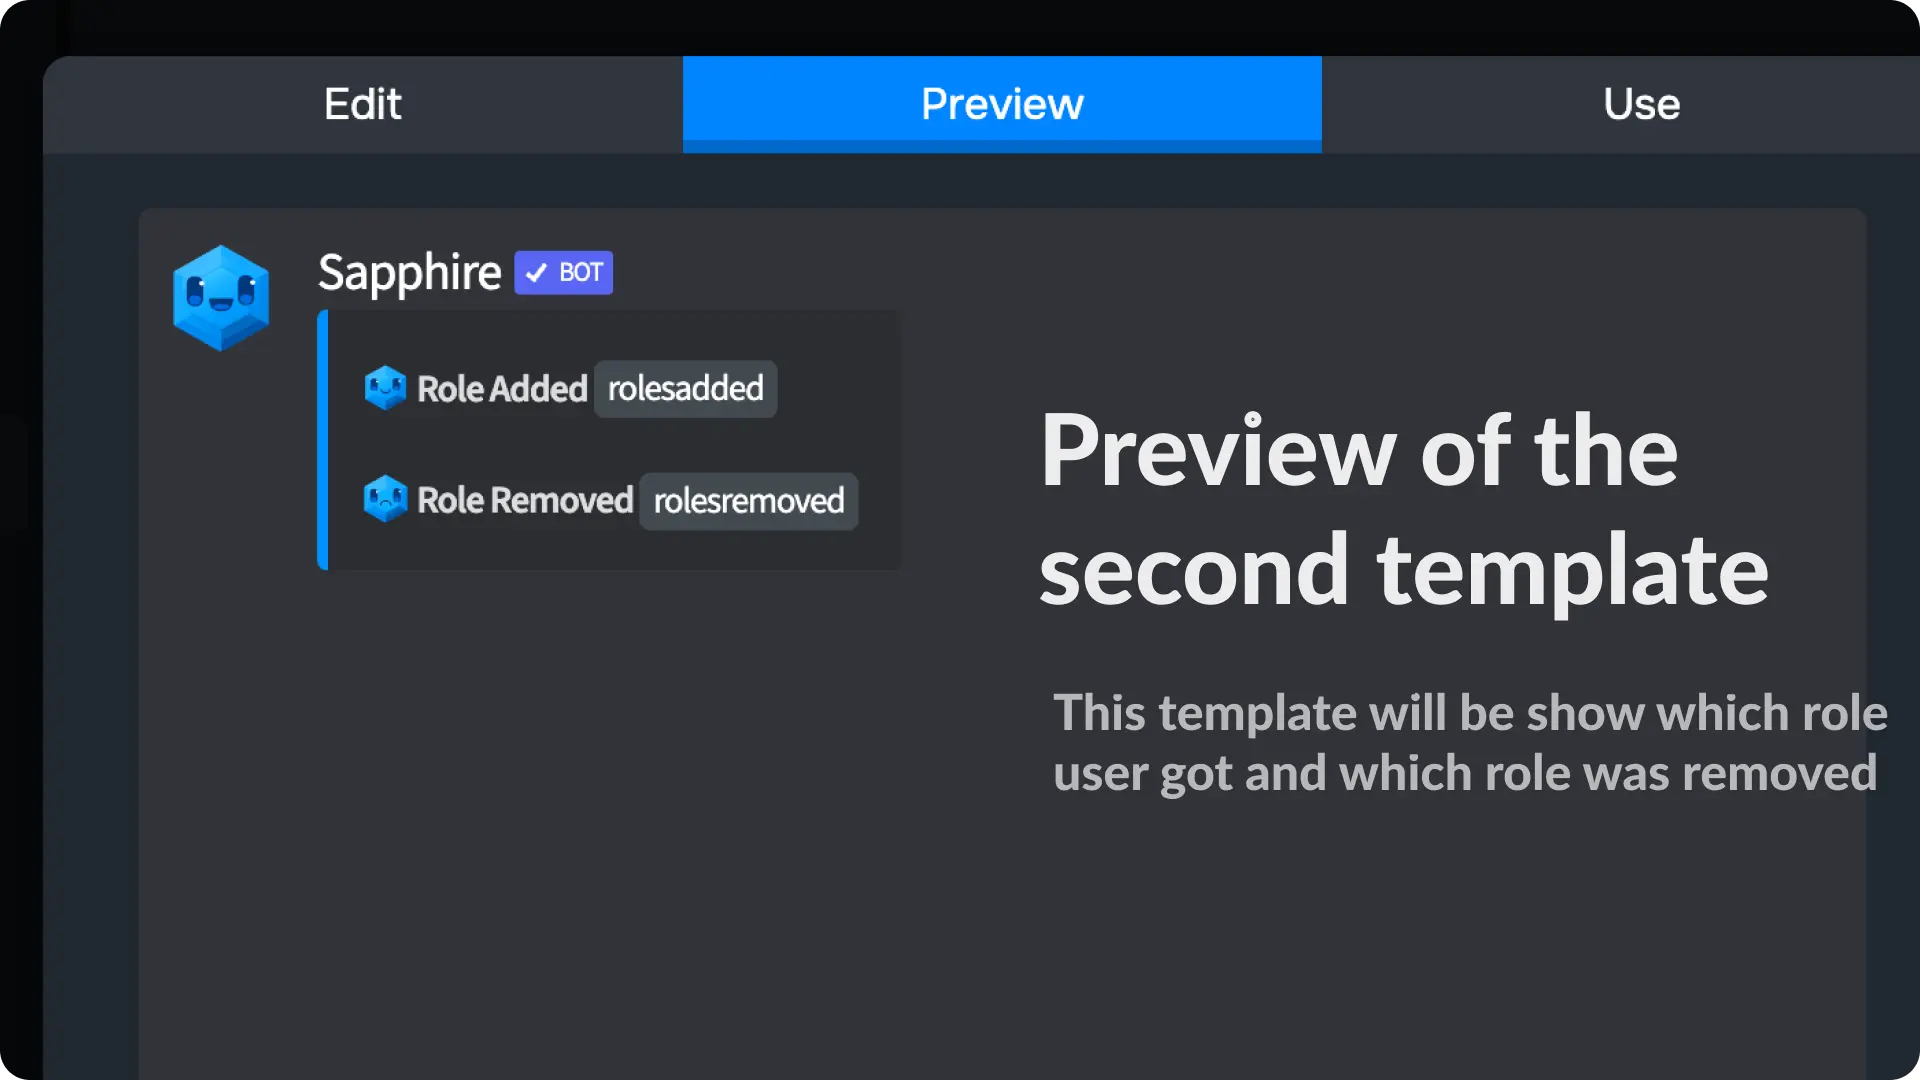
${rolesadded} - Roles Added Variable, this will show which role the user got after clicking the Select Menu
${rolesremoved} - Roles Removed Variable, this will show which role is removed from the user got after clicking the Select Menu
12) Remove Empty Lines
Go to the variables menu on the template editor of the message you created on the previous step and enable the option Remove Empty Lines
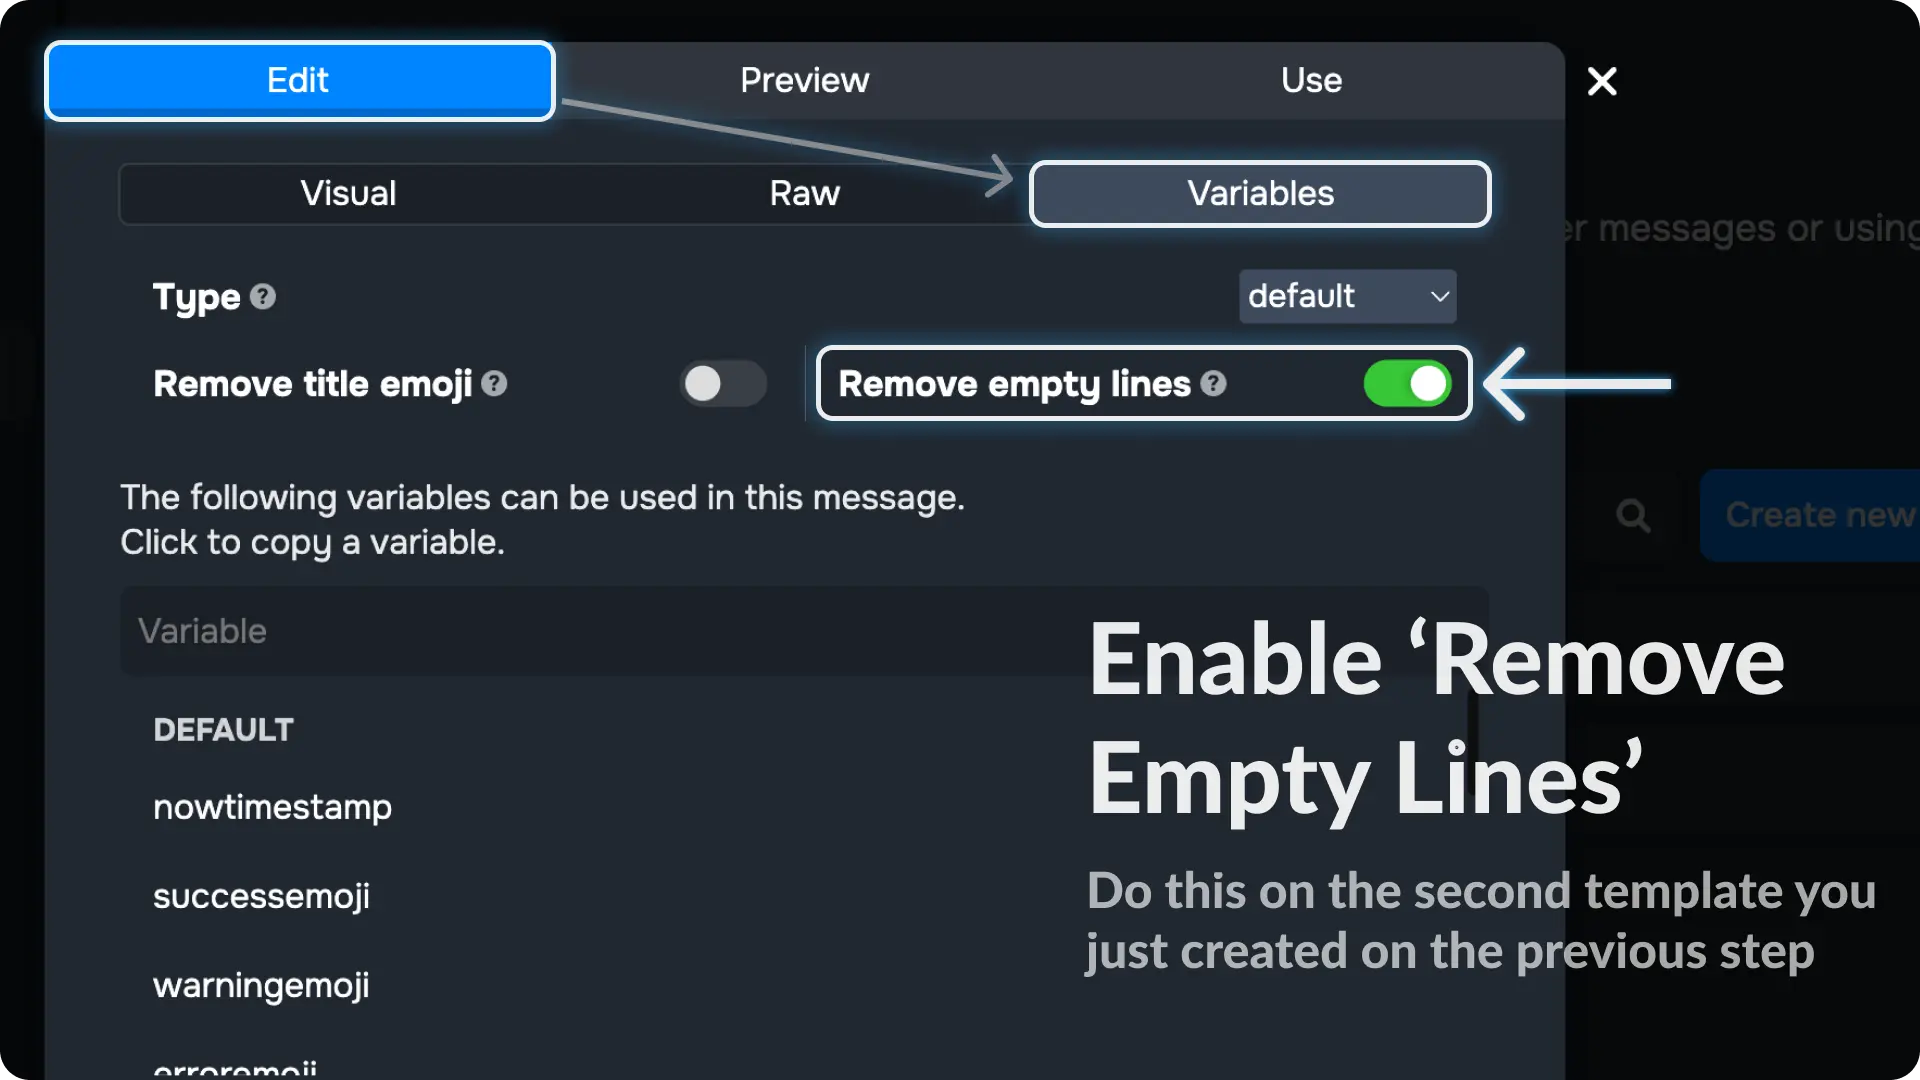
Note
The option Remove Empty Lines will hide the line from message template if the variable used on the line is empty. We use it on this template so that it only show the roles added to the user or removed from the user.
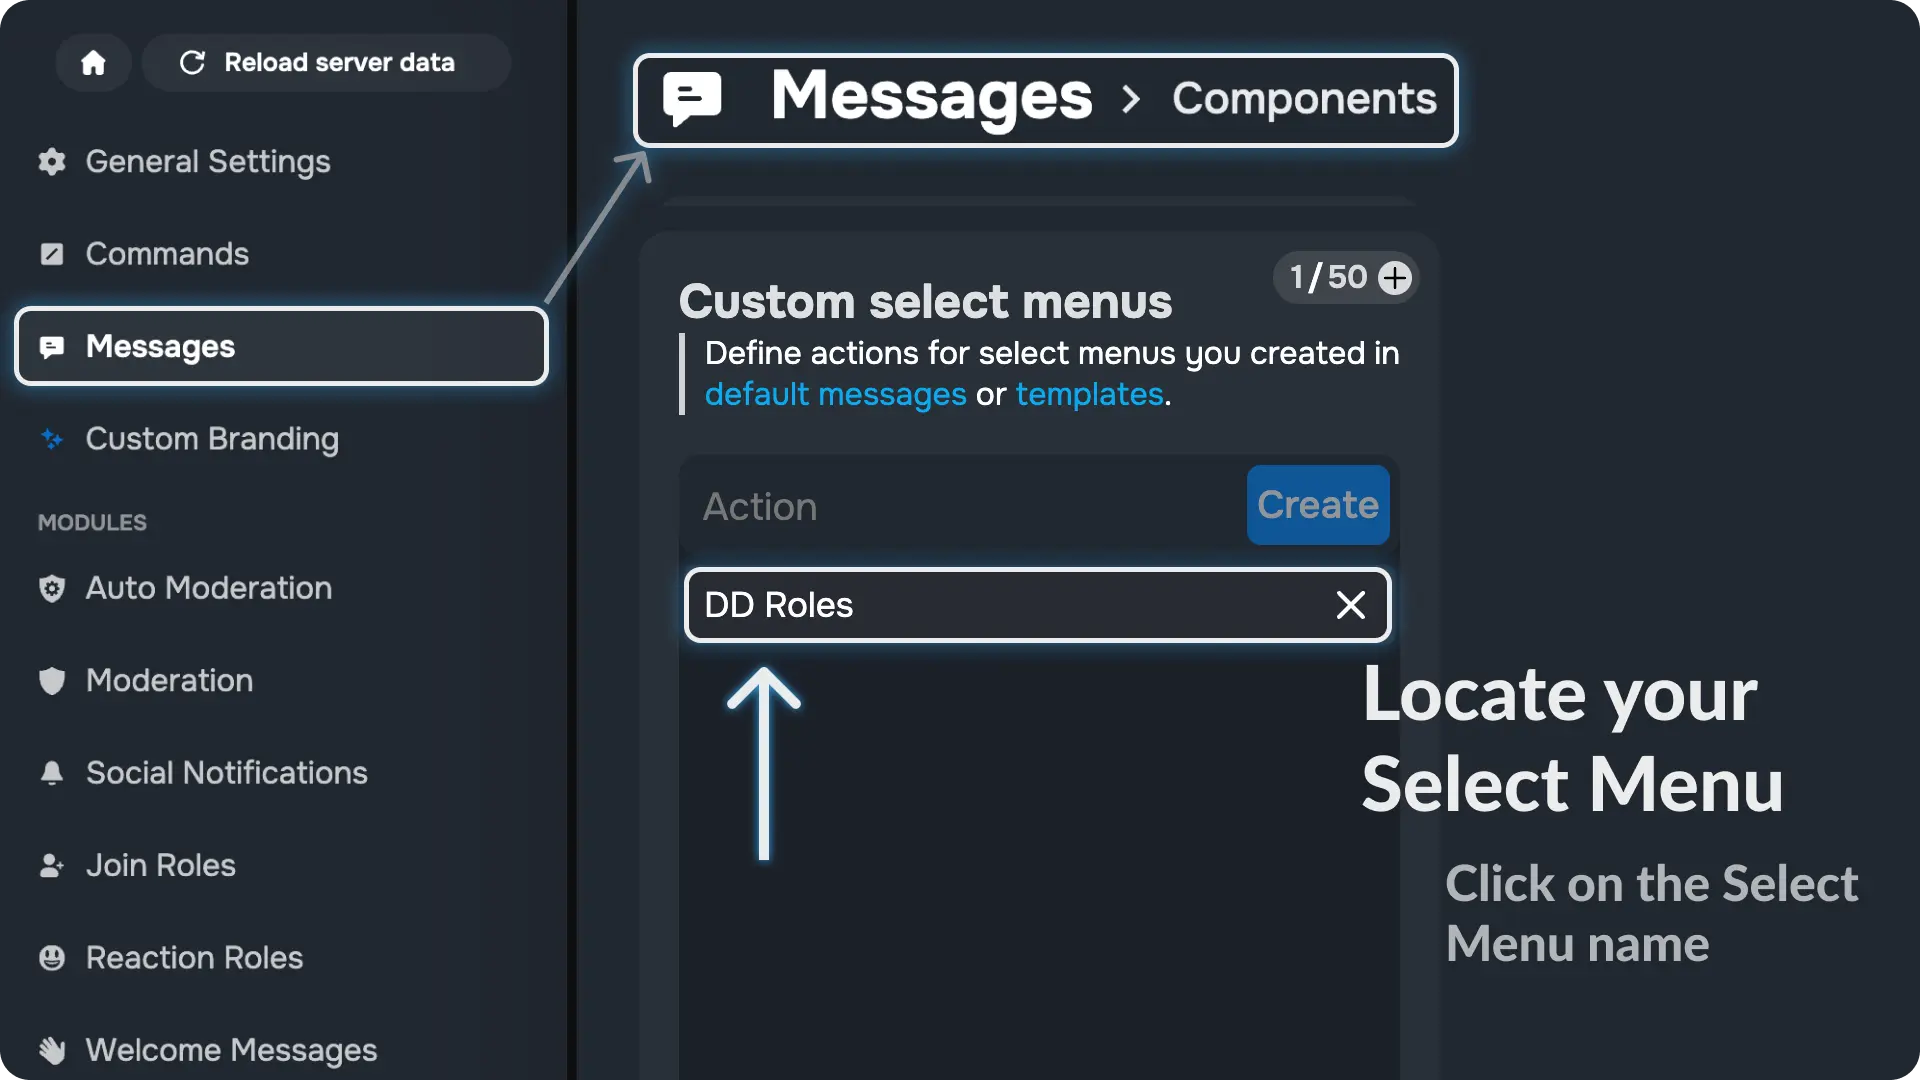
13) Locate your Select Menu component
Go to the Components page from Messages menu on Sapphire dashboard and click on the Select Menu name we created earlier.
Note
The Select menu Component will be automatically created on the components page because we created it from the message template editor on step 6
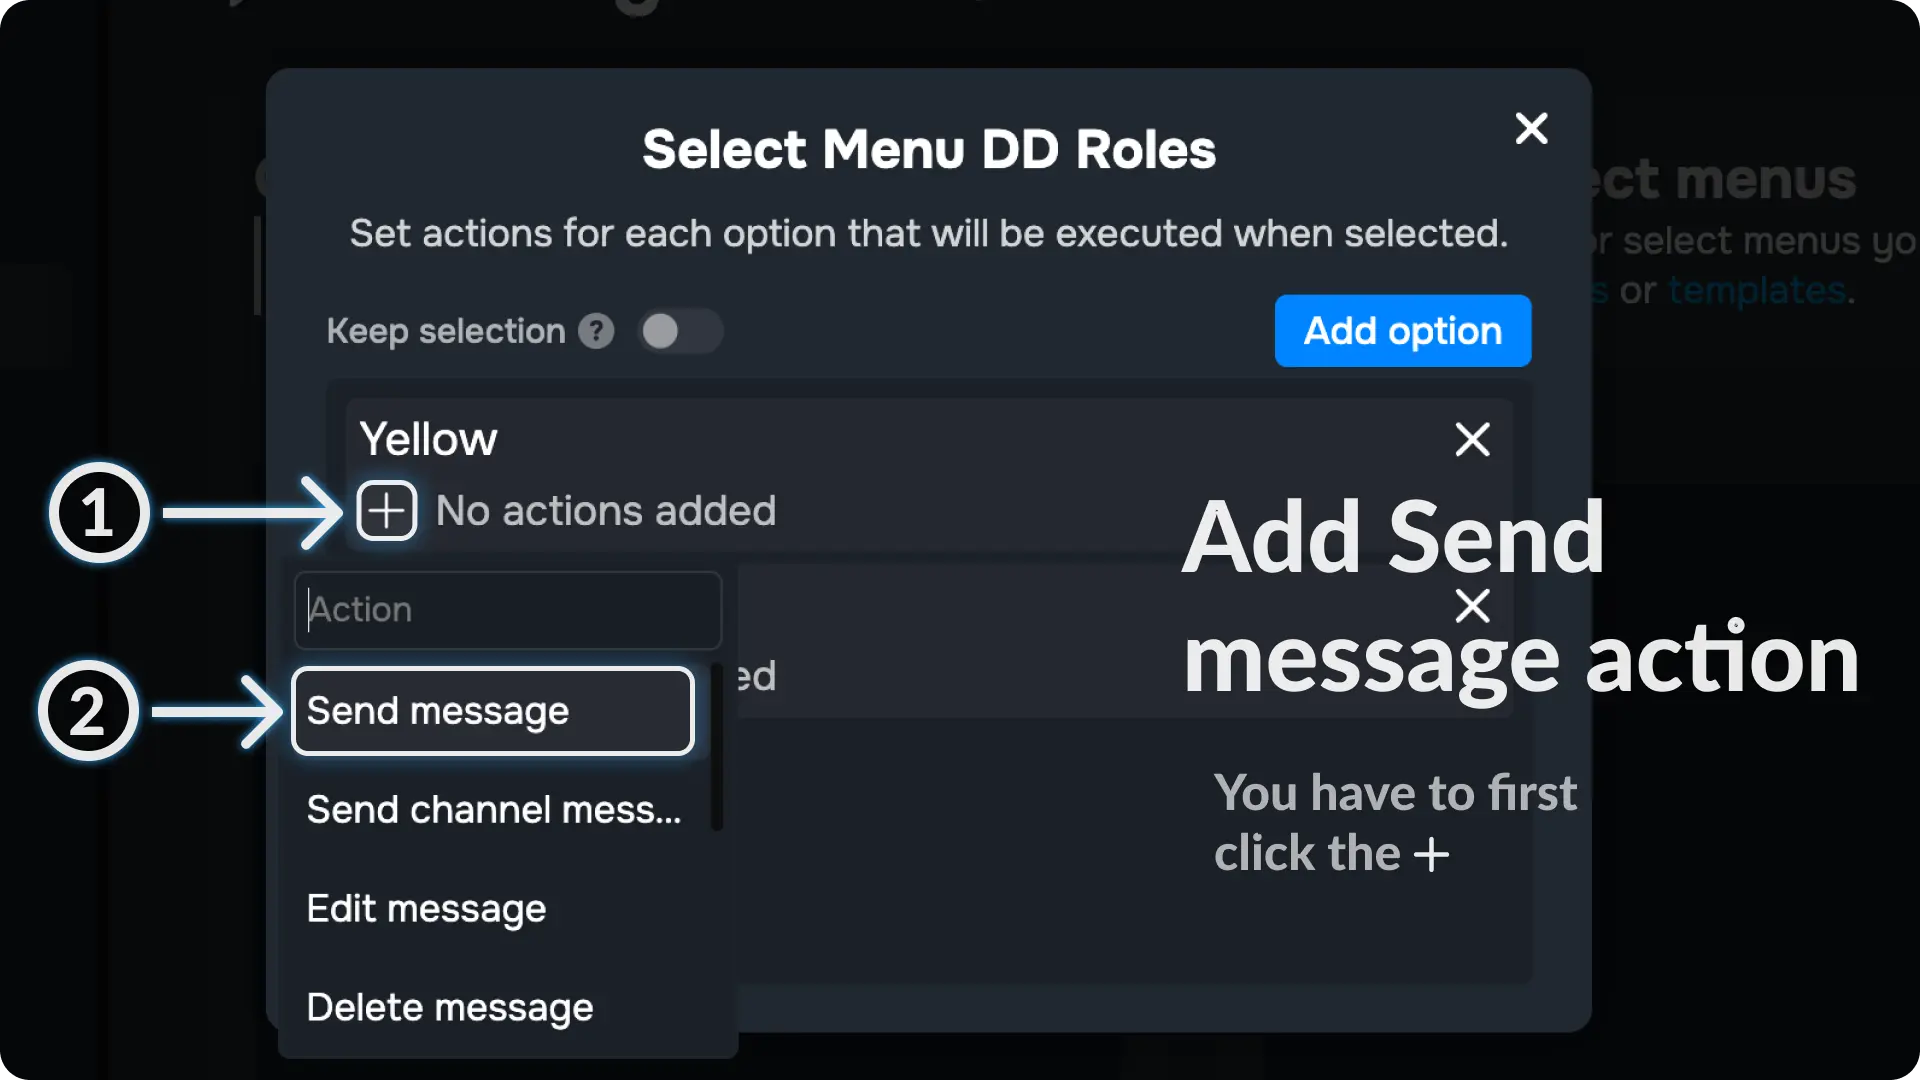
14) Add actions to your Select Menu component
Click the + icon and it will show you a list of all actions you can add to your Select Menu.
Choose the action Send Message
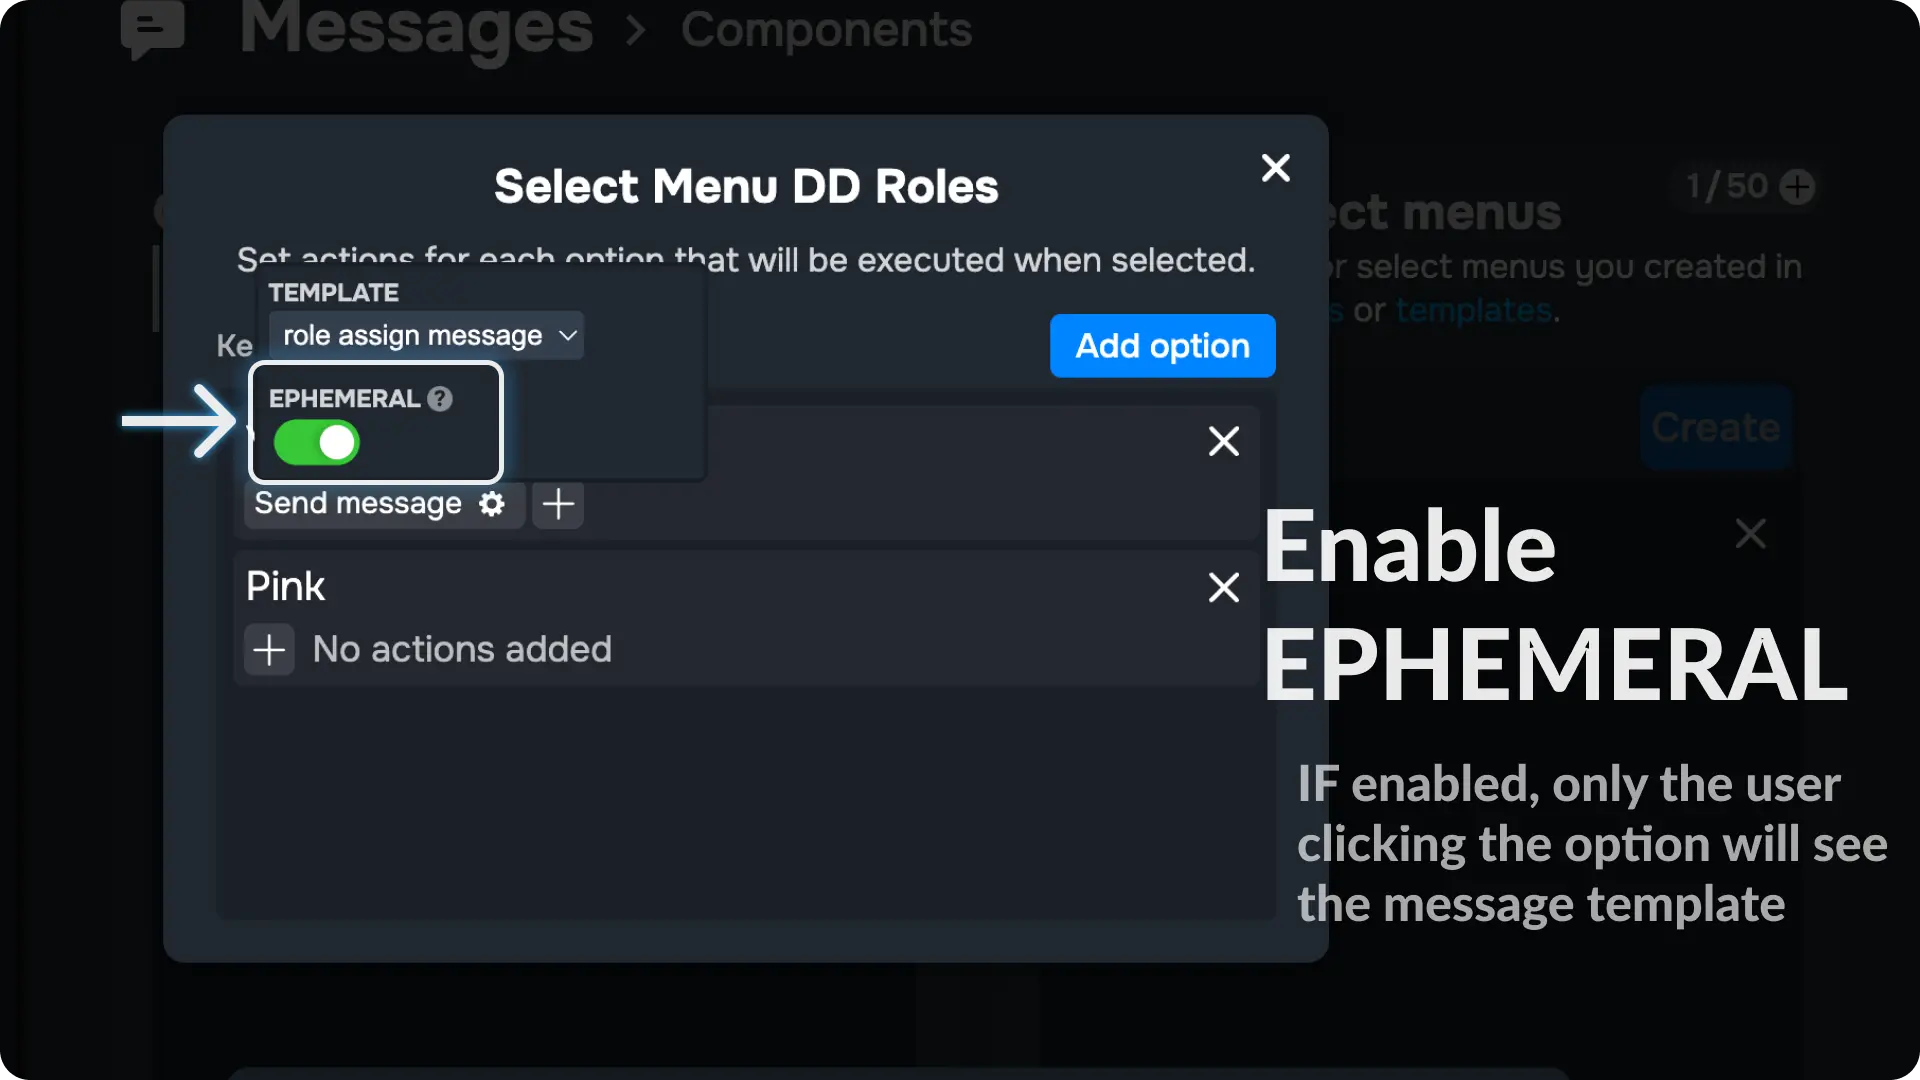
15) Configure the Action of Select Menu Component
Click the ⚙ icon on the Send Messages action and choose the template we created on step 11

16) Enable EPHEMERAL Option
Enable the option called EPHEMERAL, this will make the message only visible to the person who clicks the Select Menu
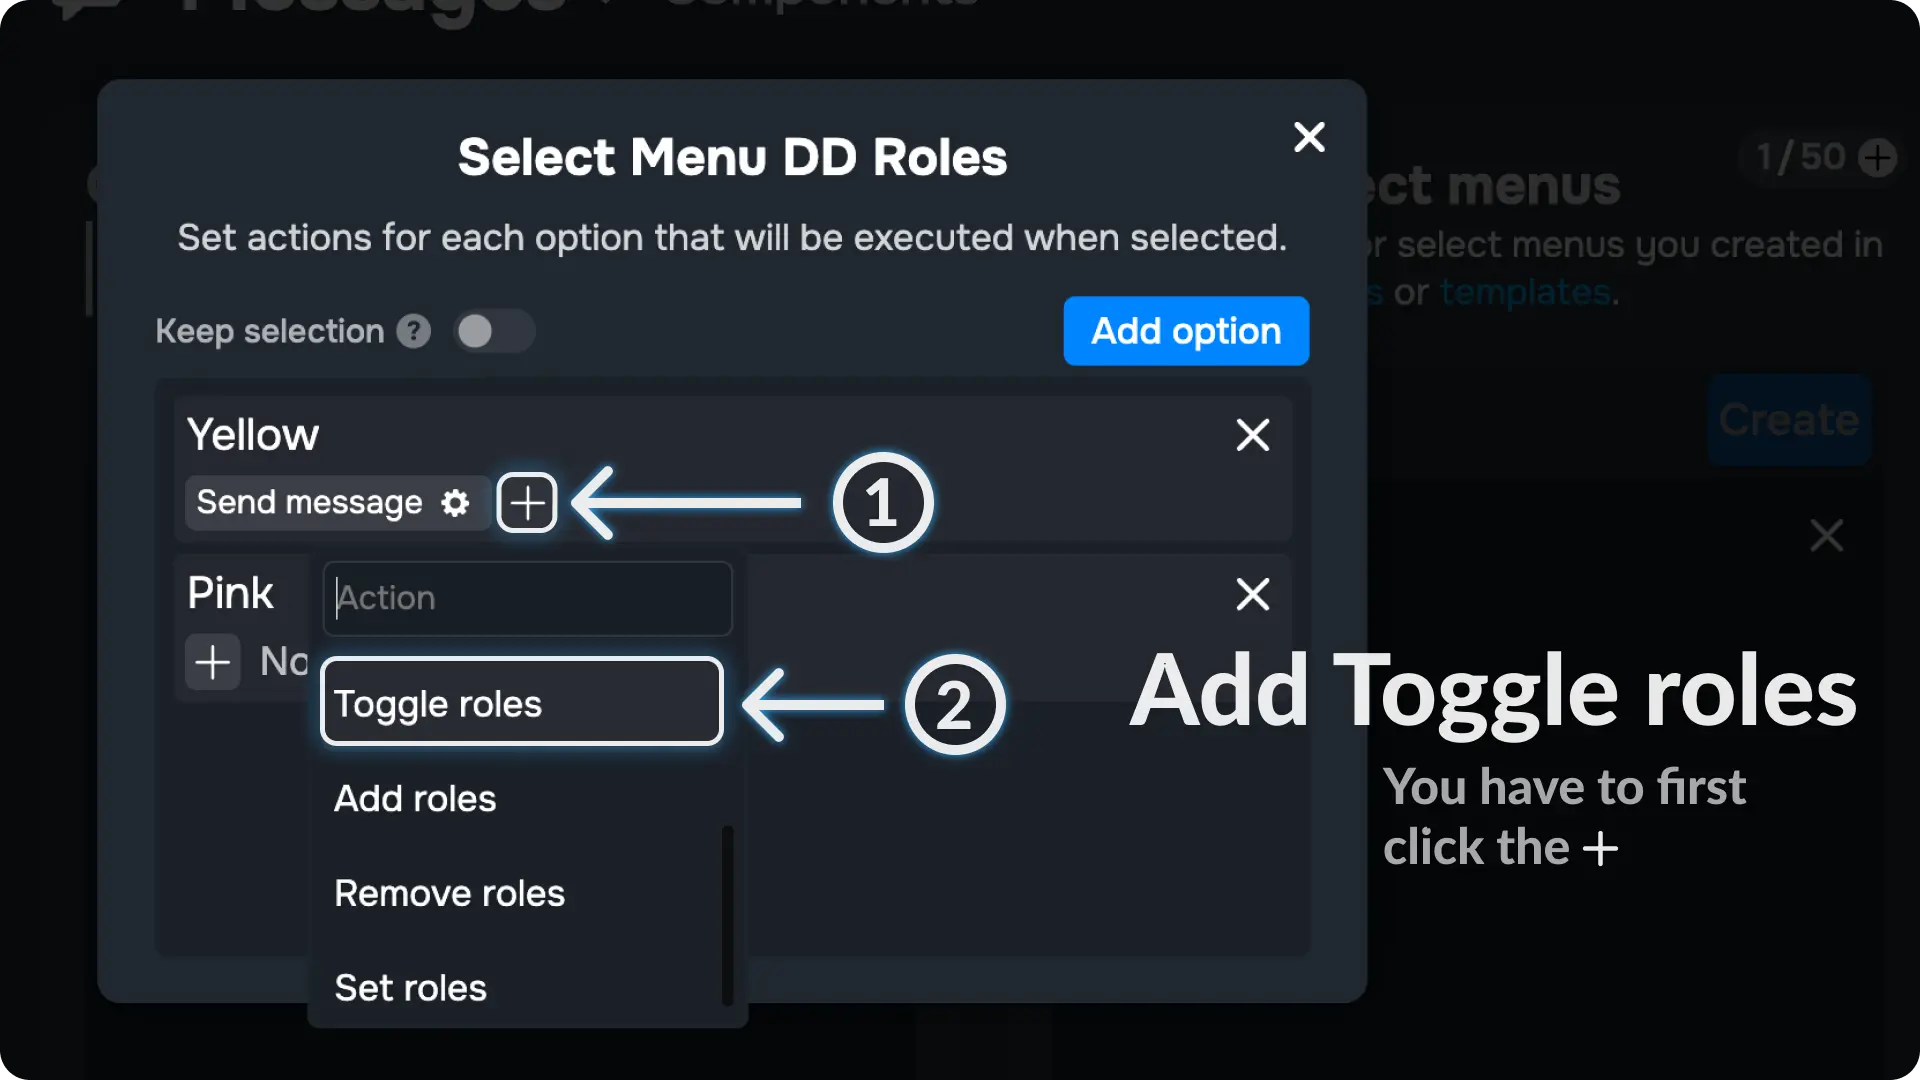
17) Add Toggle Role Action to your Select Menu
Click the + icon and it will show you a list of all actions you can add to your Select Menu.
Choose the action Toggle Roles
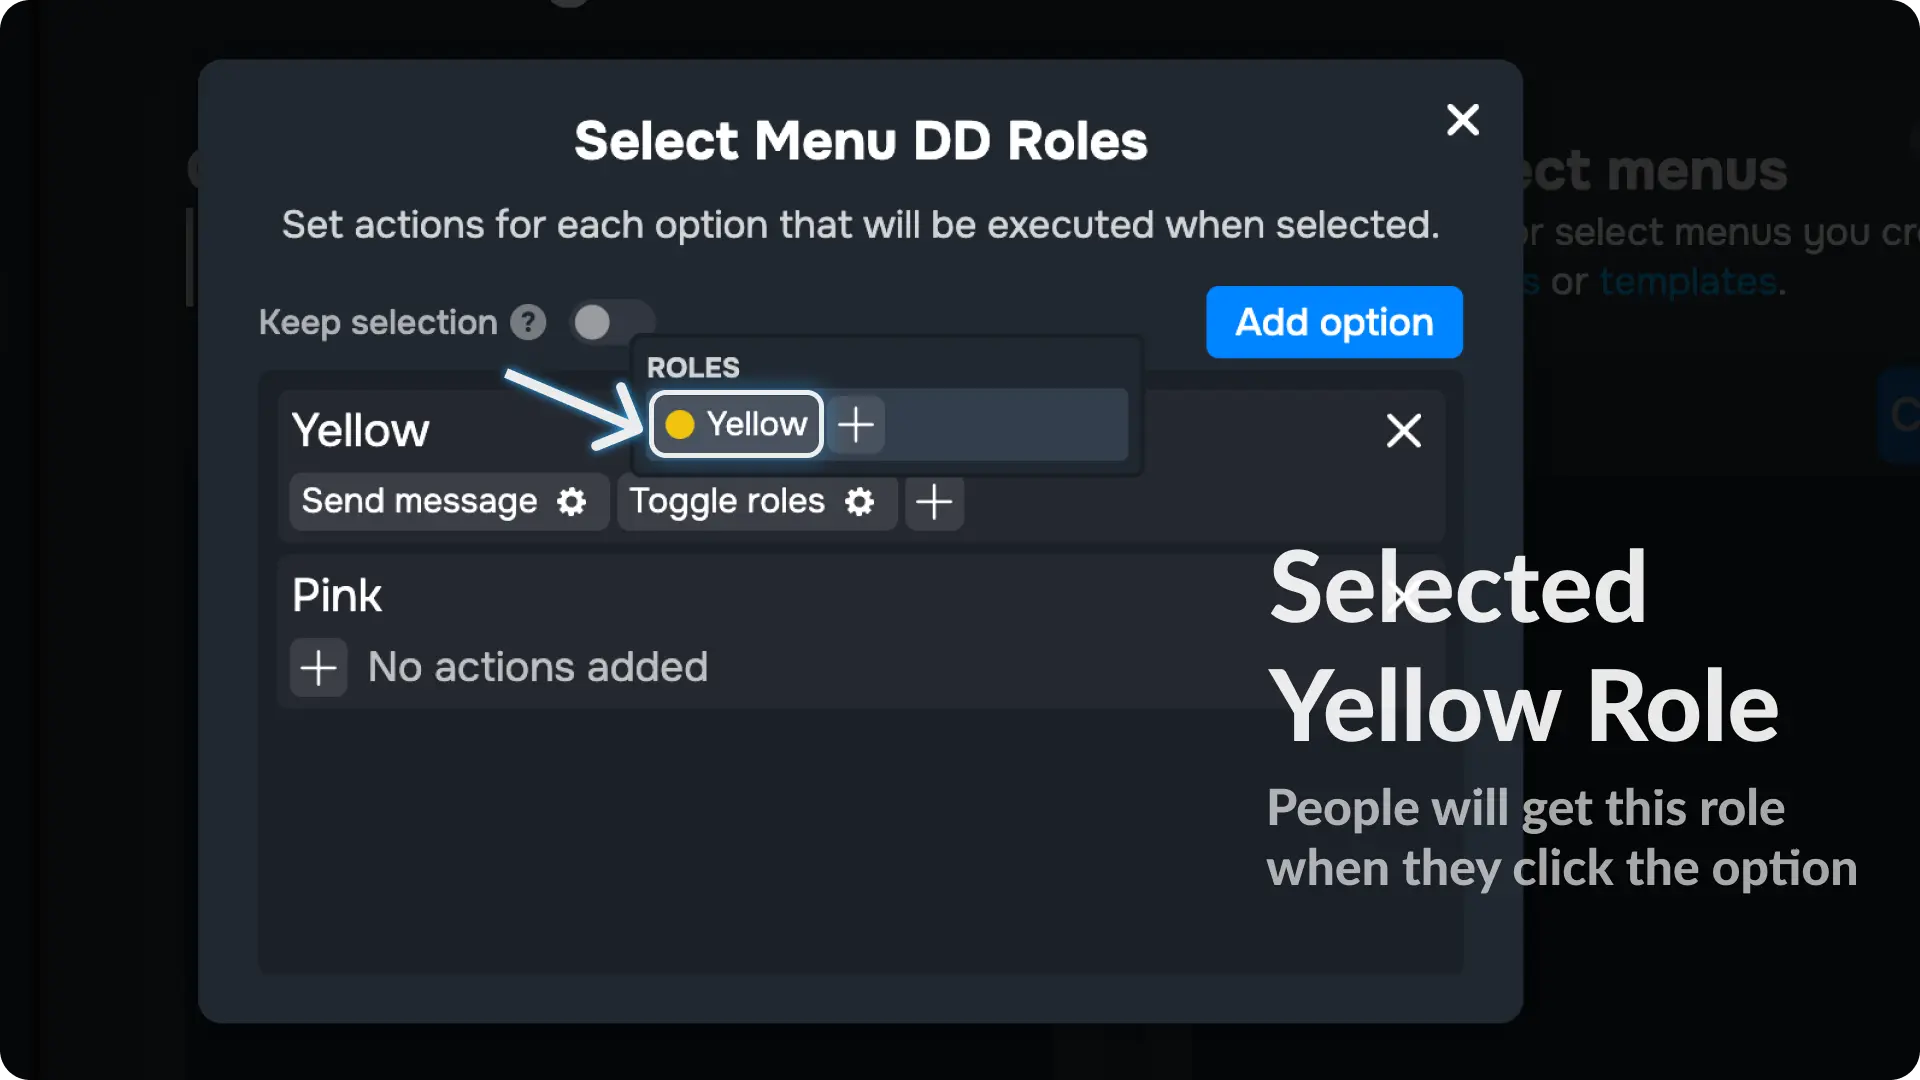
18) Add Roles to your Select Menu
Click the ⚙ icon on the Toggle Roles action and choose the Roles you want to give when someone clicks the Select Menu
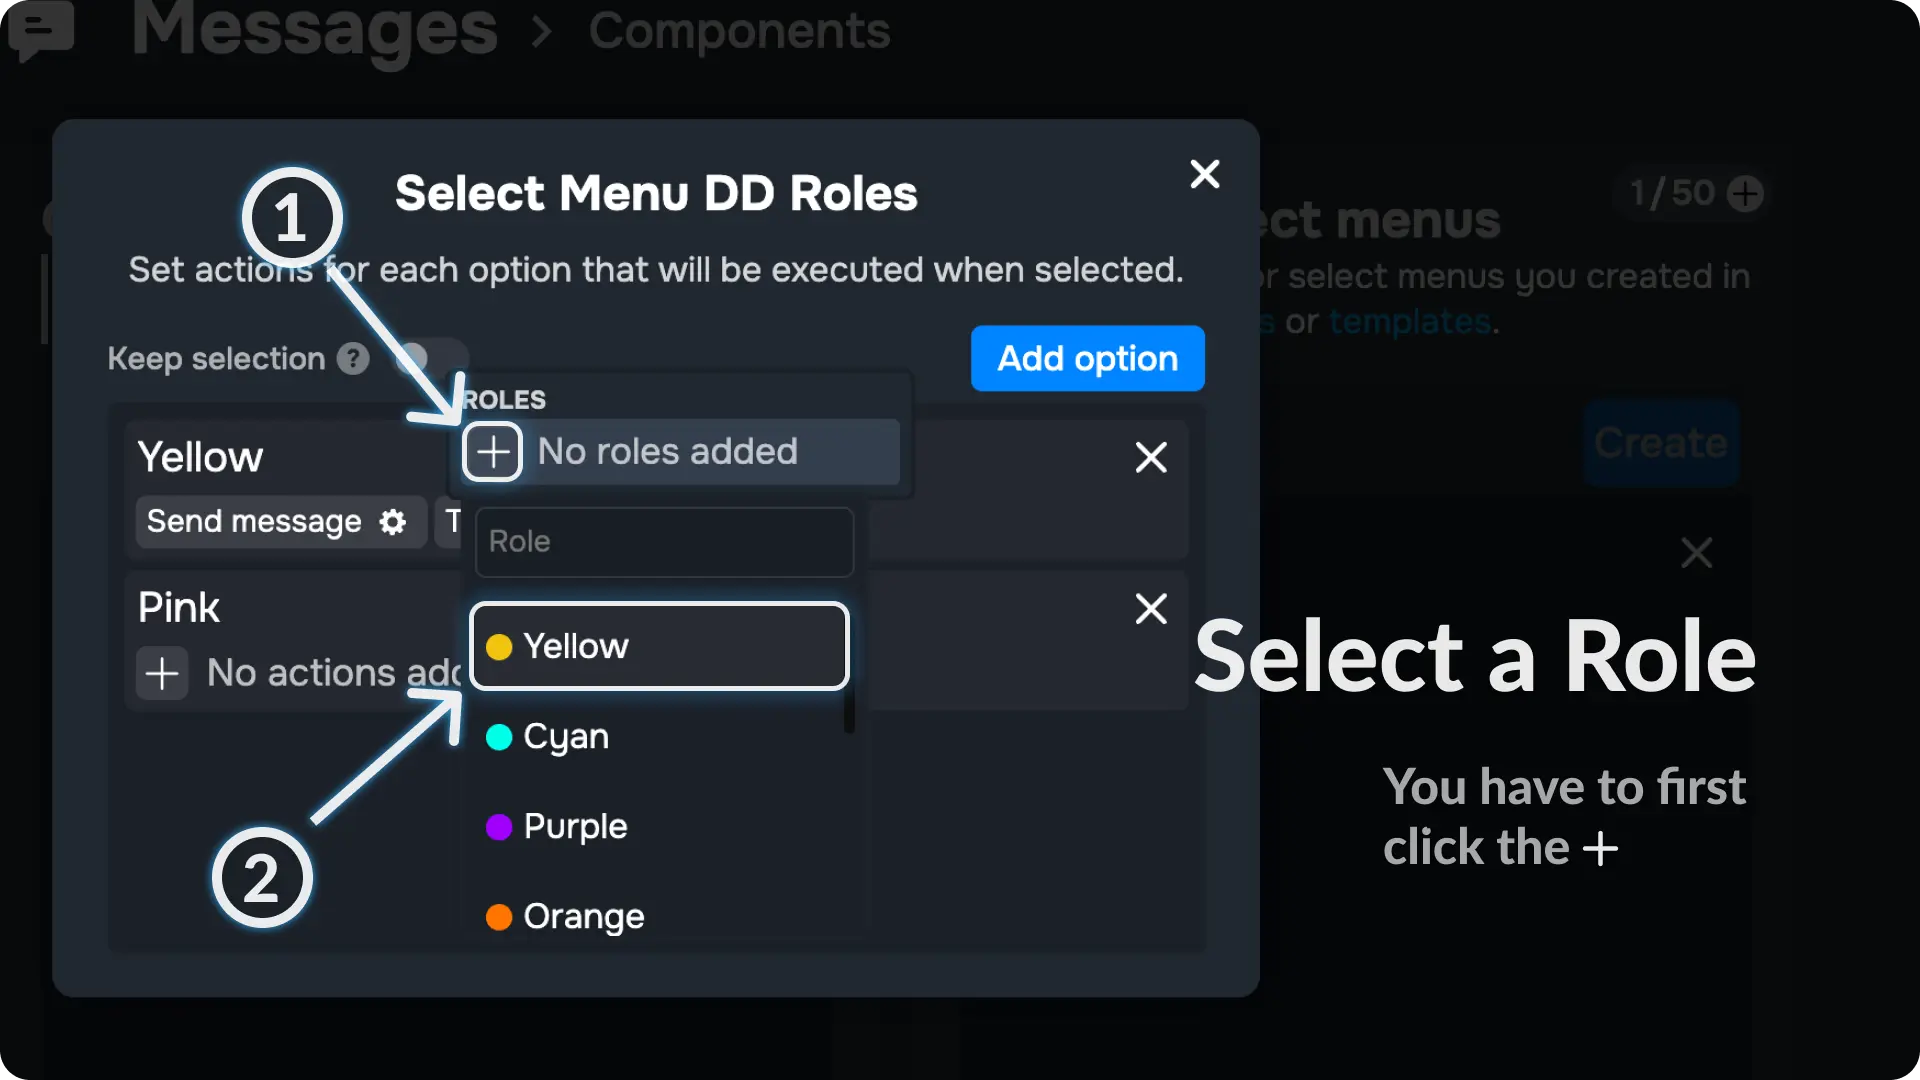
I have added the role Yellow Role to give when someone clicks the Select Menu
Note
Repeat this process for other options you have on your select menu
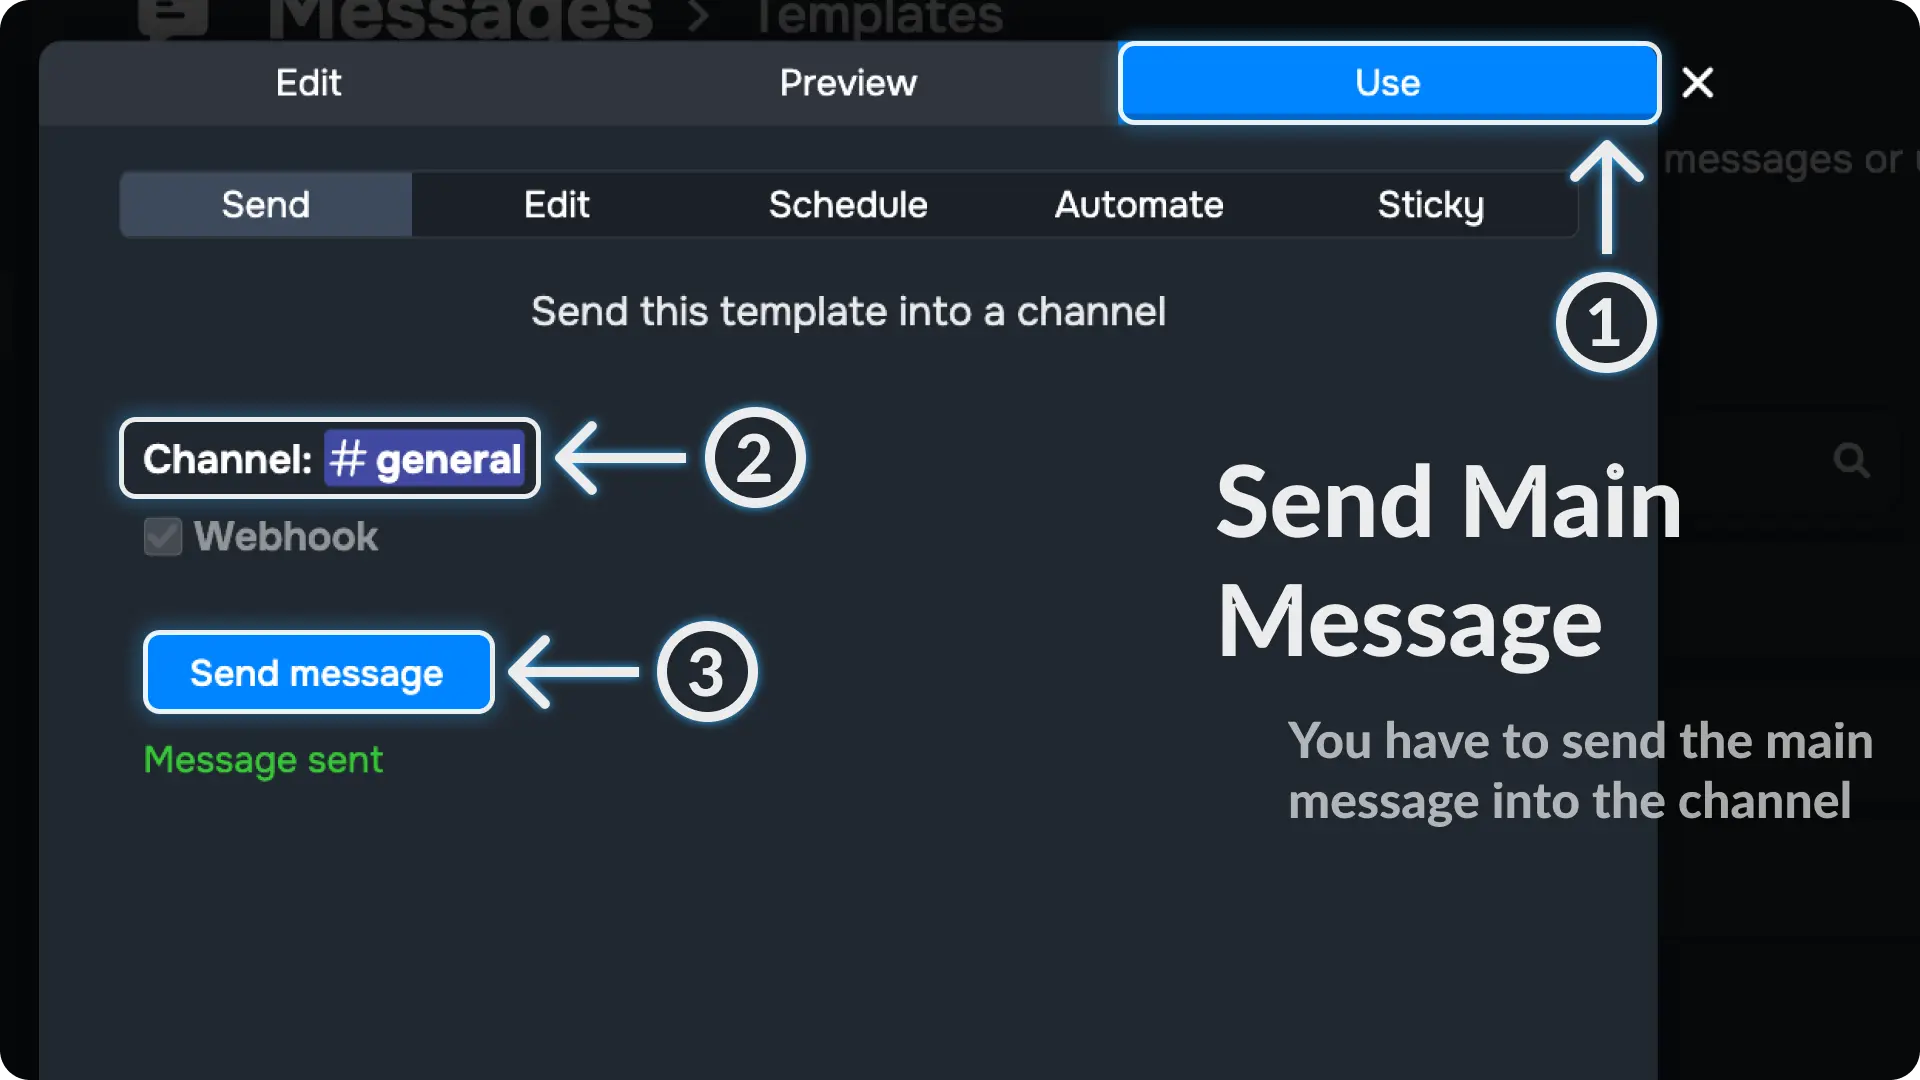
19) Send the Main Message
Go to the Message Template page from Messages menu on Sapphire dashboard and open the message template we created on step 1.
Then go to the Use menu on the template editor.
Once you are in the Use menu, select a channel (where you want to send the message with the Select Menu) and click the send message Select Menu.
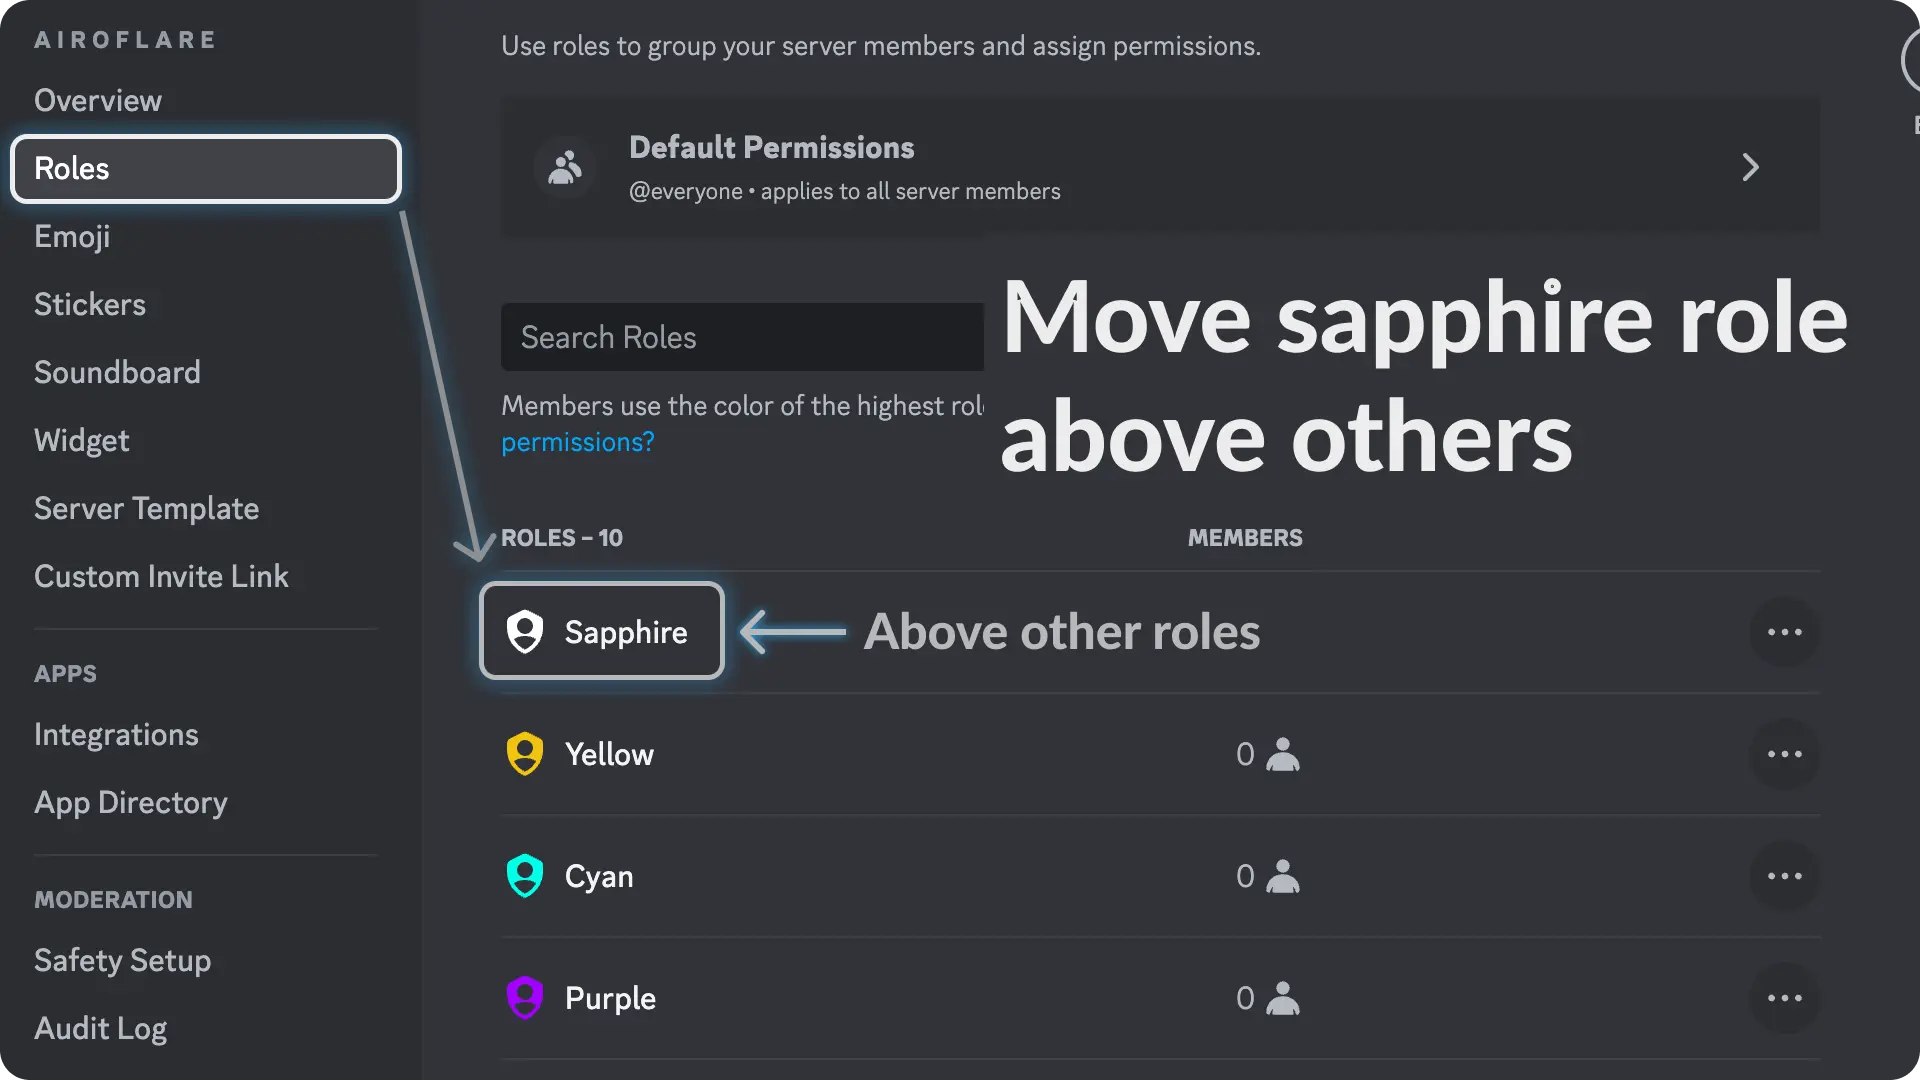
20) Adjust Sapphire Role
Go to your sever settings and move Sapphire Role above the roles you want to give to users when they selects an option from the select menu
Final Result
Video Tutorial
If any step didn't make sense or you got stuck, you can watch a tutorial video by clicking here
Support
If you need any help then feel free to join our community server or sapphire support server and create a post on the support channel.