Ticket System (with buttons)
Sapphire doesn’t have a built-in ticket system, but we can use the Ticket Tool bot with Sapphire to create a highly customizable ticket system.
How this works?
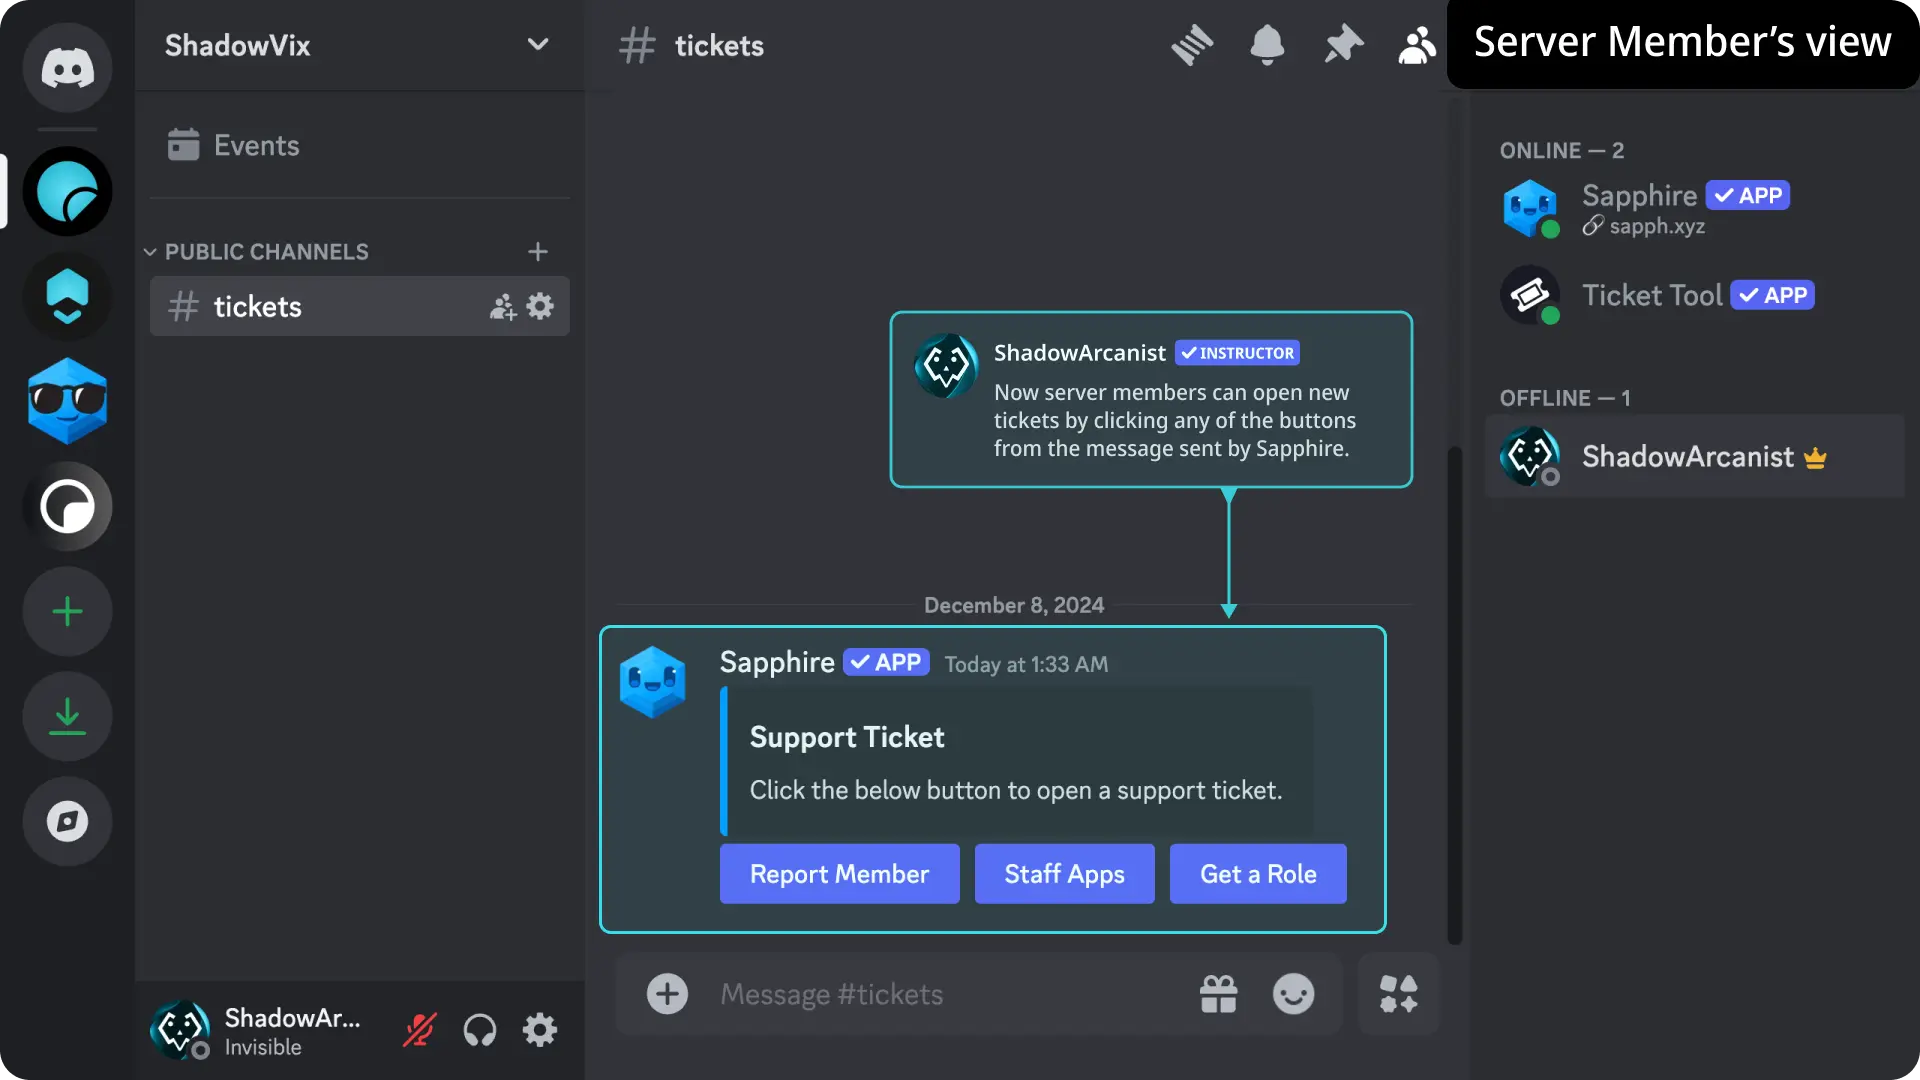
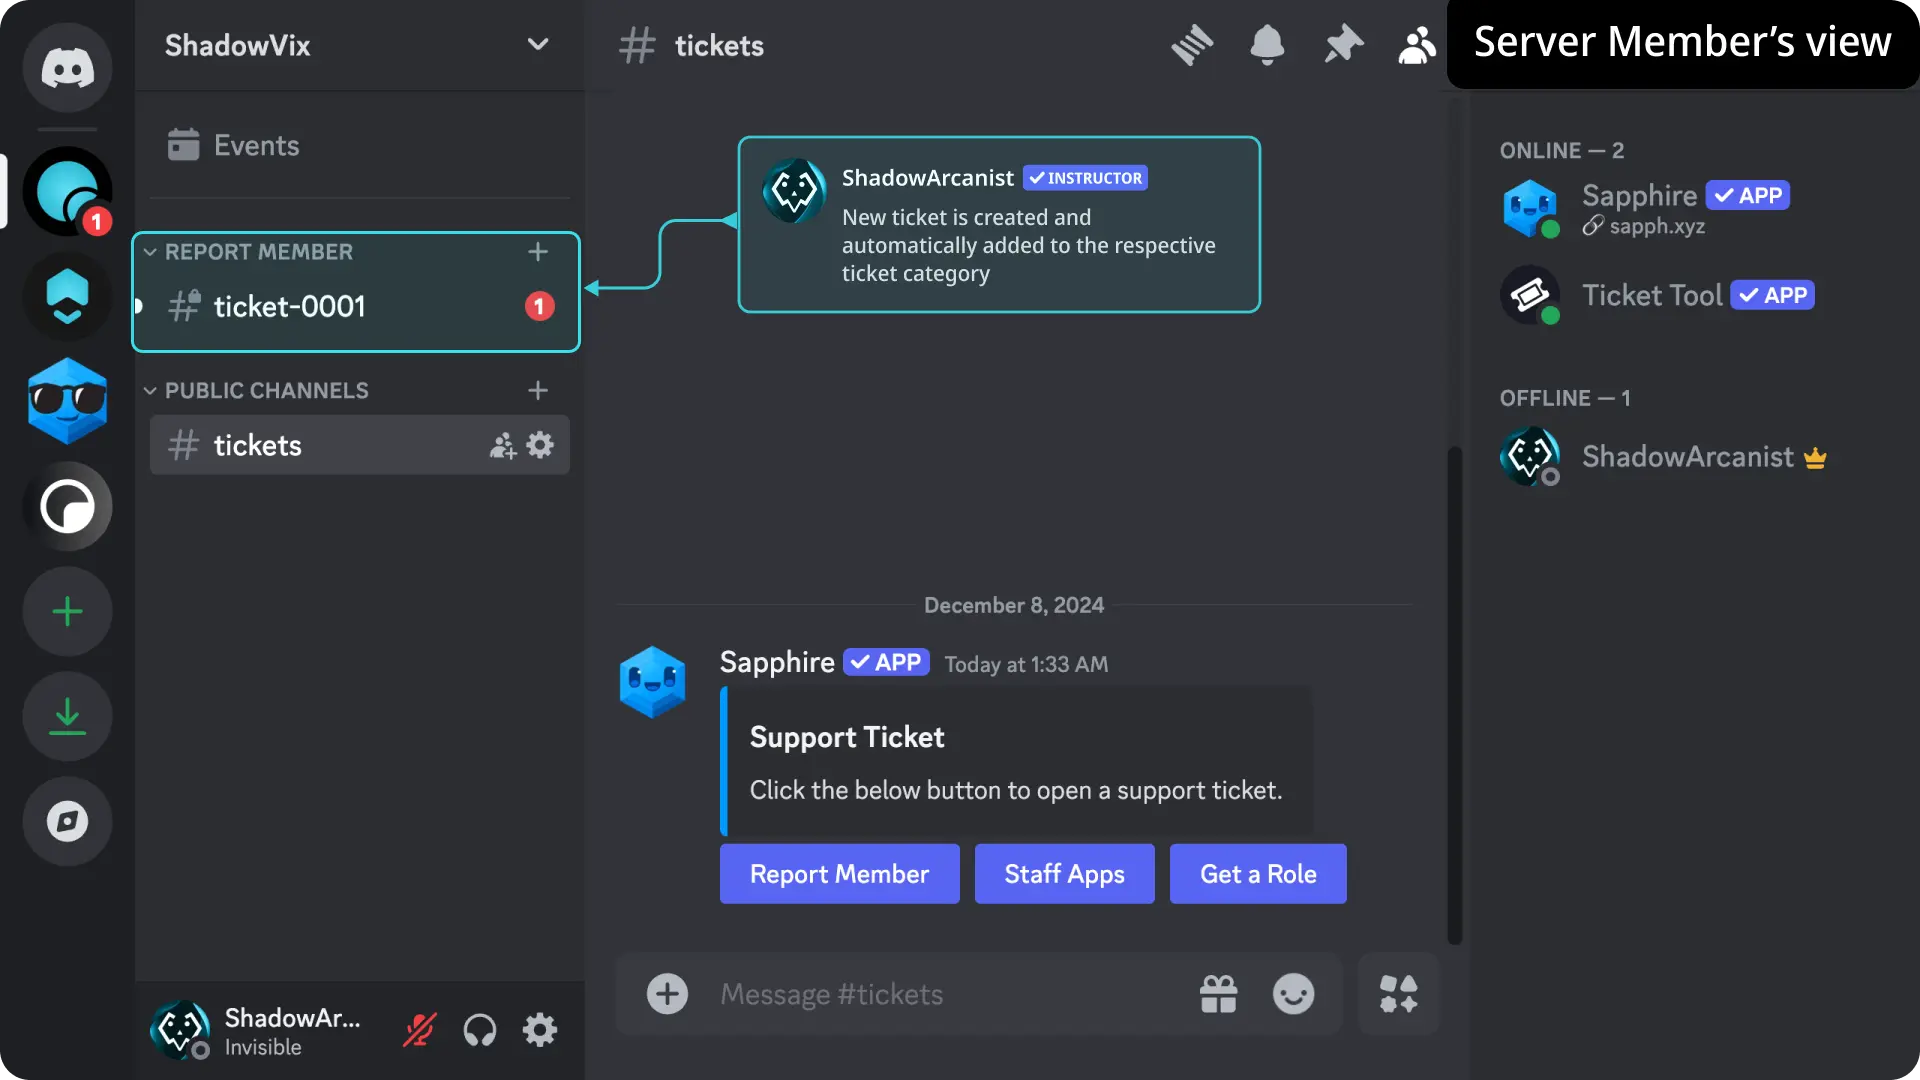
We will create a ticket panel (an embed message with buttons) using the Sapphire bot and send it to a channel where server members can create tickets.
While the Ticket Tool bot alone can handle this, it doesn’t offer many customization options for the ticket panel (an embed message with buttons). However, With Sapphire, we have many customization options.
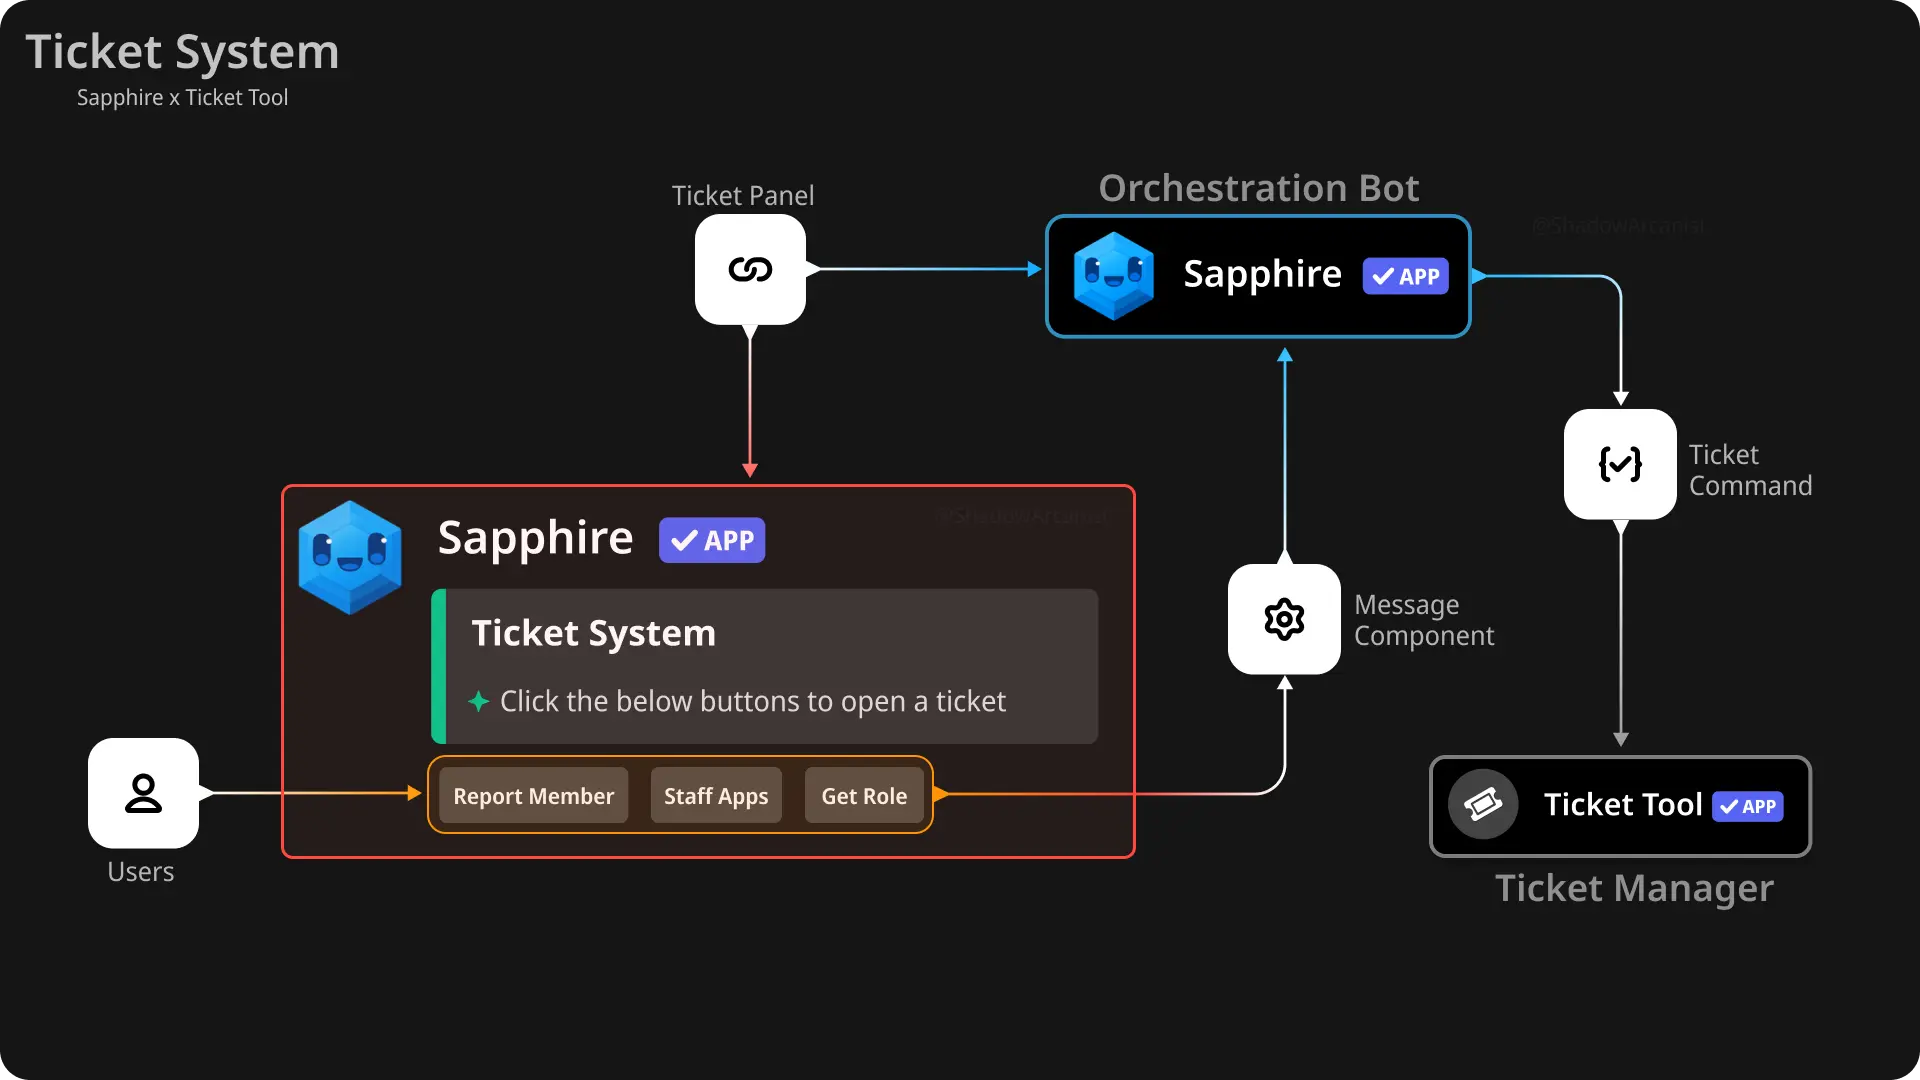
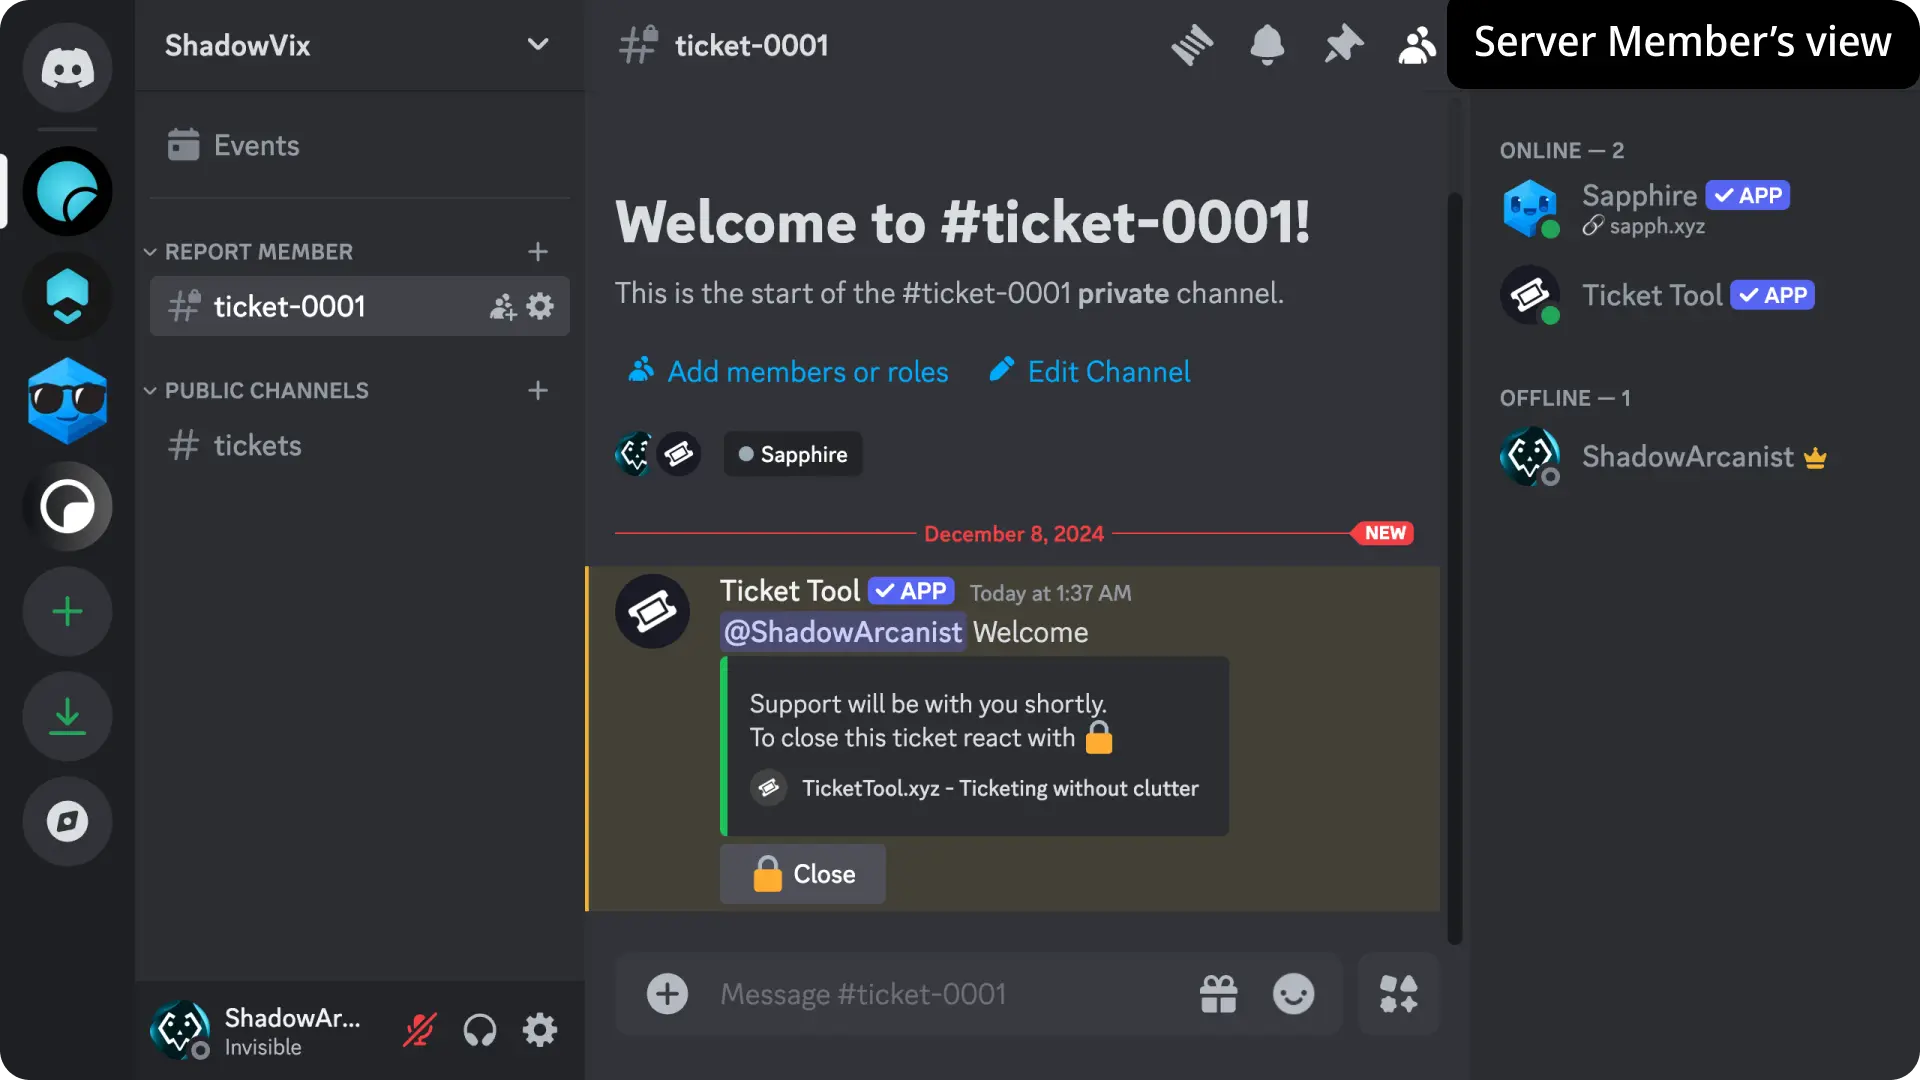
Whenever a server member clicks a button, Sapphire handles the interaction and instructs Ticket Tool to create a new ticket for the member who clicked the button.
Normally, bots don’t listen to other bots on Discord, but Ticket Tool includes a special option that allows it to listen to other bots. Using this feature, we can make this ticket system work seamlessly.
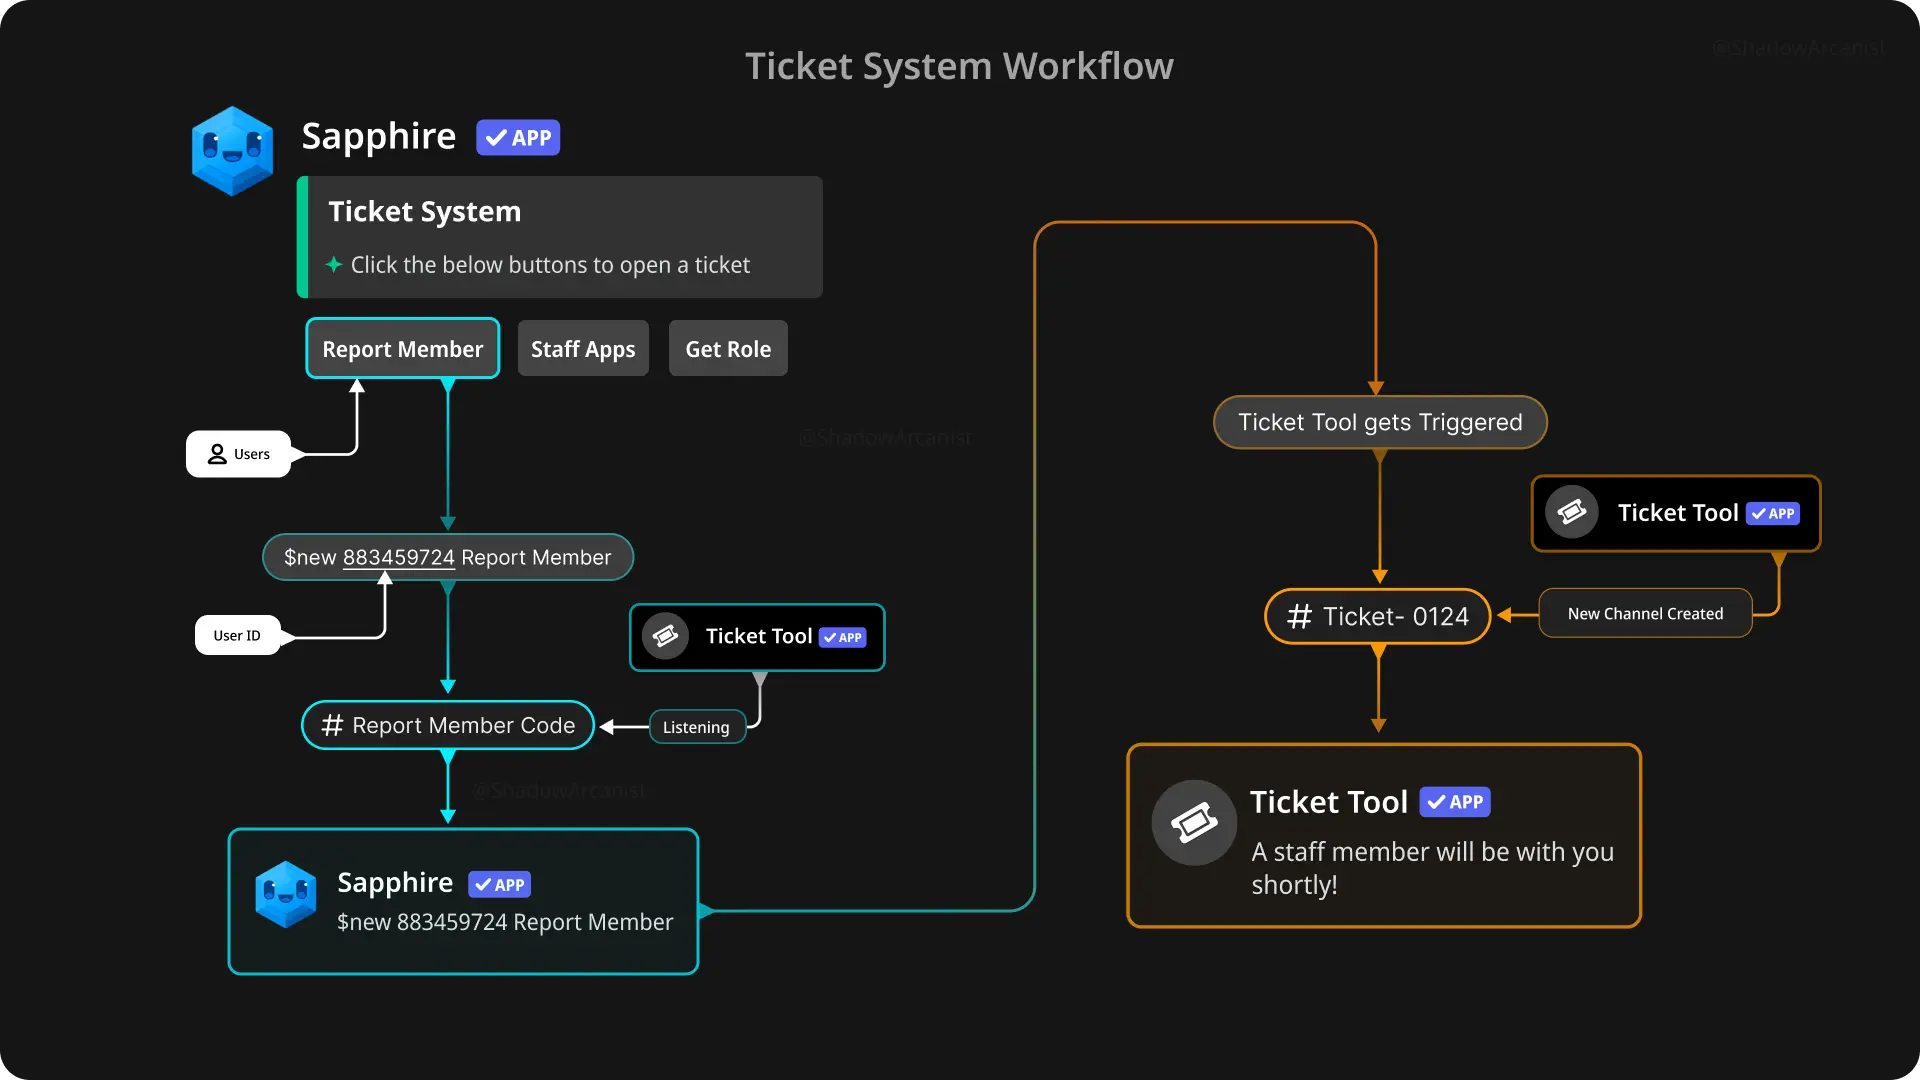
For this ticket system to work, you’ll need one channel and a few private channels (the number of private channels depends on your ticket categories).
Each private channel will be configured for Ticket Tool to wait for trigger messages from the Sapphire bot.

This ticket system setup might seem confusing to people unfamiliar with setting up bots, so the images above are provided to give you a idea of how it works.
Now, let’s begin the tutorial!
1) Add Ticket Tool bot
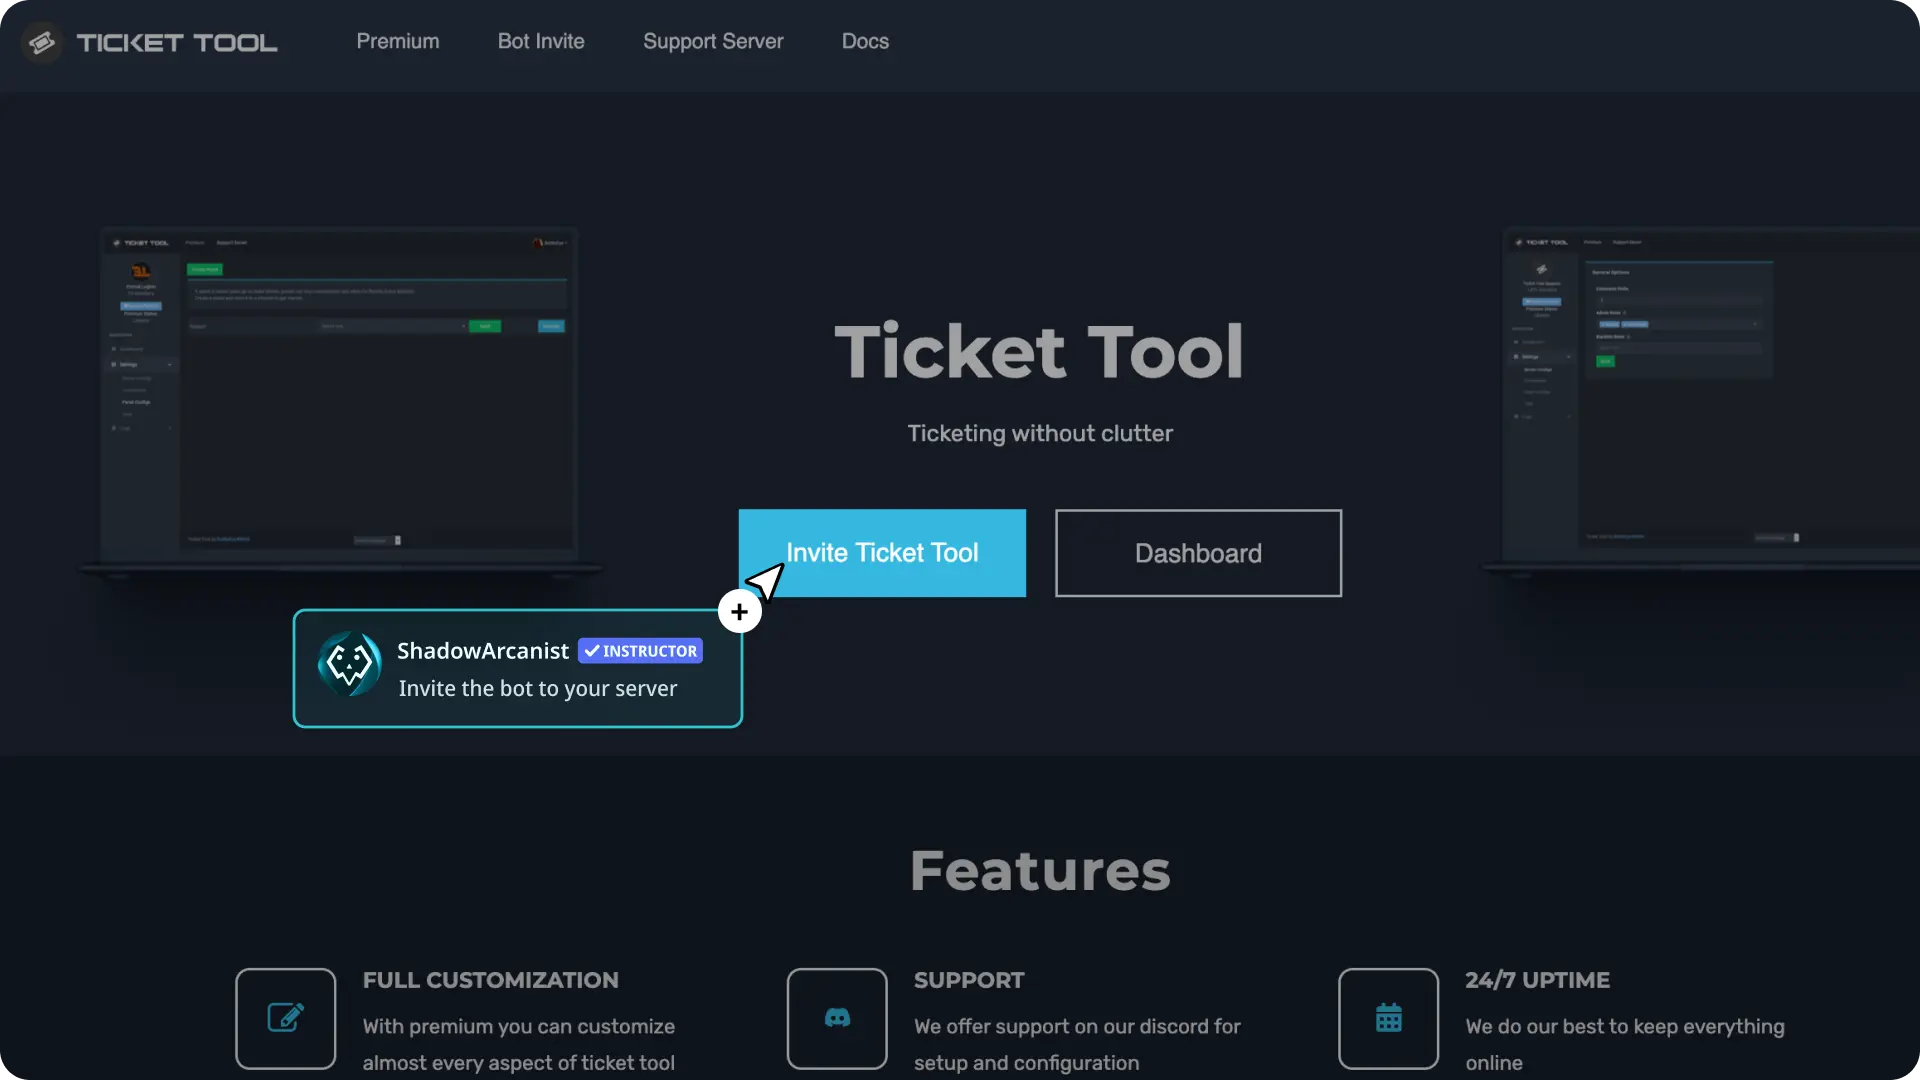
Visit Ticket Tool Website and Invite Ticket tool bot to your server
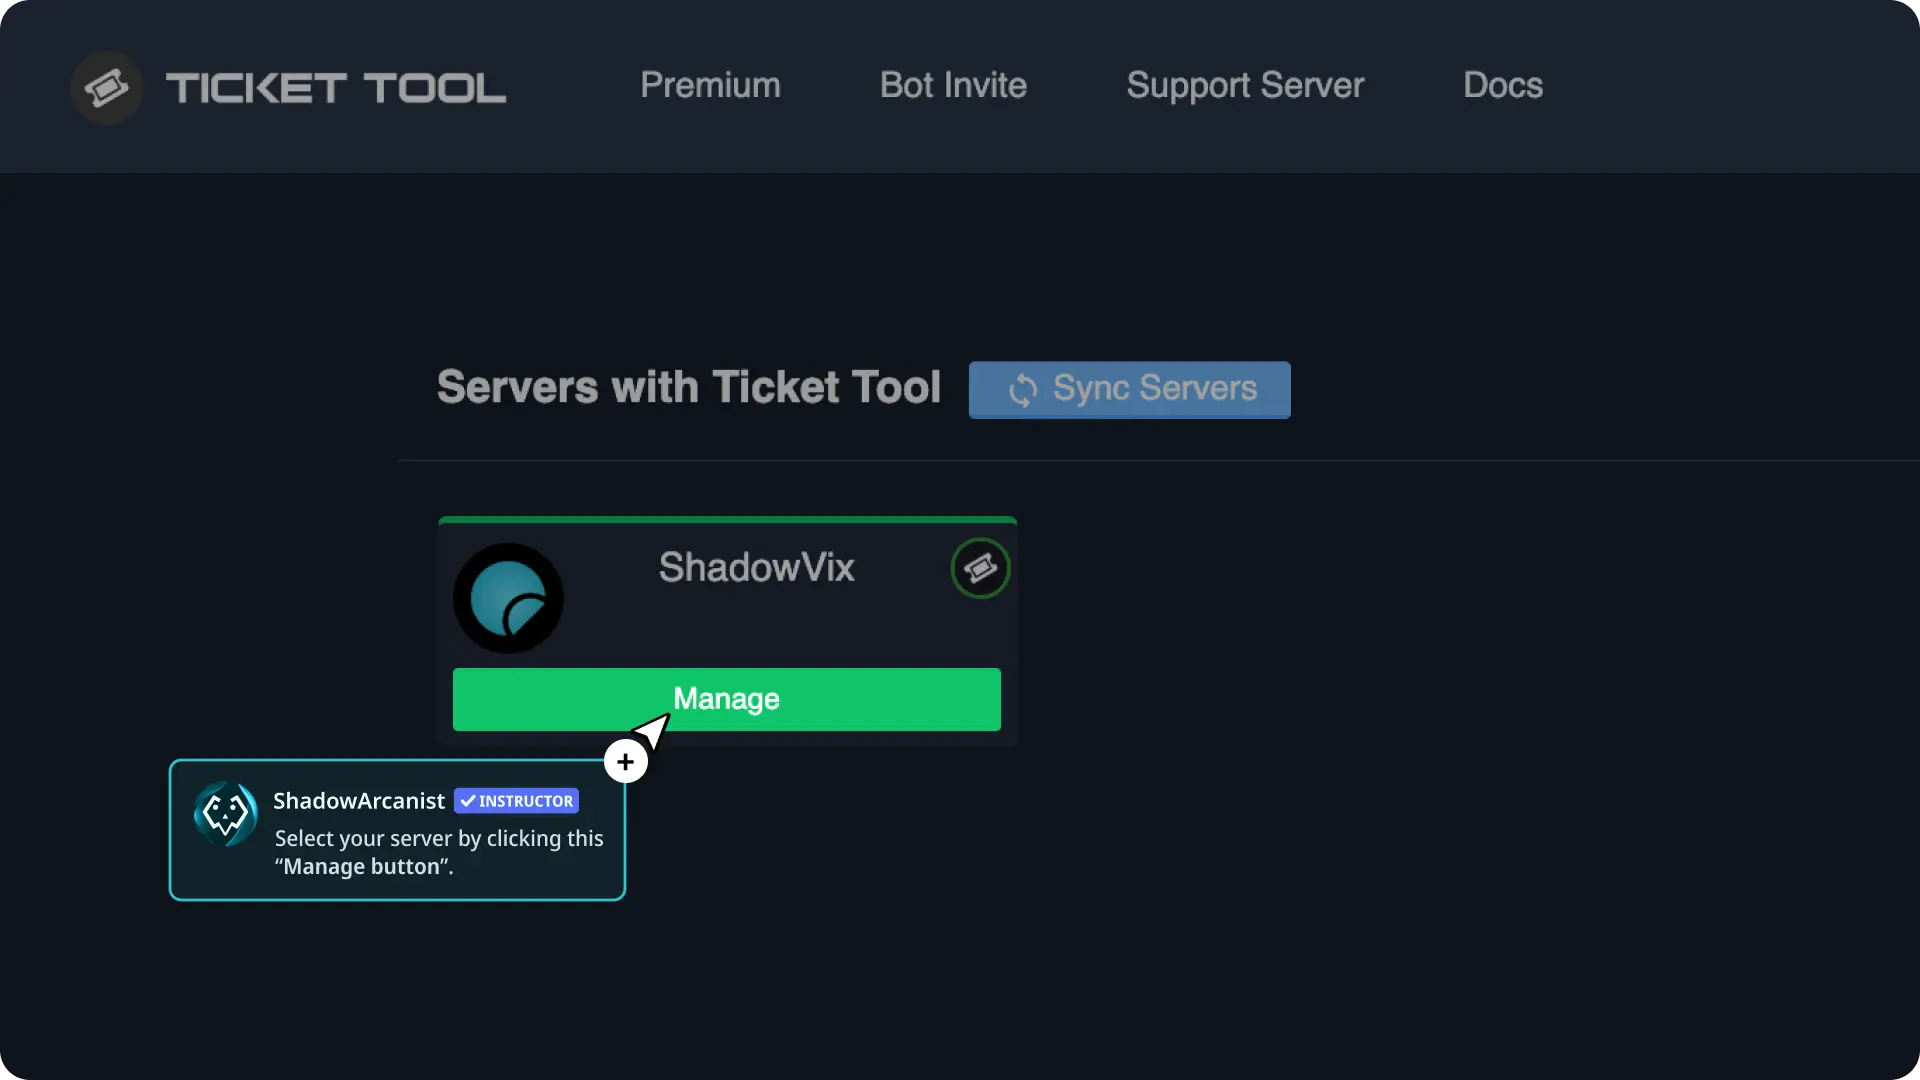
After inviting the Ticket Tool bot to your server, visit the Ticket Tool Dashboard and select your server.
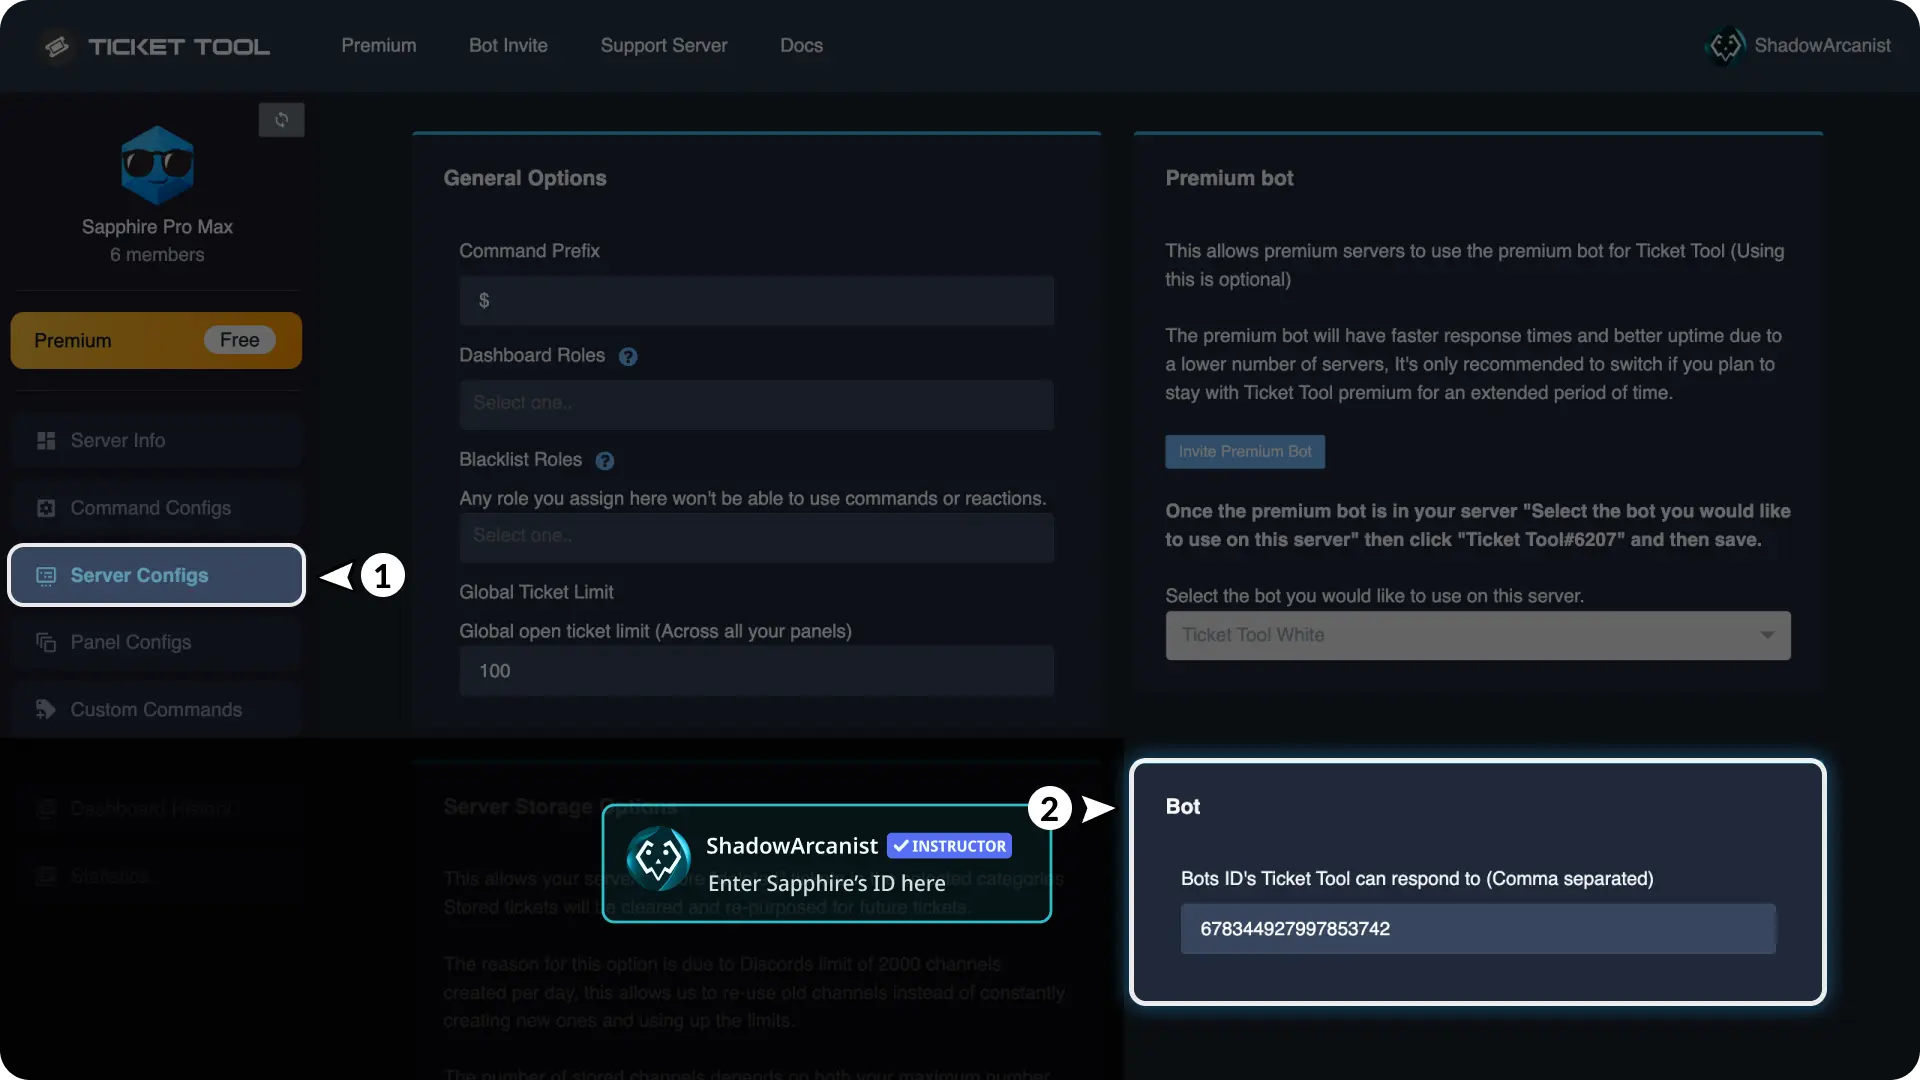
In the sidebar, go to the Server Config menu and go to the Bot module (see the image below).
Enter Sapphire's user ID in the Bot module: 678344927997853742
Note for Custom Branding Users
If you're using a custom branded bot, make sure to enter the user ID of your bot instead of Sapphire's ID.
2) Setup Required Channels & Categories

You need to create a channel to send the message with the button, allowing members to create new tickets by clicking it. For this tutorial, I created a channel called tickets (check above image - highlighted with orange color).
Next, you'll need a few private channels. The number of private channels depends on how many ticket categories you want.
In the image above (highlighted with red color), you can see I created three private channels:
- report-member-code
- apply-for-staff-code
- get-a-role-code
I chose three channels to represent three ticket categories:
- Report a Server Member
- Apply for Staff
- Get a VIP Role
You should create private channels based on your needs.
Similarly, for private categories, I have three in the image above (highlighted with green color). This setup allows me to assign tickets to one of these categories when a new ticket is created.
3) Setup Ticket tool panels
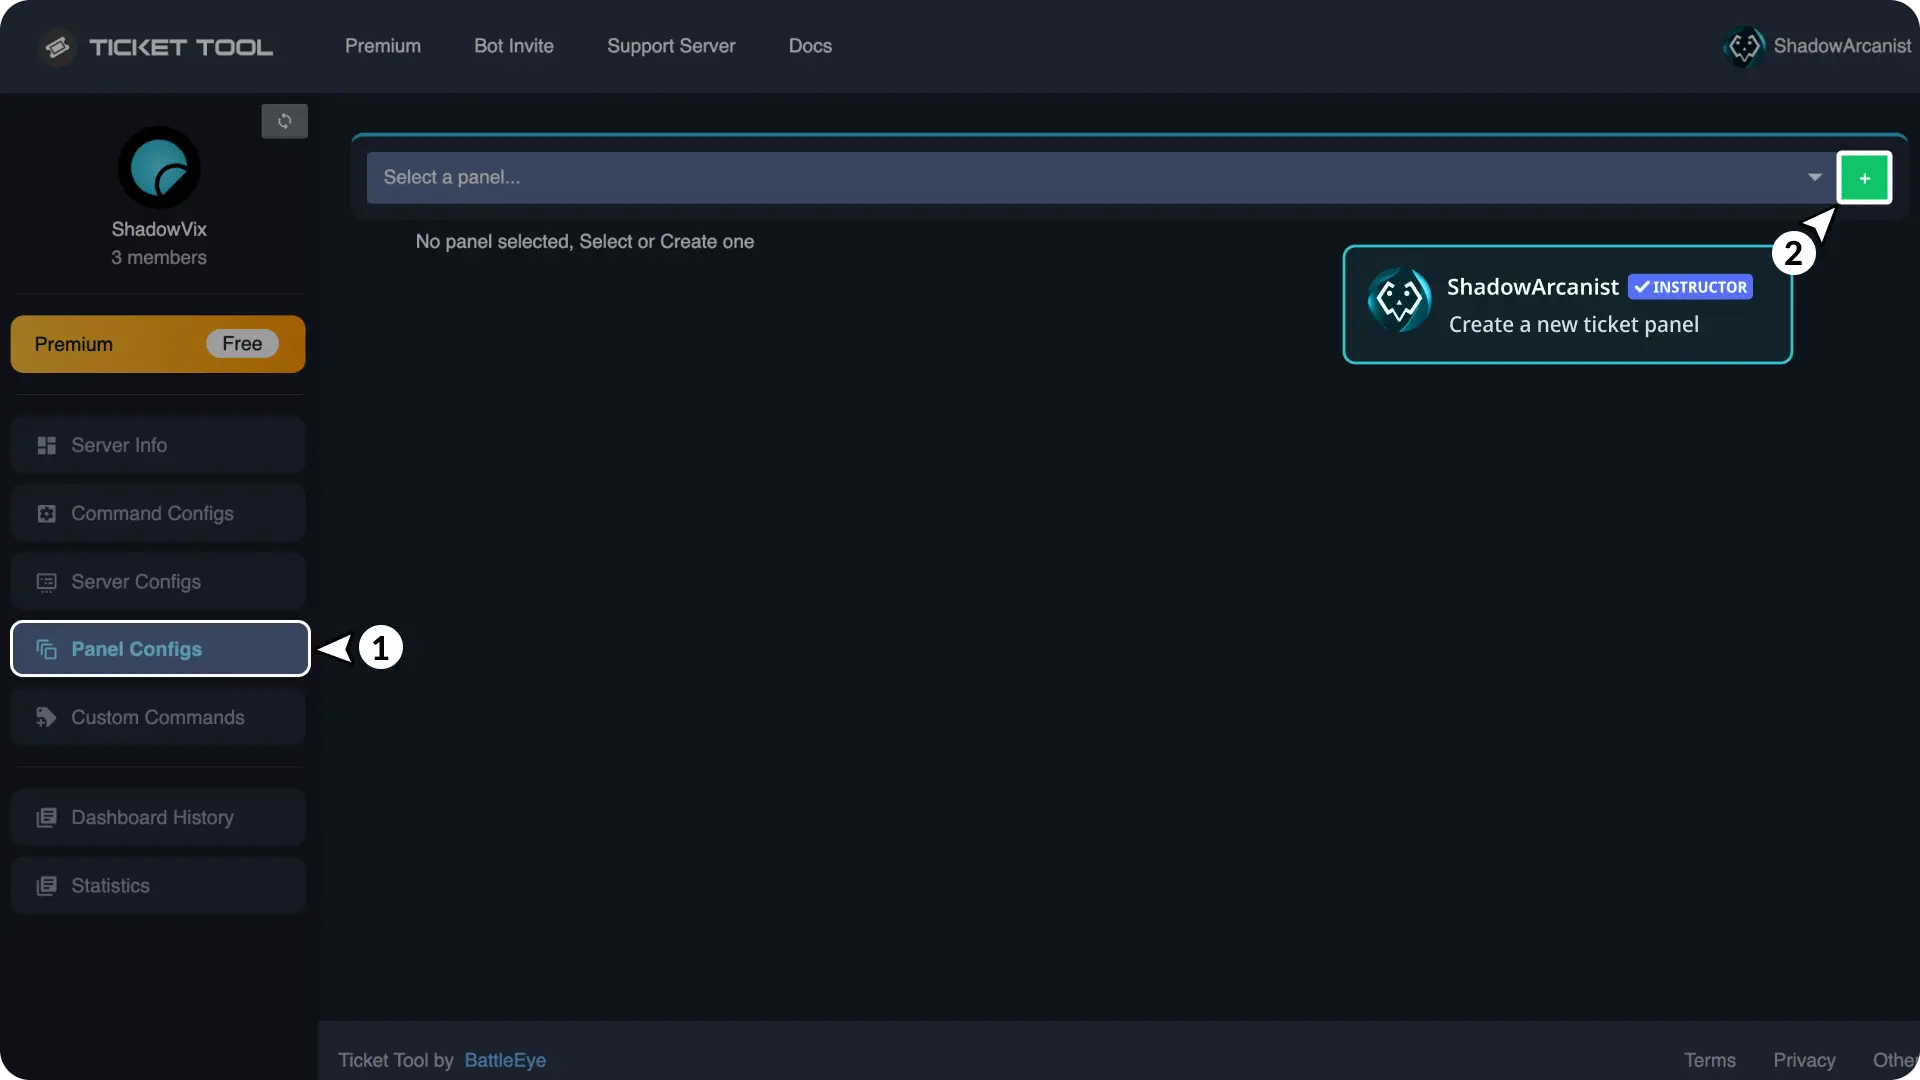
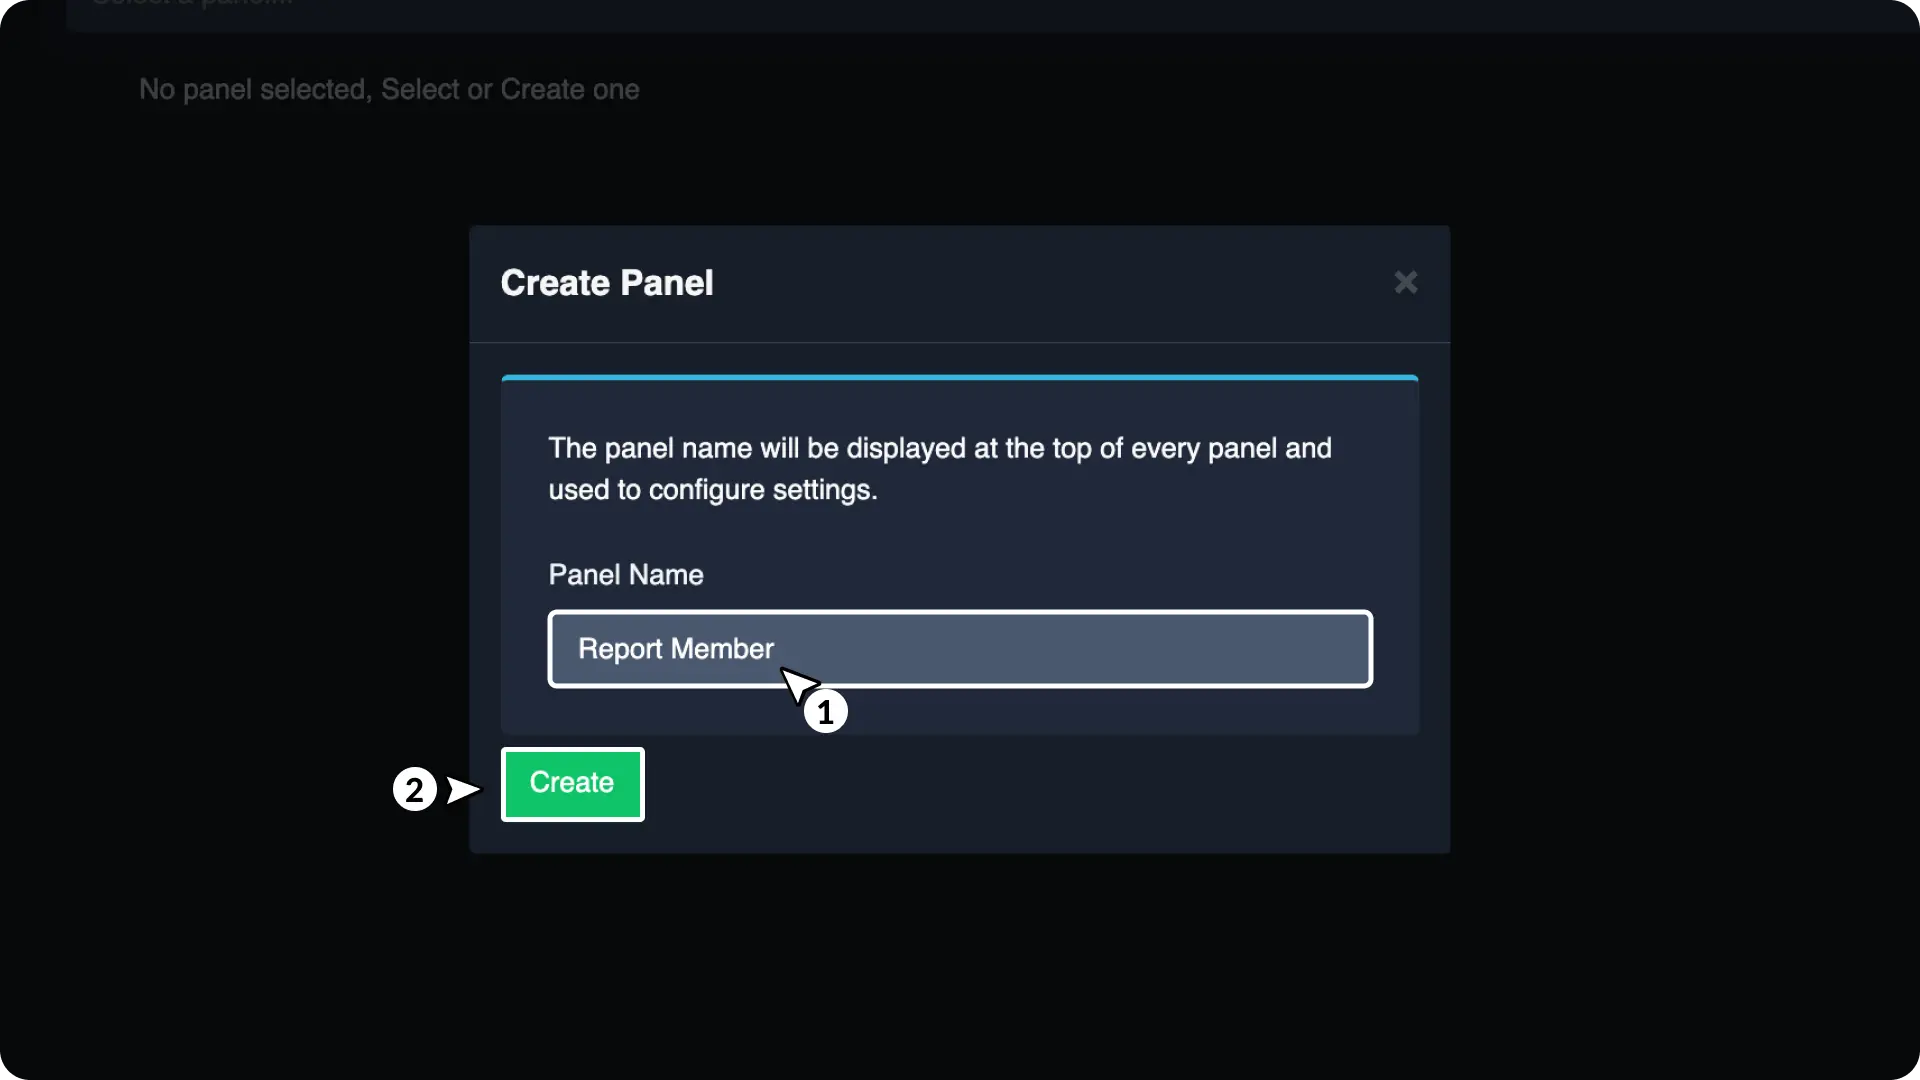
From the Ticket Tool dashboard, go to Panel Config in the sidebar and create a new panel.
Give the panel a simple, easy-to-remember name.
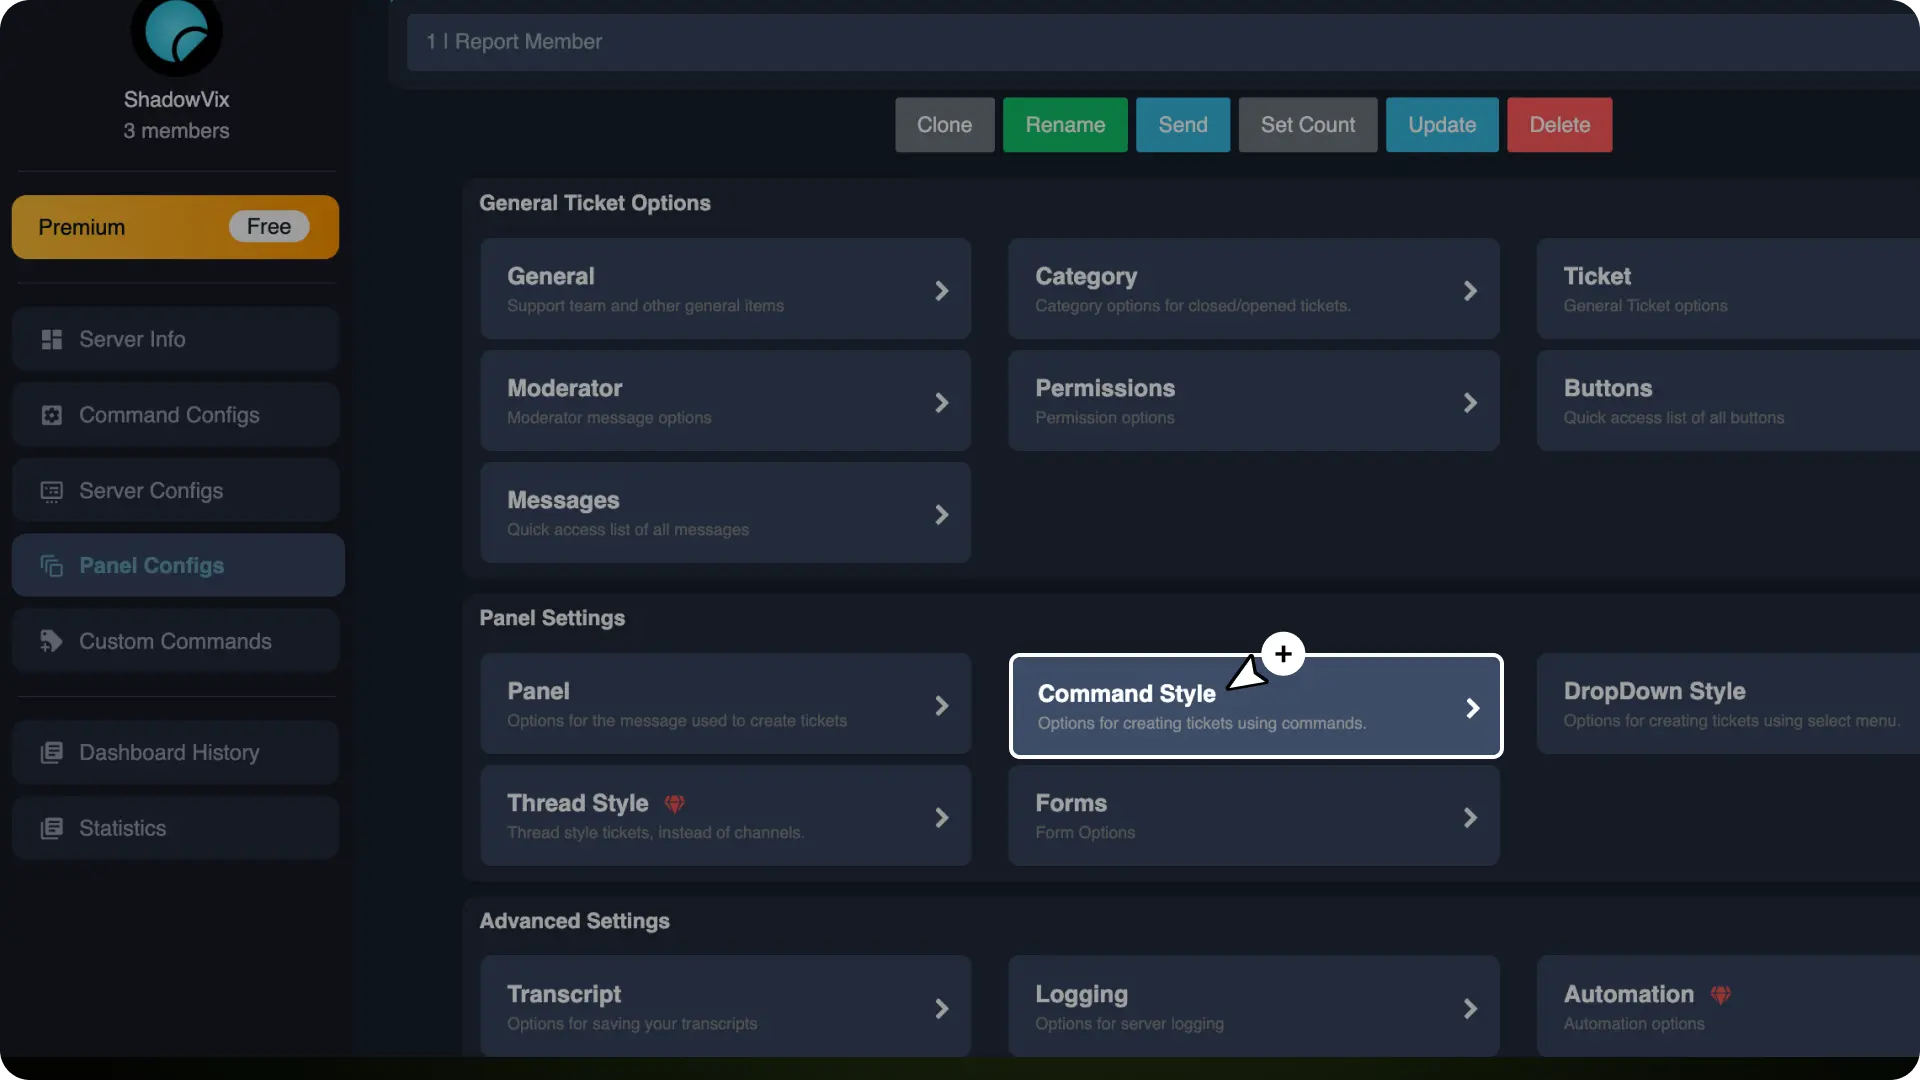
Once the panel is created, go to the Command Style module.
In the Command Style module, enable the option "Enable Command Style ticket creation" and select a private channel as the Monitor Channel (in the image below, I’ve selected the report-member-code channel).
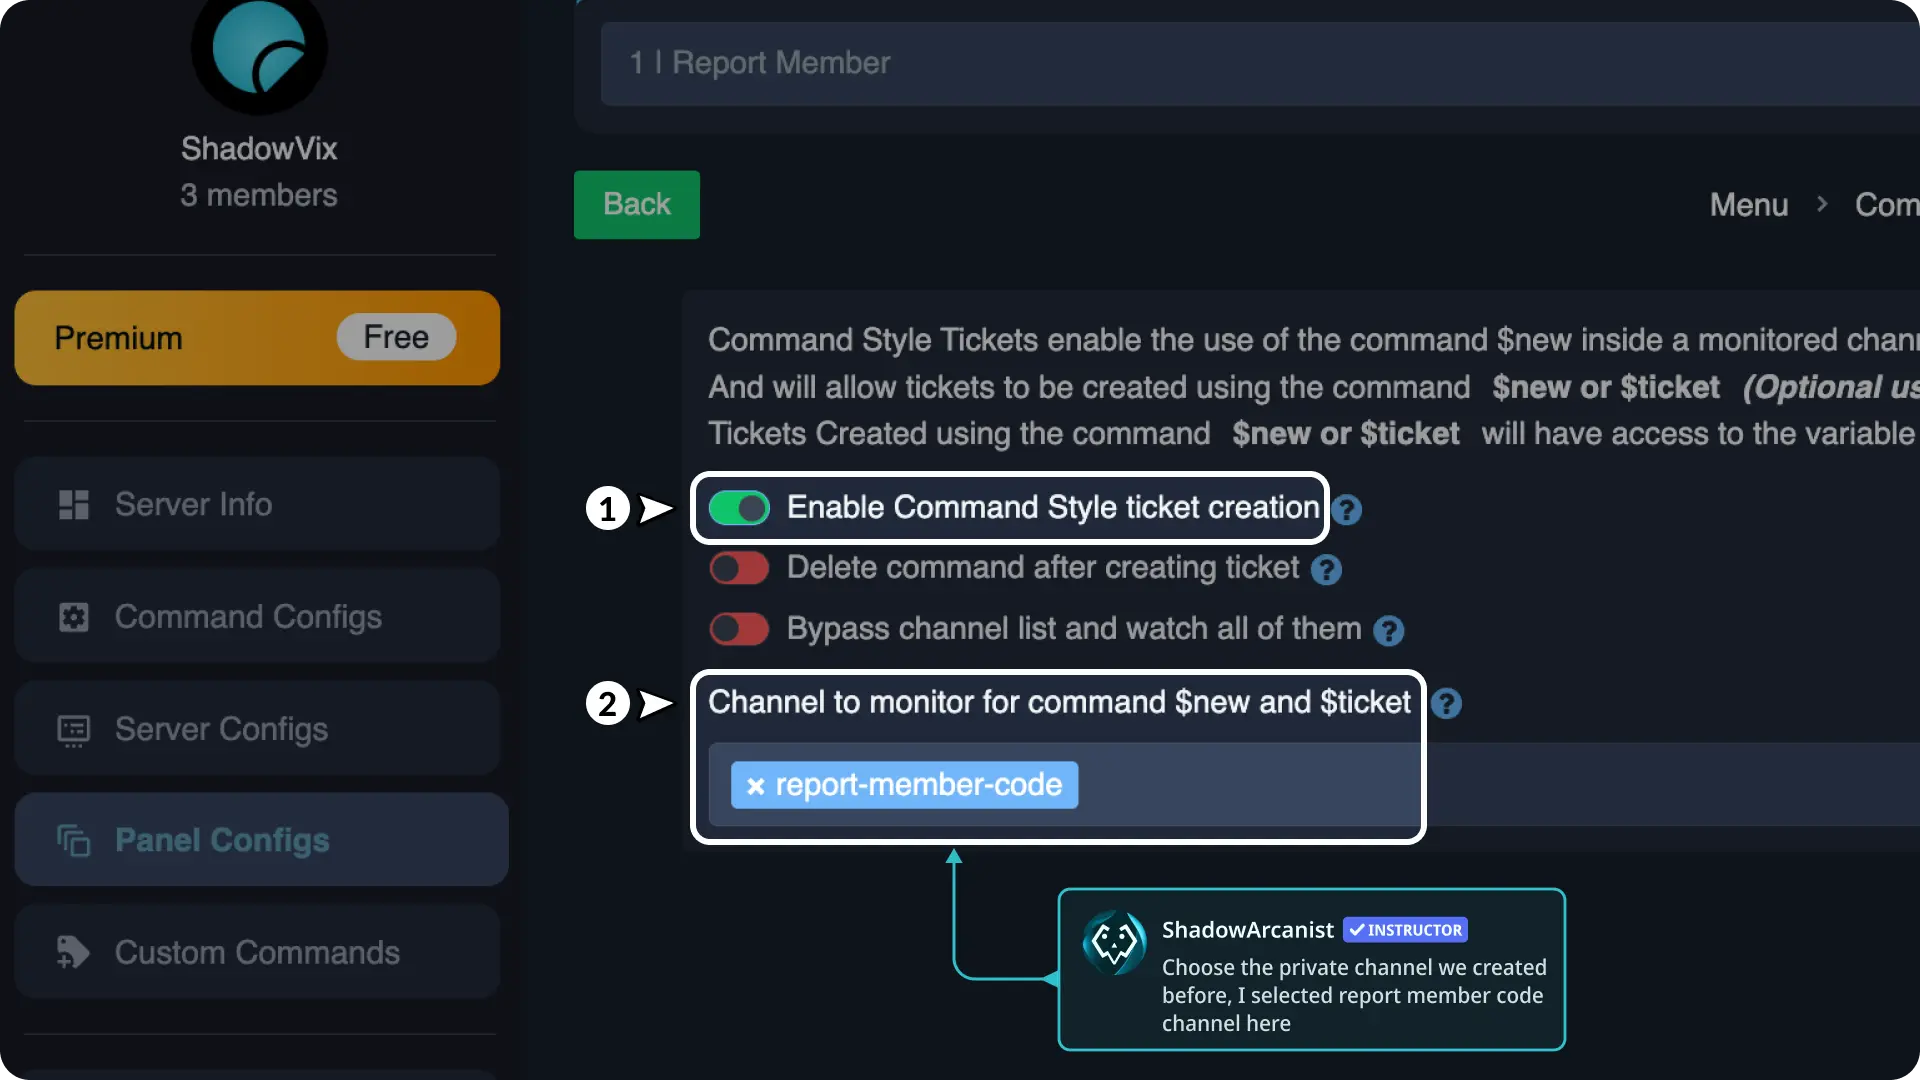
This option ensures the Ticket Tool bot waits for messages in the chosen monitor channel.
Next, go back to the Panel Config in the sidebar and open the Category module.
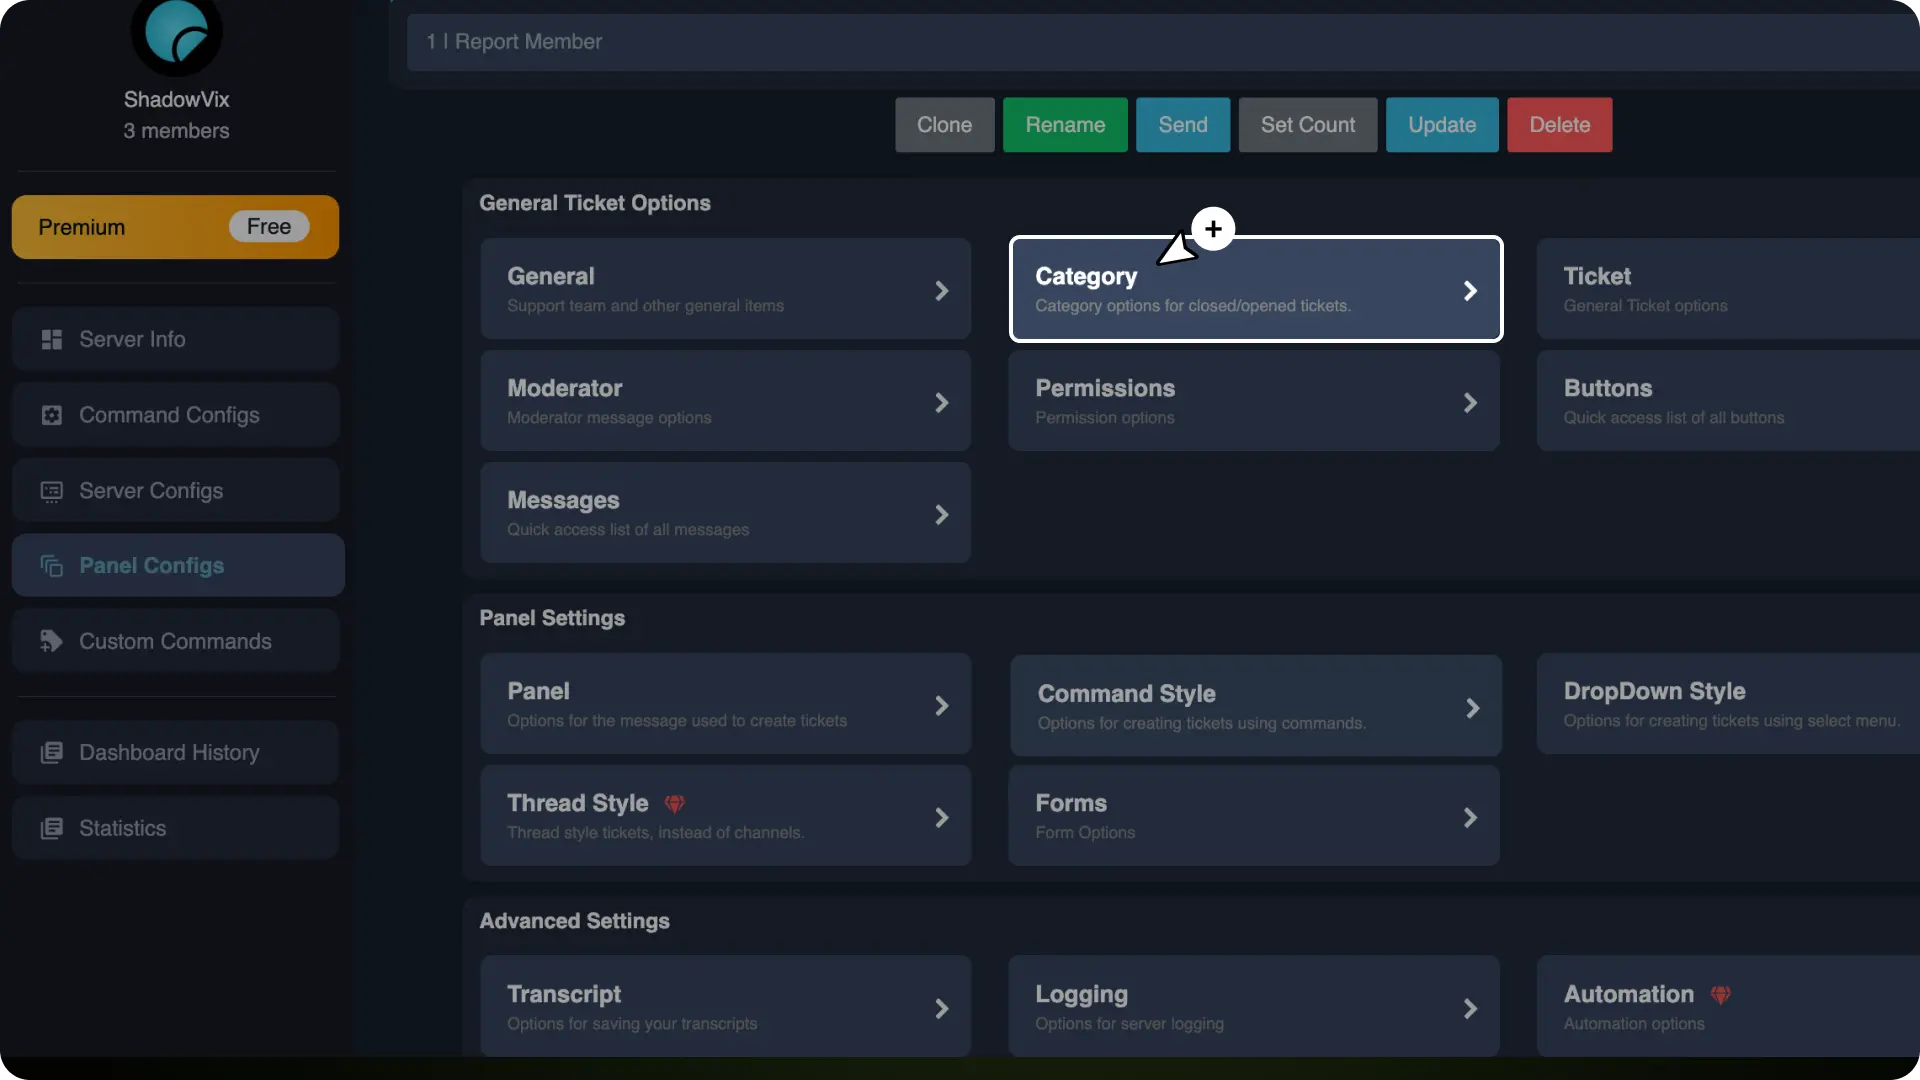
In the Category Module, select a category under Category Created/Opened.
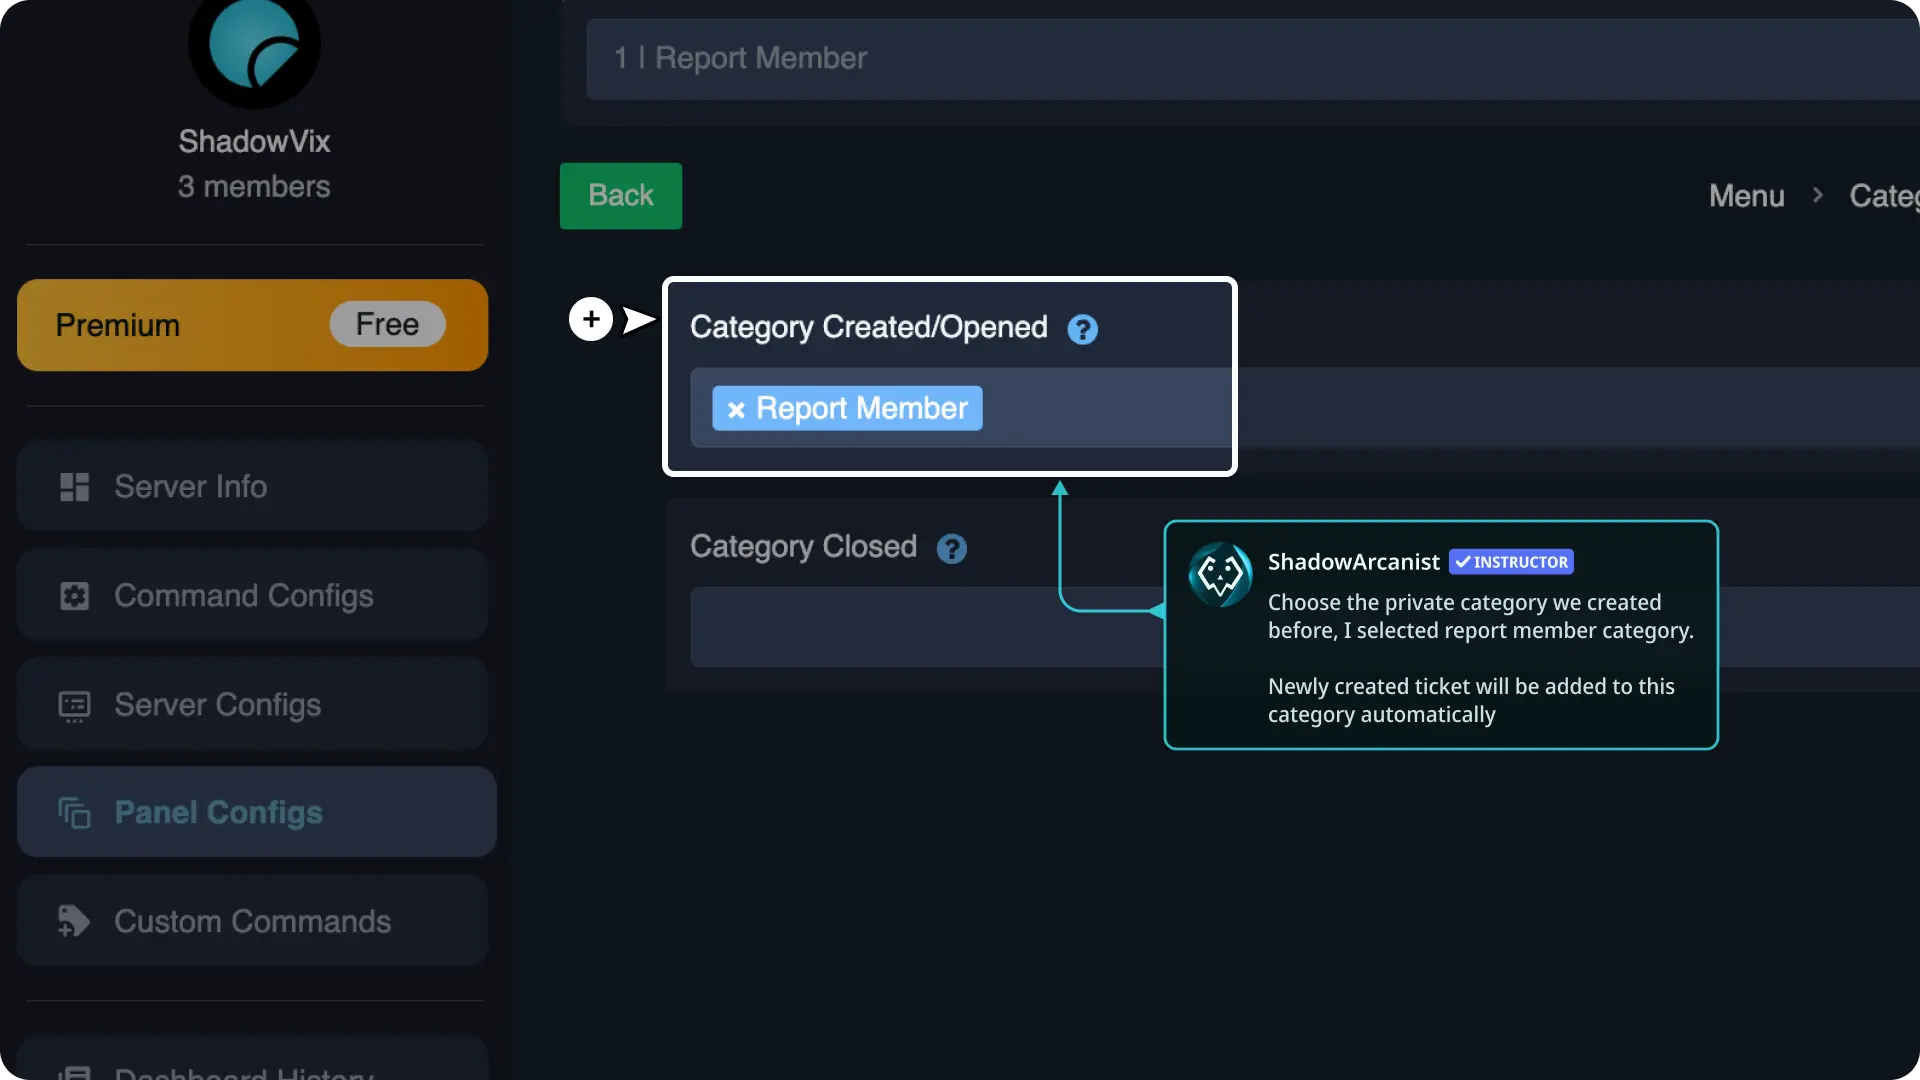
This will enable Ticket Tool to assign newly created tickets to that category.
Note:
This step is optional if you prefer not to organize tickets by channel categories on your server.
4) Create Ticket Panel Message Template on Sapphire
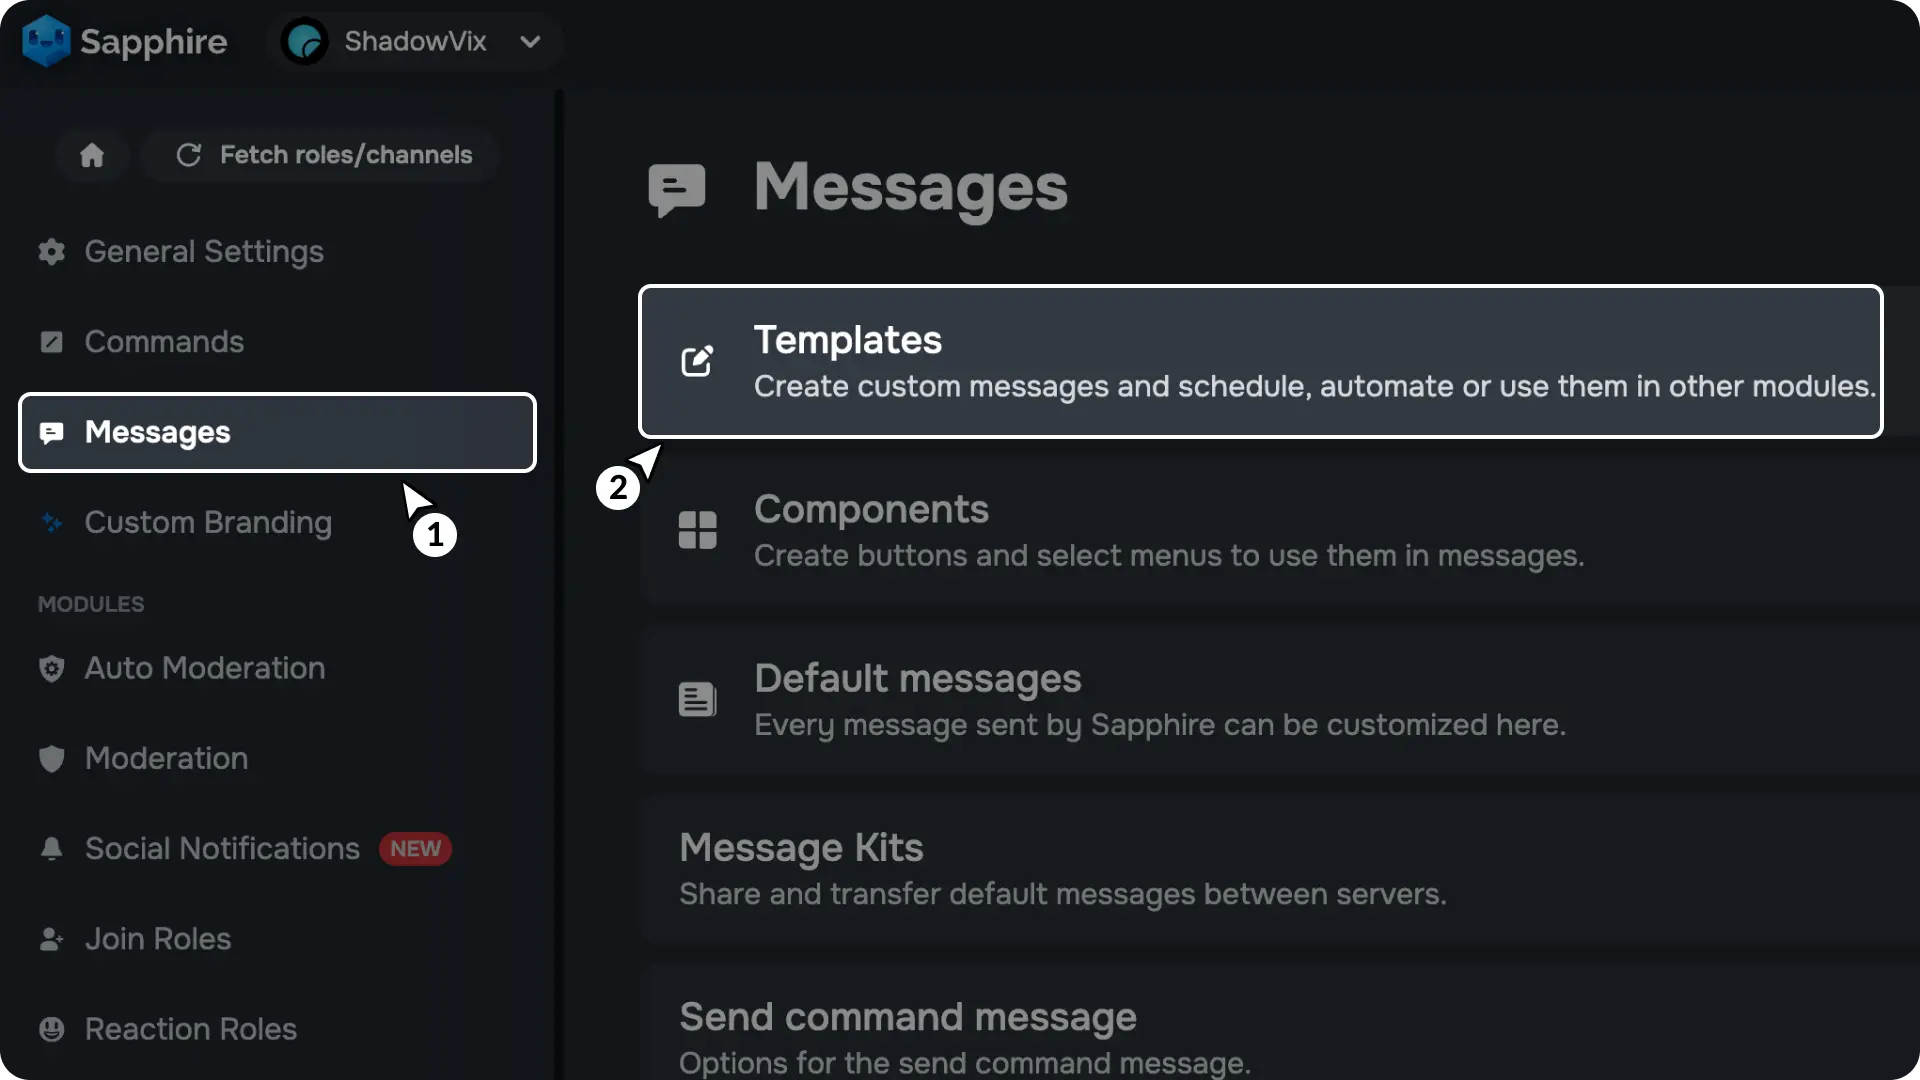
From the Sapphire dashboard, go to the Messages page in the sidebar, then go to the Templates module.
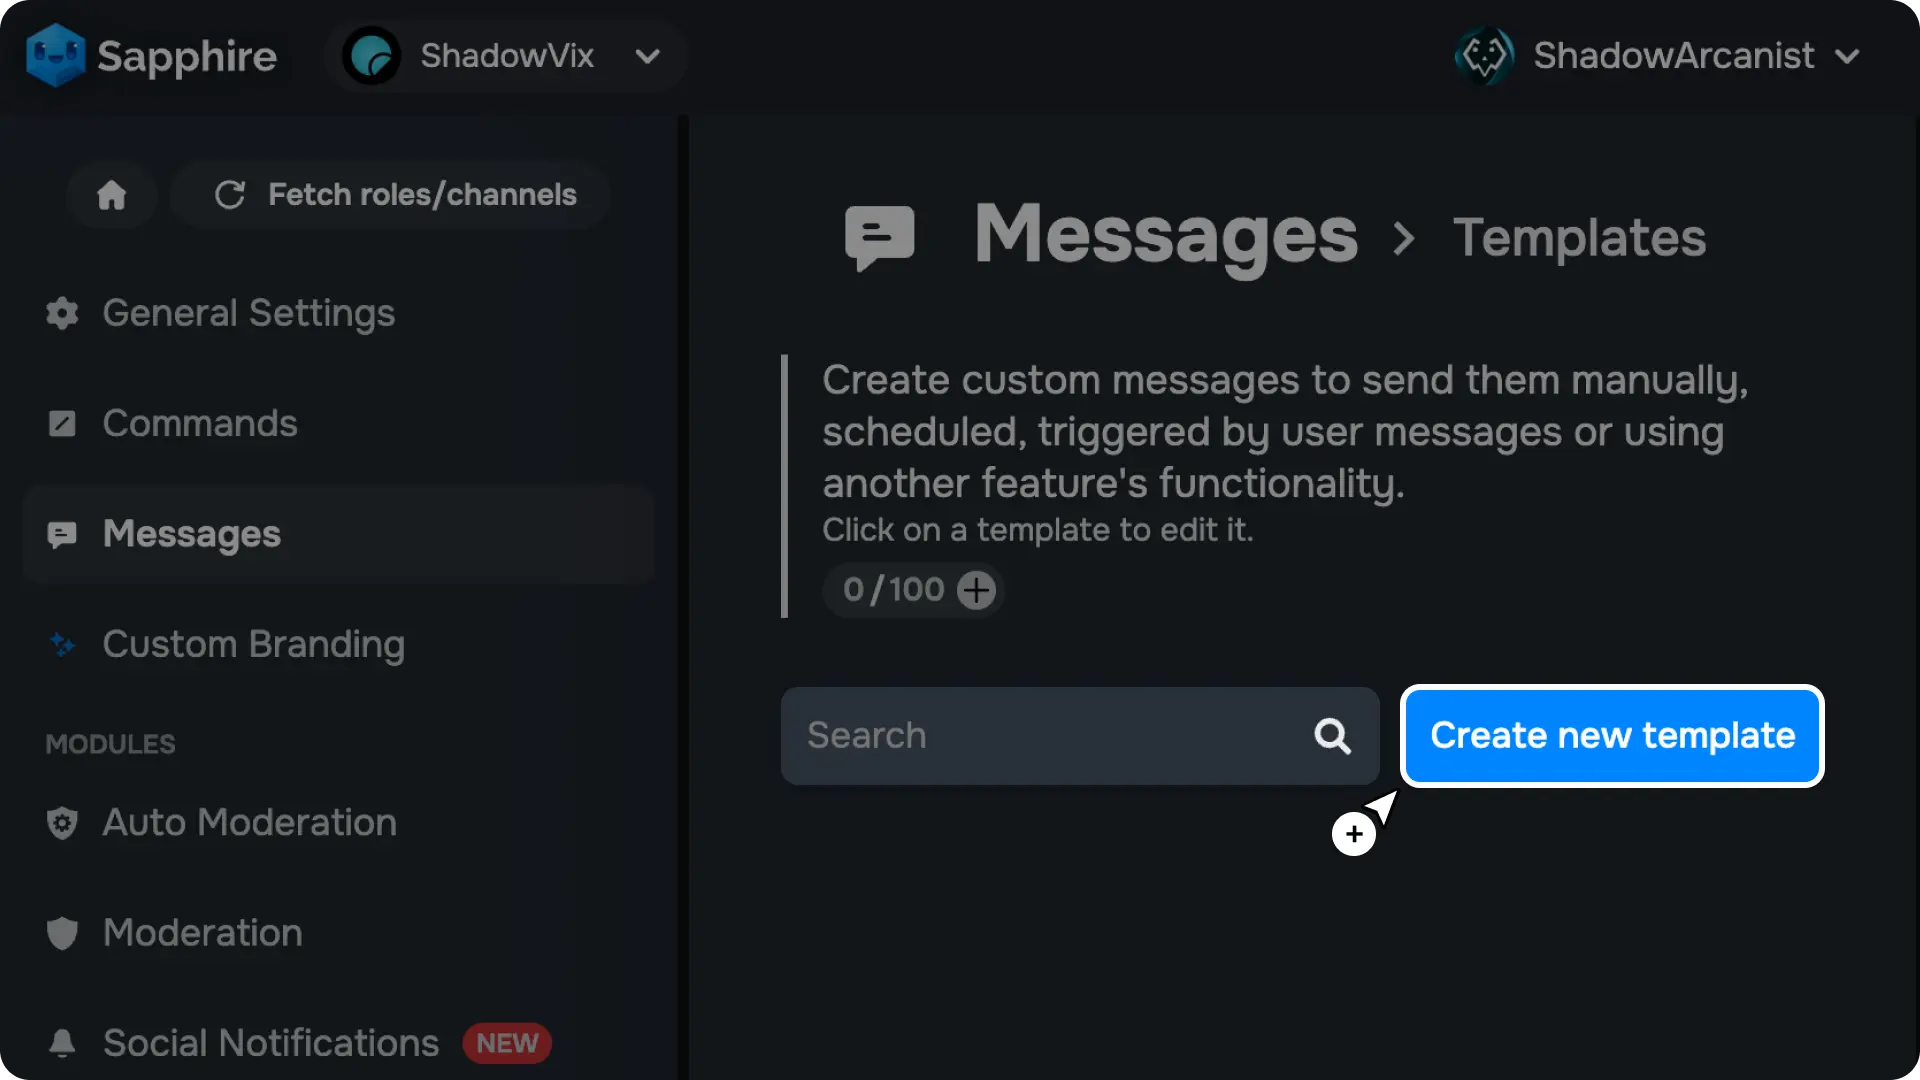
Click the "Create New Template" button to create a new message template.
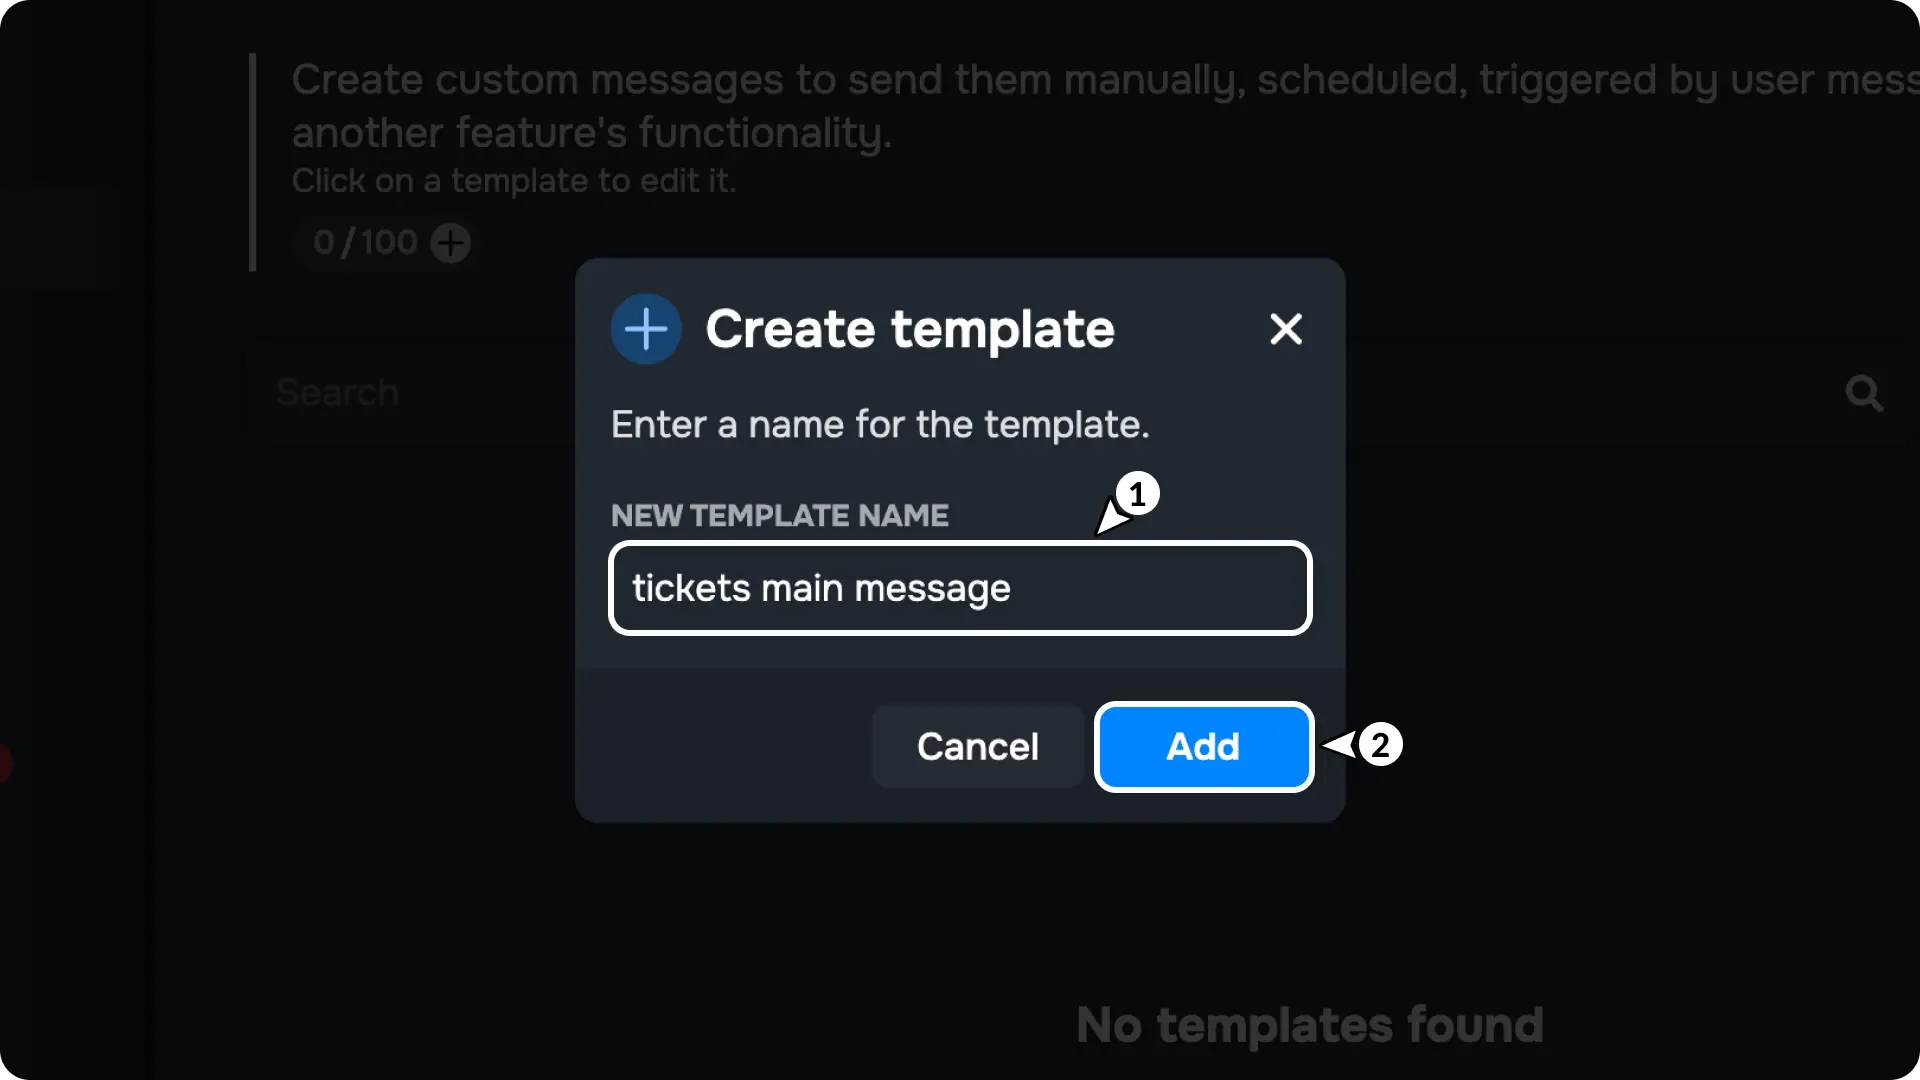
Give the template a simple, easy-to-remember name. I’ve named mine "tickets main message".
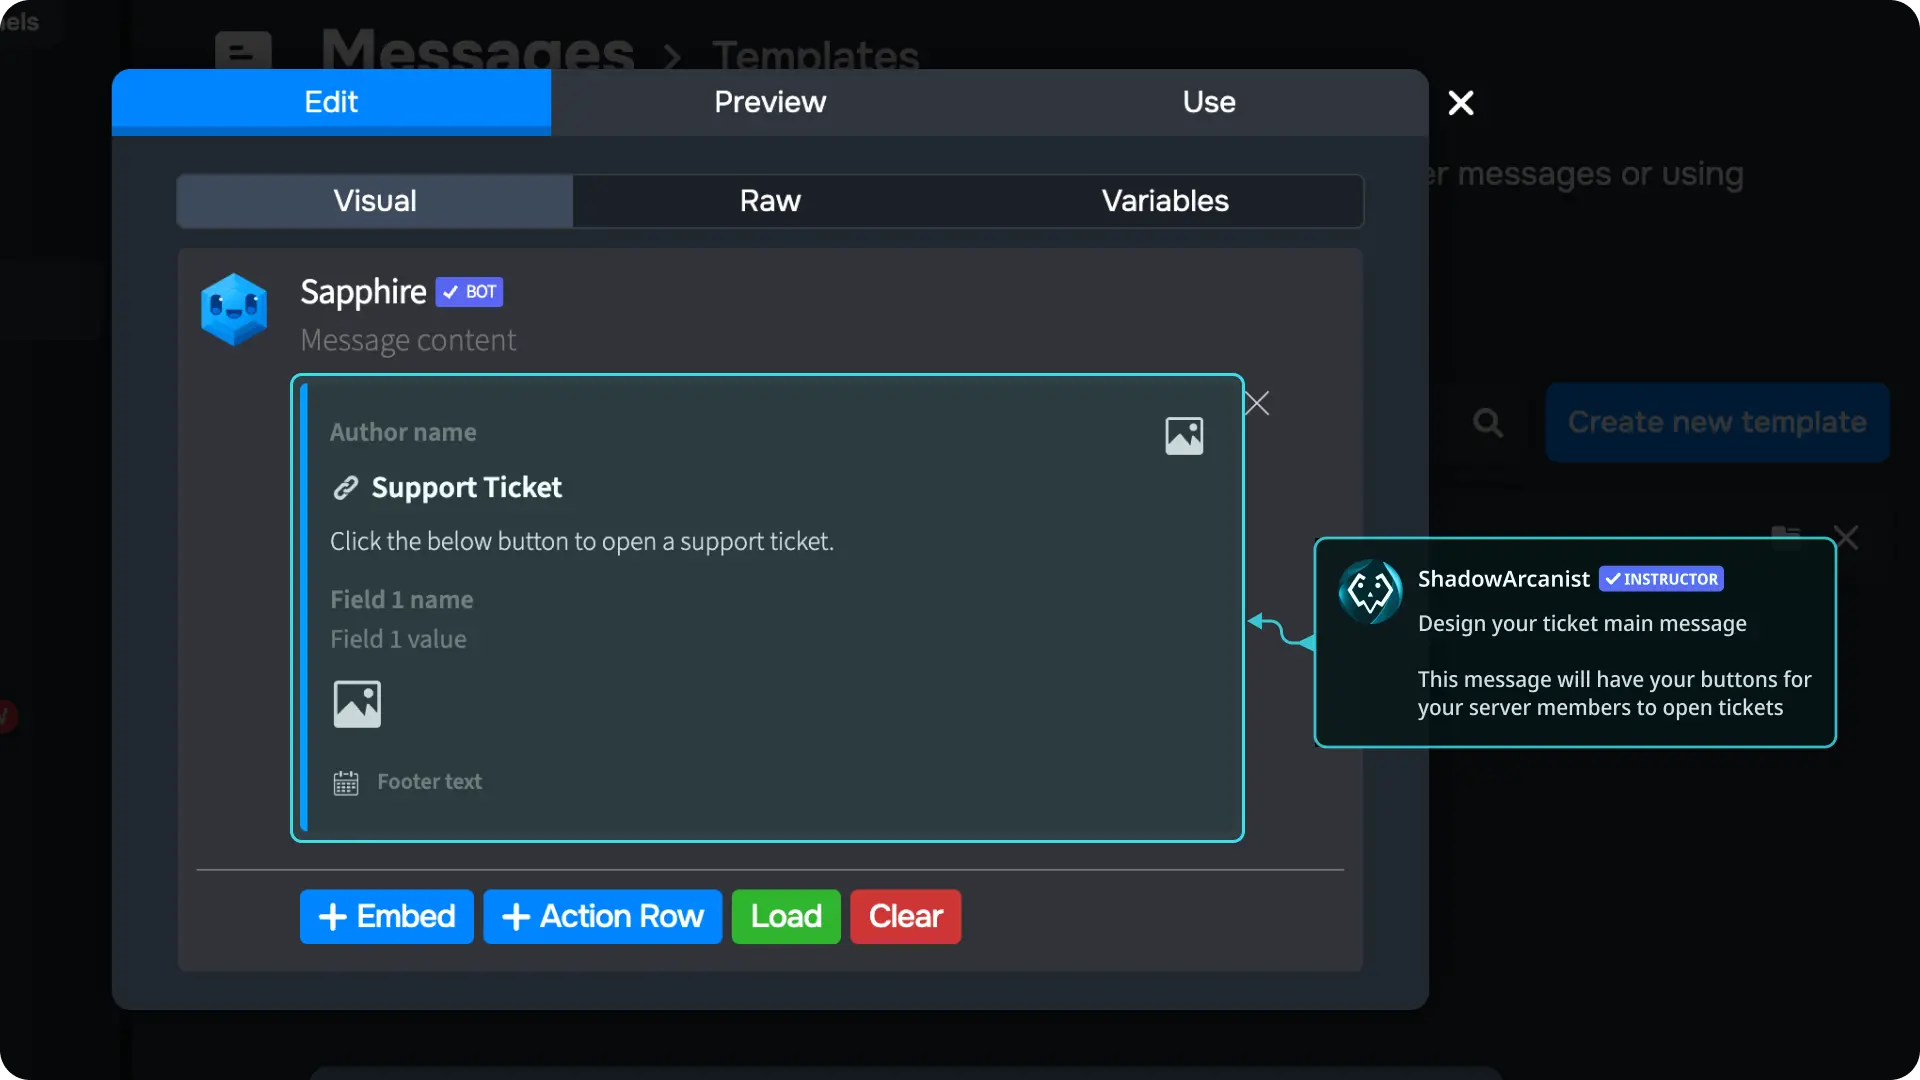
5) Design your Tickets panel message template
For this guide, we will design a simple ticket panel message which will have a button called "Report Member", but you can customize the message however you like.
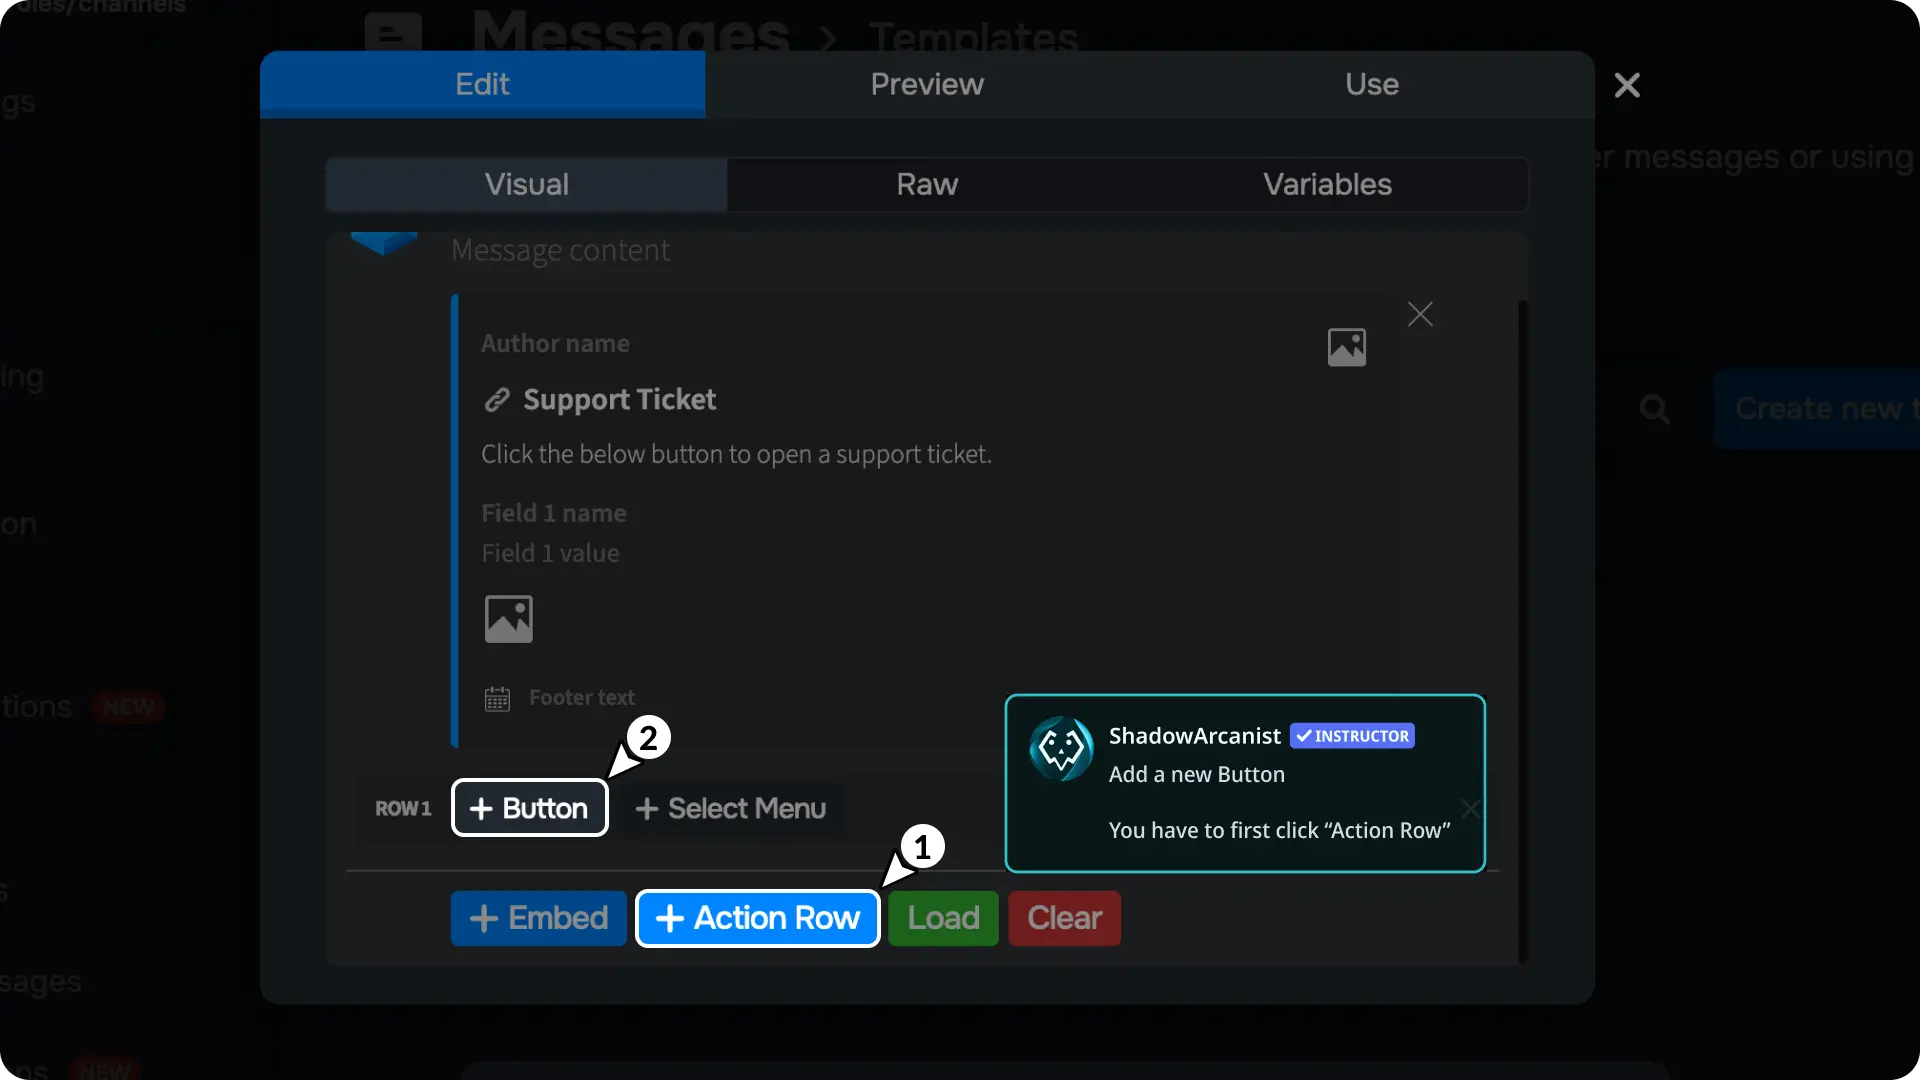
6) Add the Button to the Main Message
Click "+ Action Row" to add an action row to the message template, then click "+ Button" to add a button.
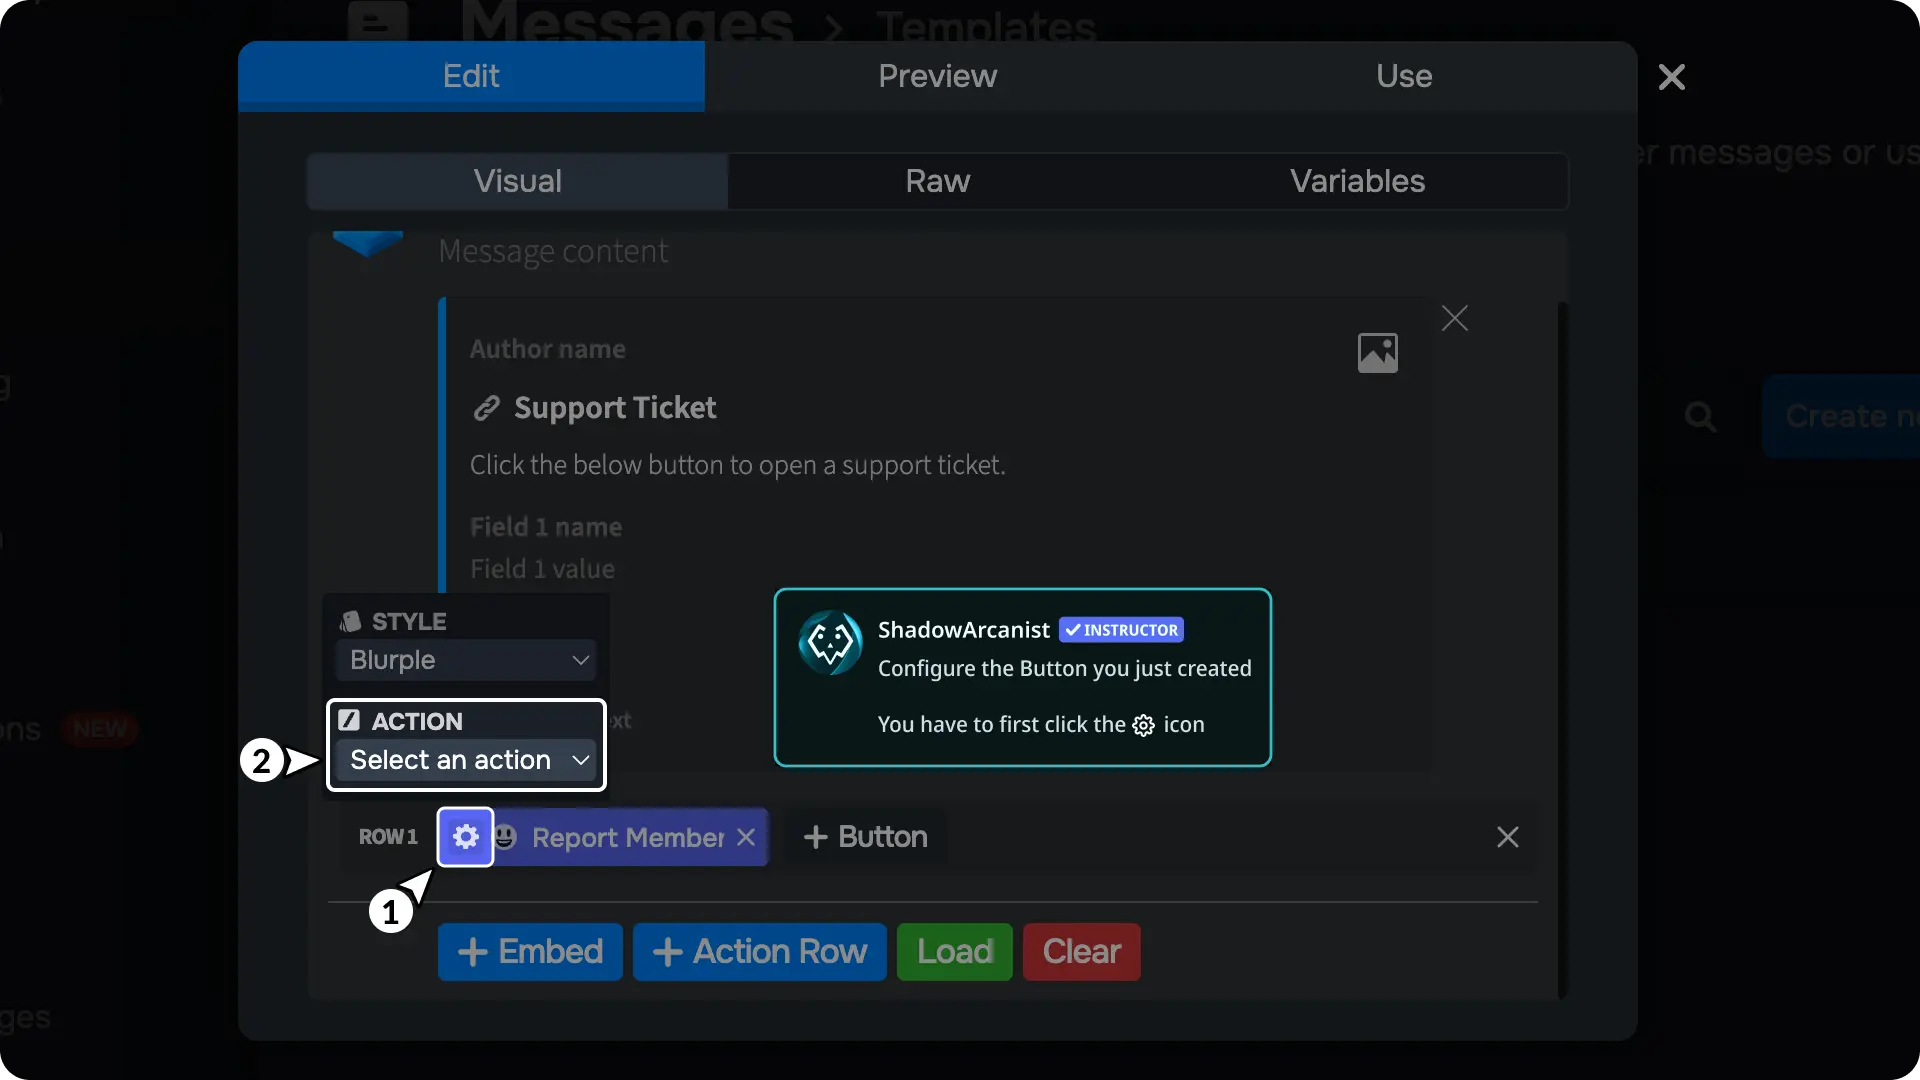
7) Configure the Button on Message Template
Click the ⚙ on the button, then click "Select an action".
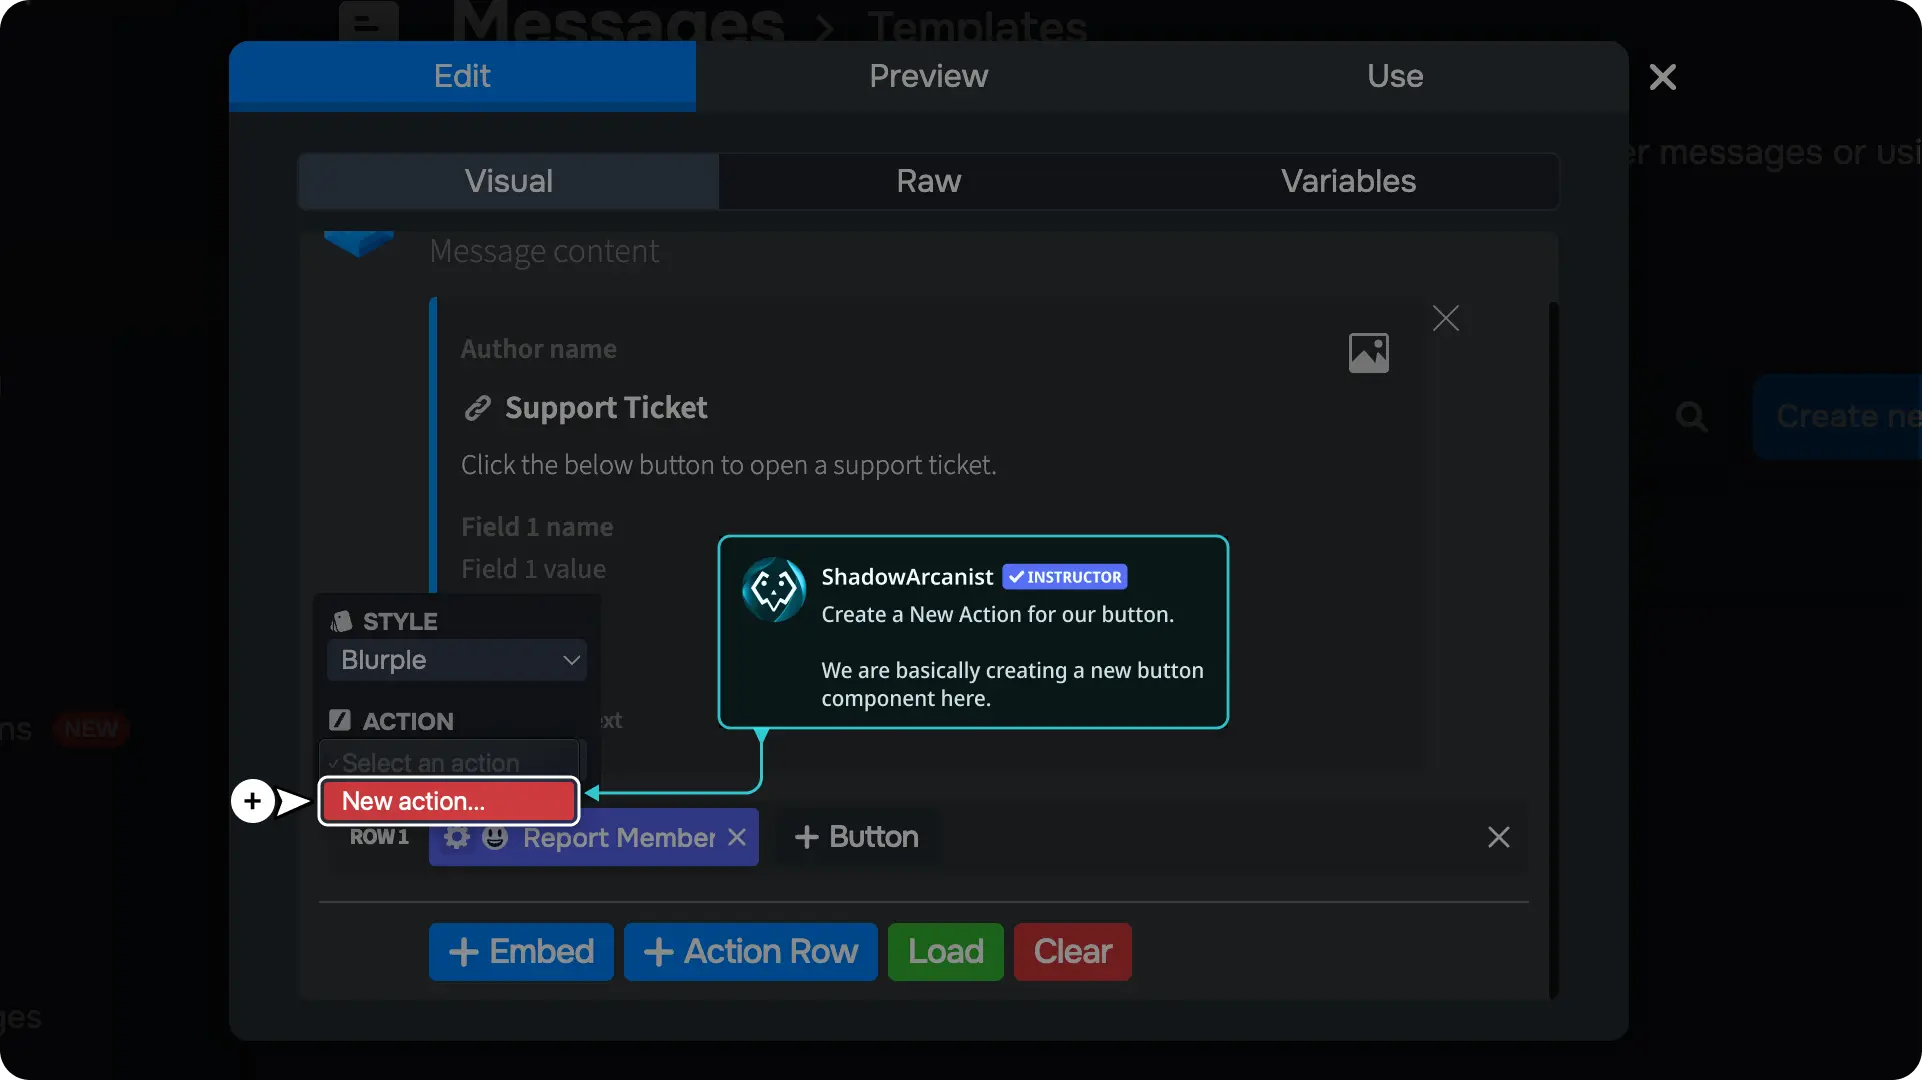
8) Create a New Action
If you've already created any button components, they'll appear in the actions list. Since we haven't created any components yet, we'll see an option to create a new button component.
Click on "New action" to create a new button component.
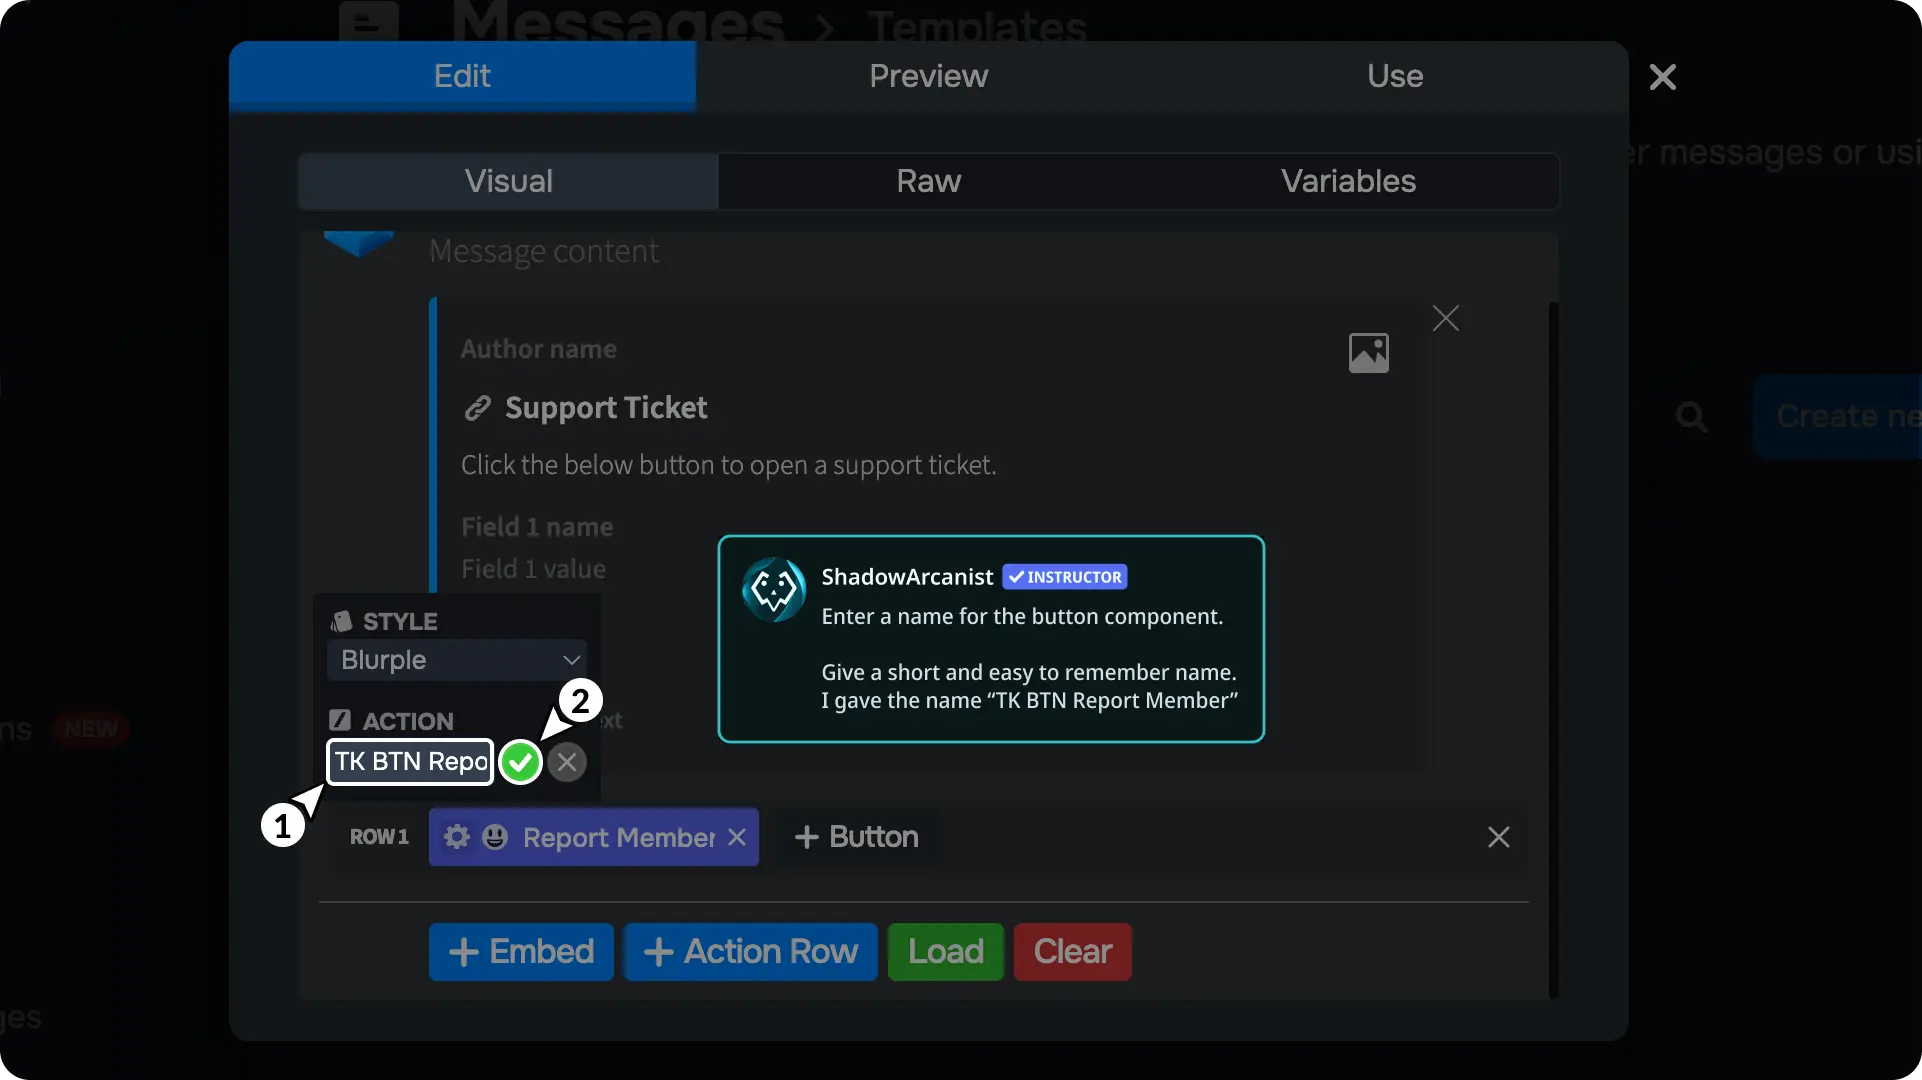
9) Enter a name for your Button Component
Type in a name for your button component and click the ✅. This will make a new button component and link it to this button.
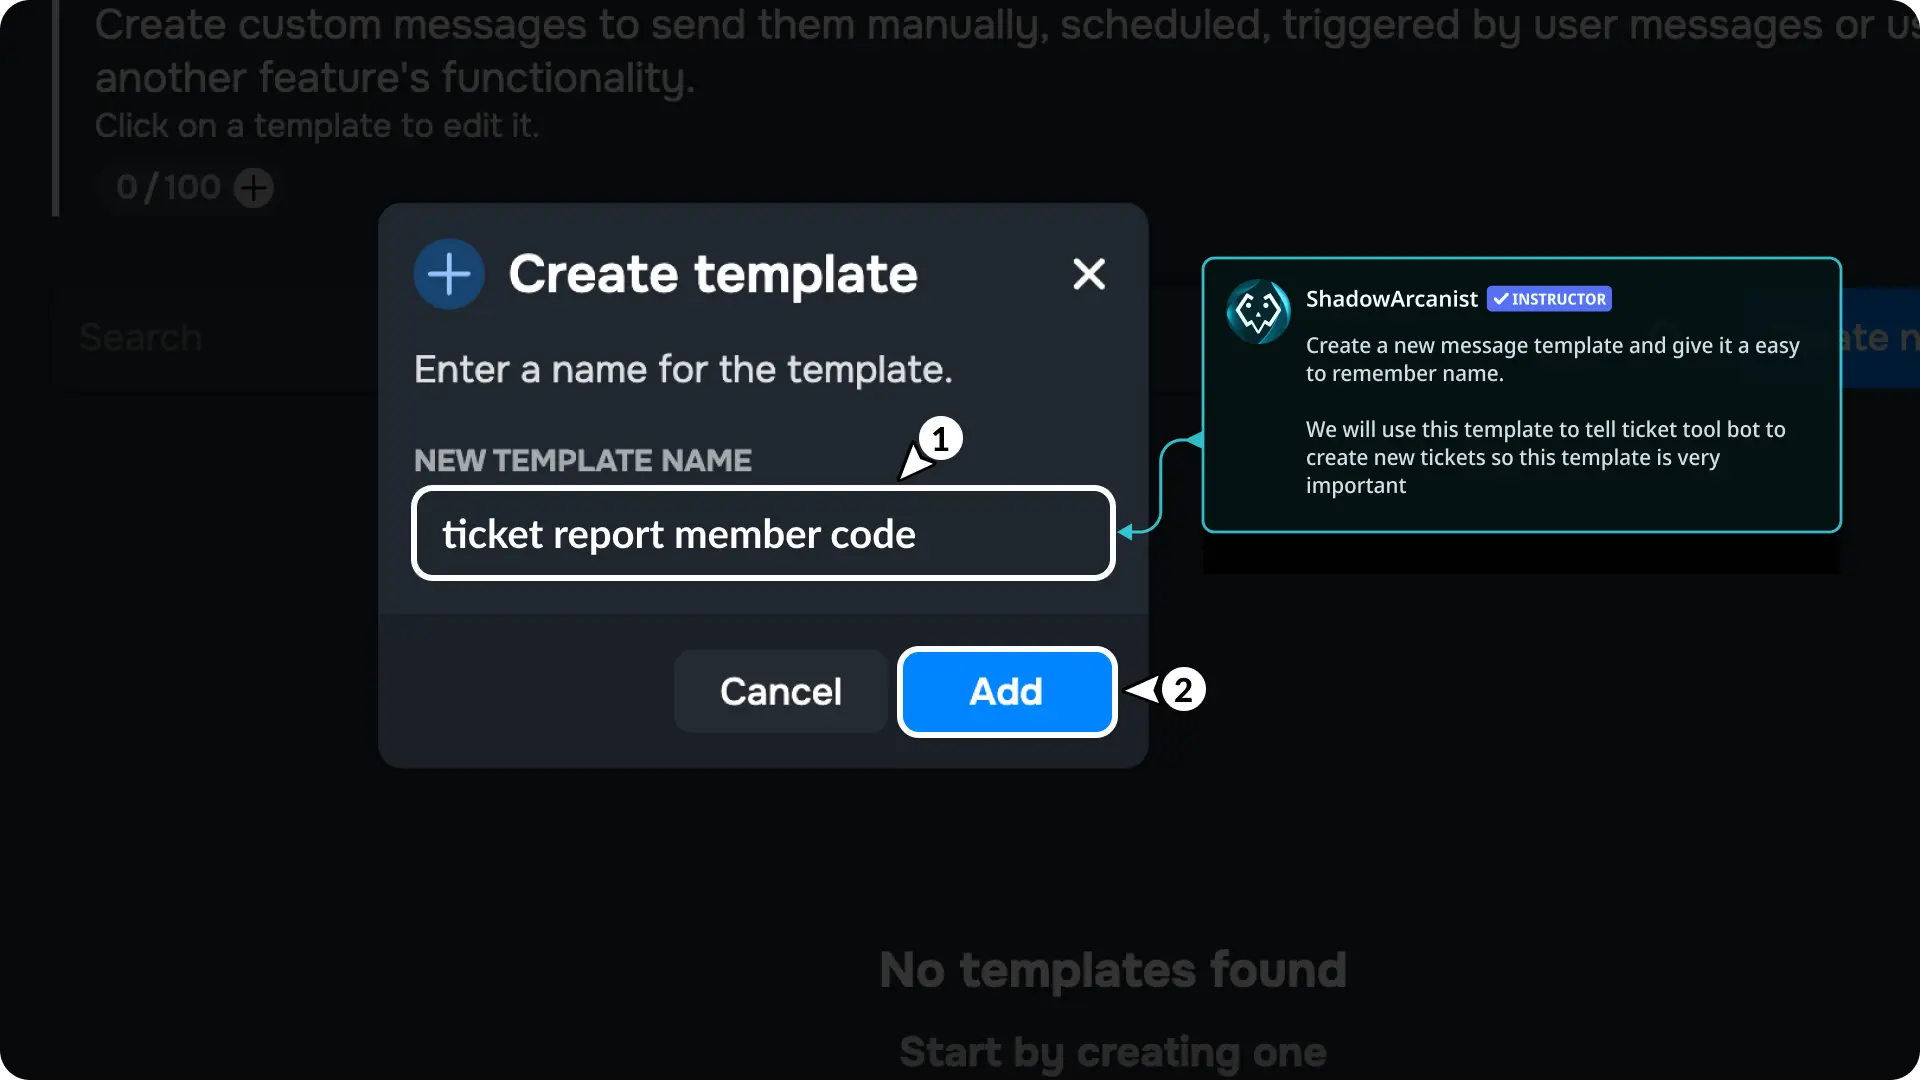
10) Create another message template
Create a new message template, just like we did in step 4. Sapphire will send this template on a private channel when someone clicks the button.
Give the template a simple, easy-to-remember name. I’ve named mine "ticket report member code".
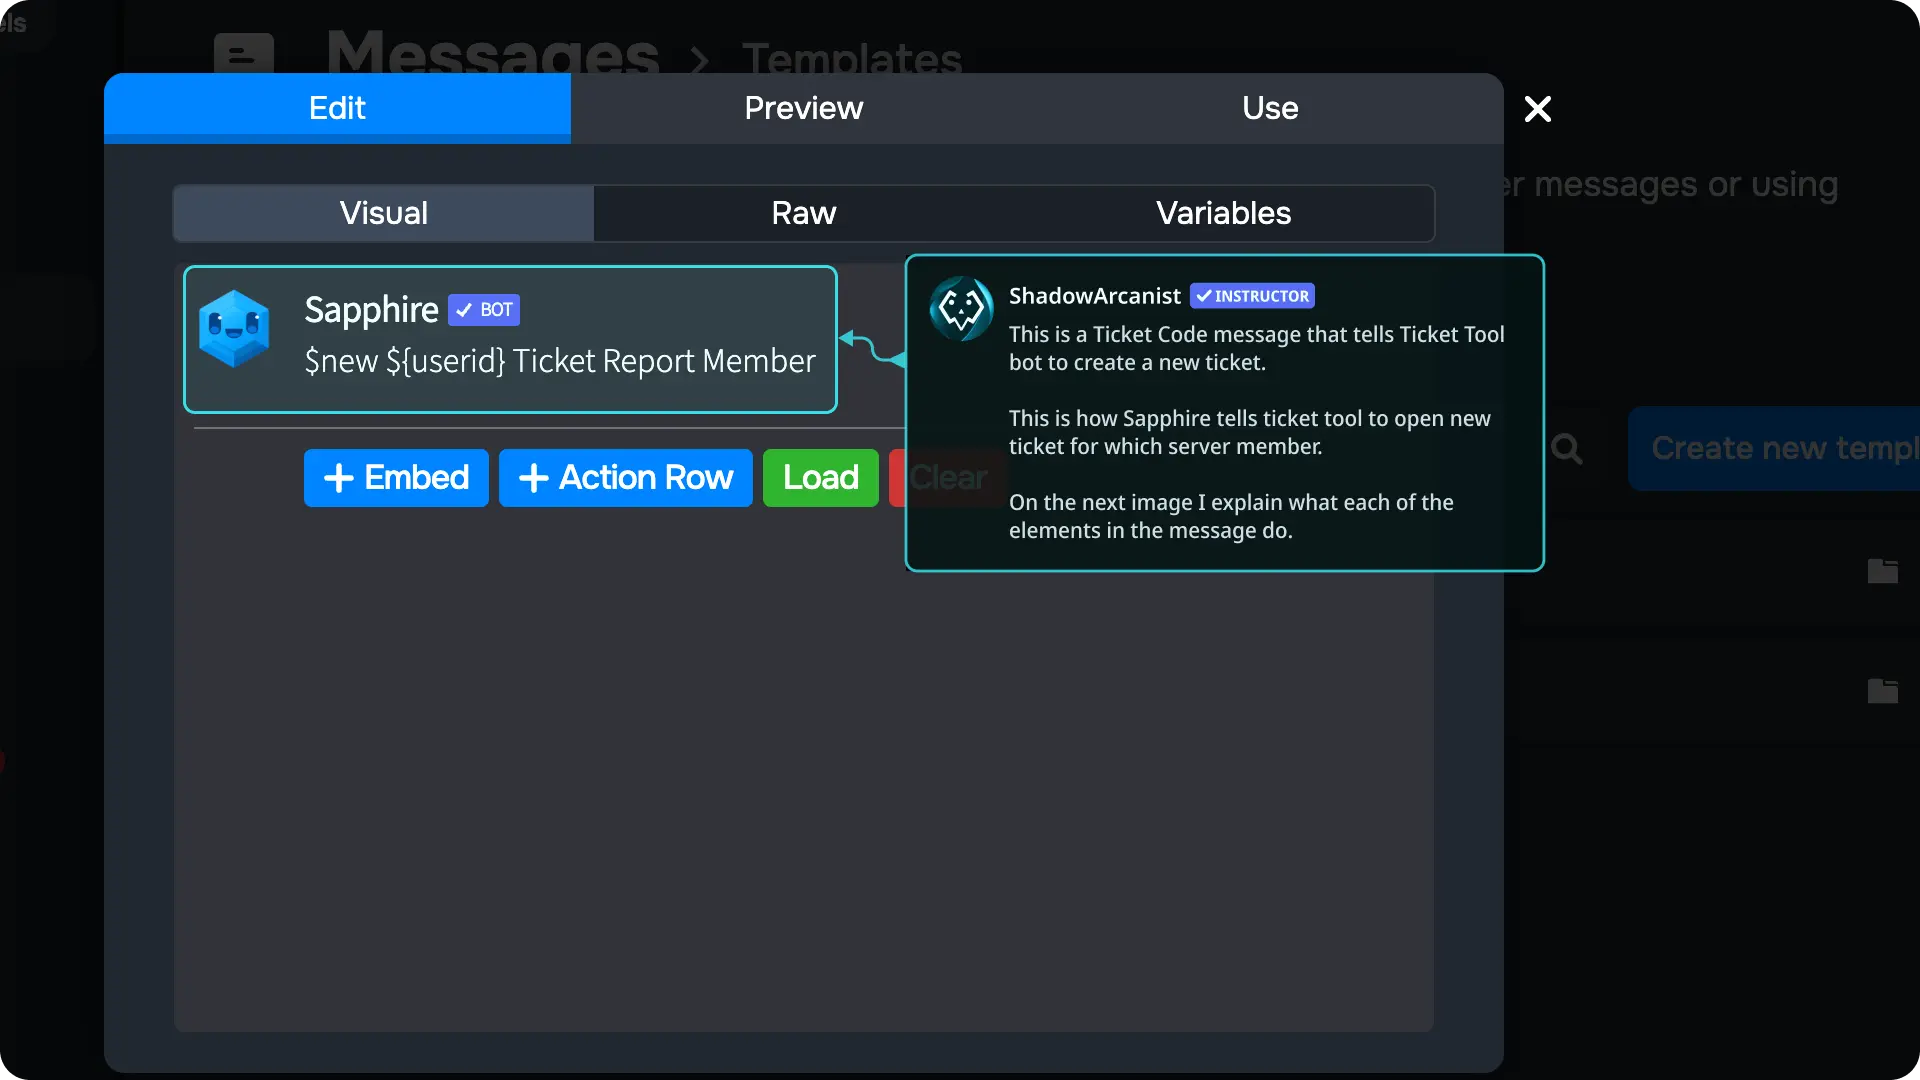
Copy and paste the following into the message template: $new ${userid} Ticket Report Member
The Ticket Report Member text is optional and does not affect how the ticket system functions.

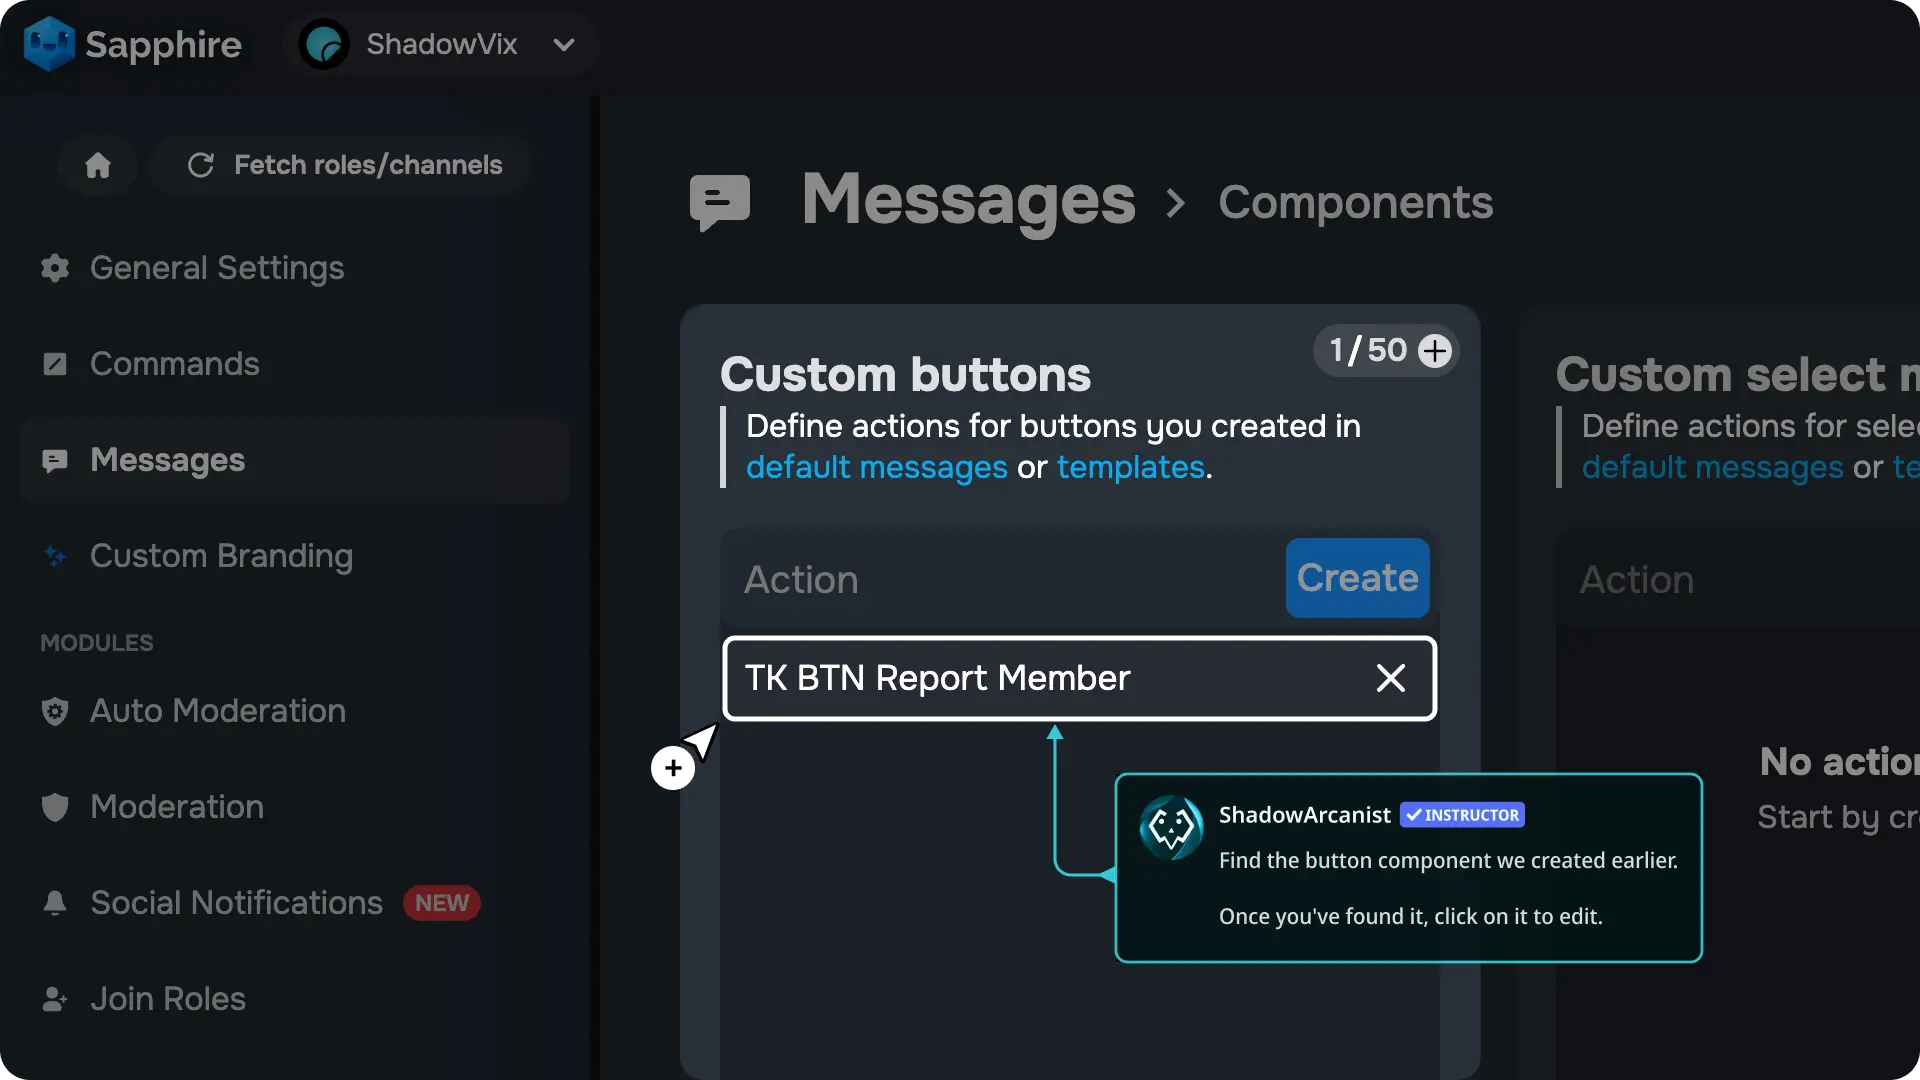
11) Locate your button component
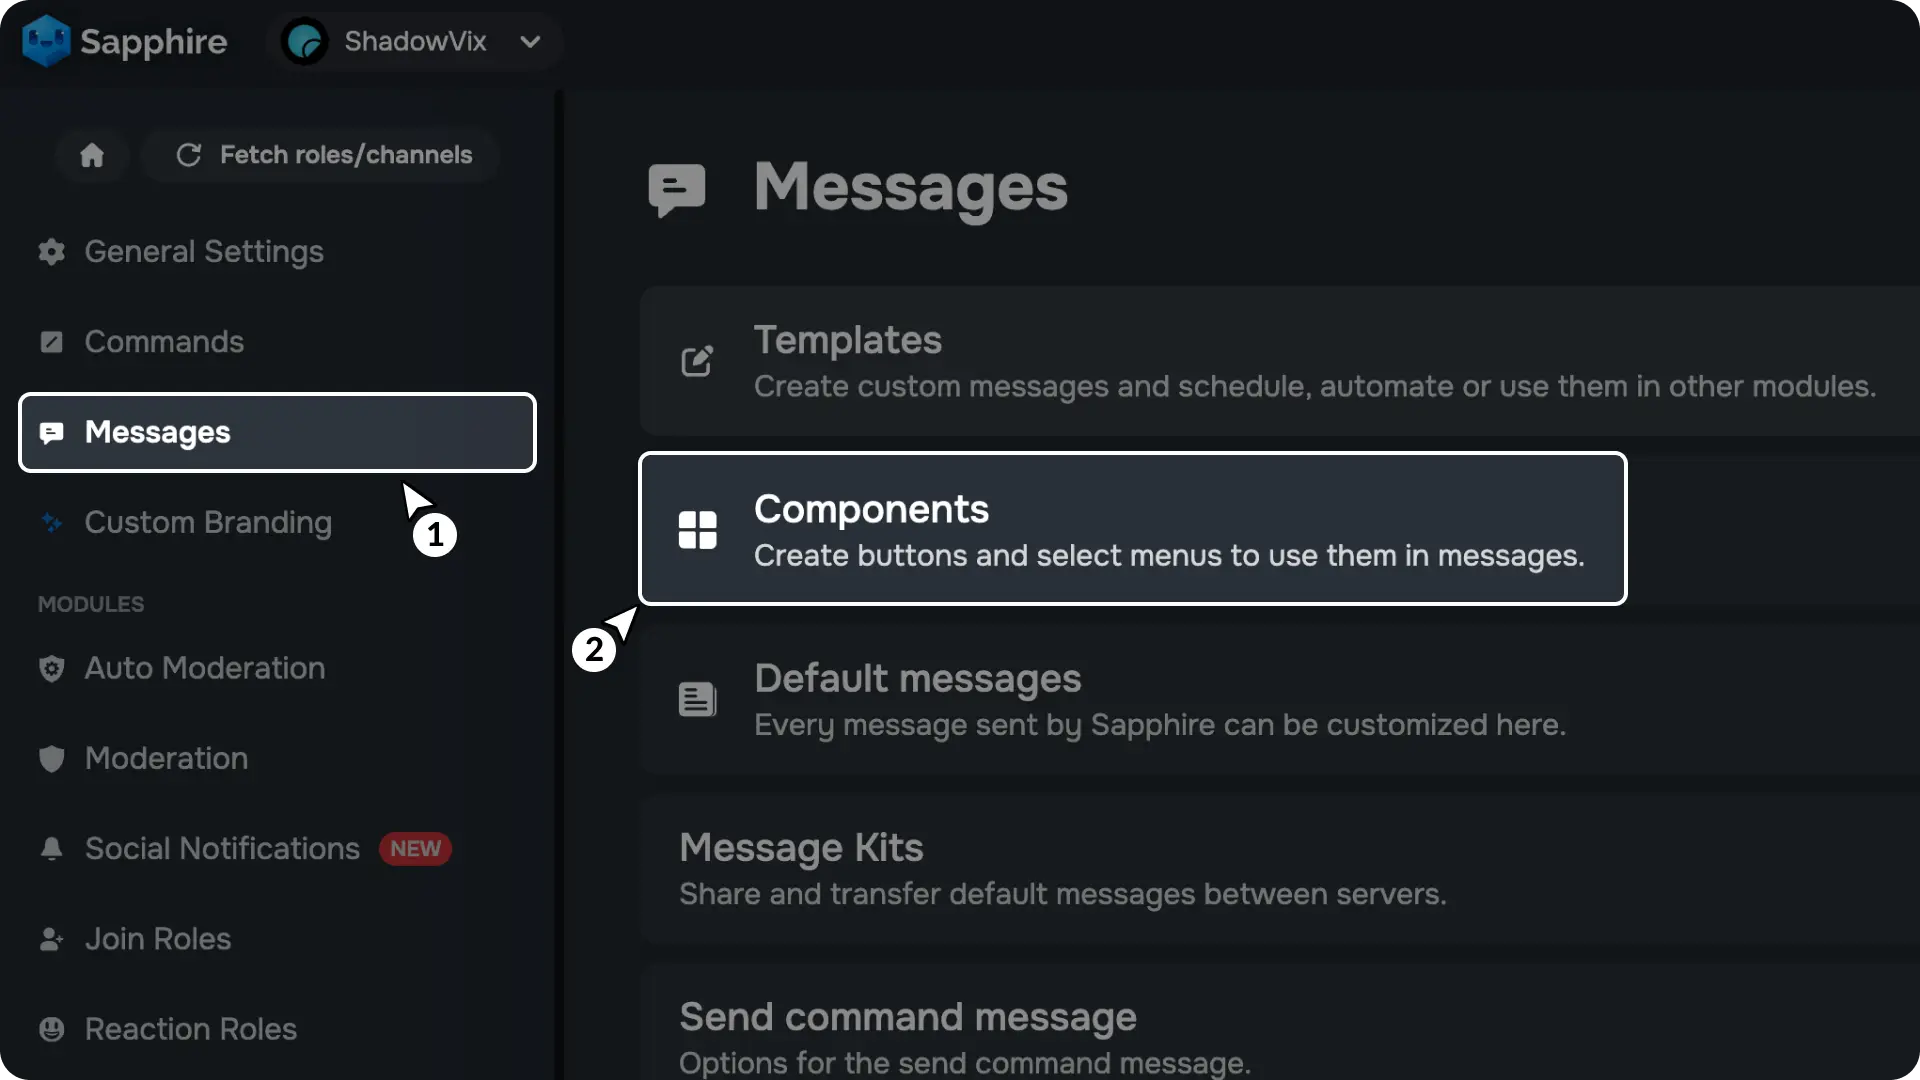
Go to the Messages page in the sidebar, then go to the Components module.
Find the button component we created earlier. Once you’ve found it, click on it to edit.
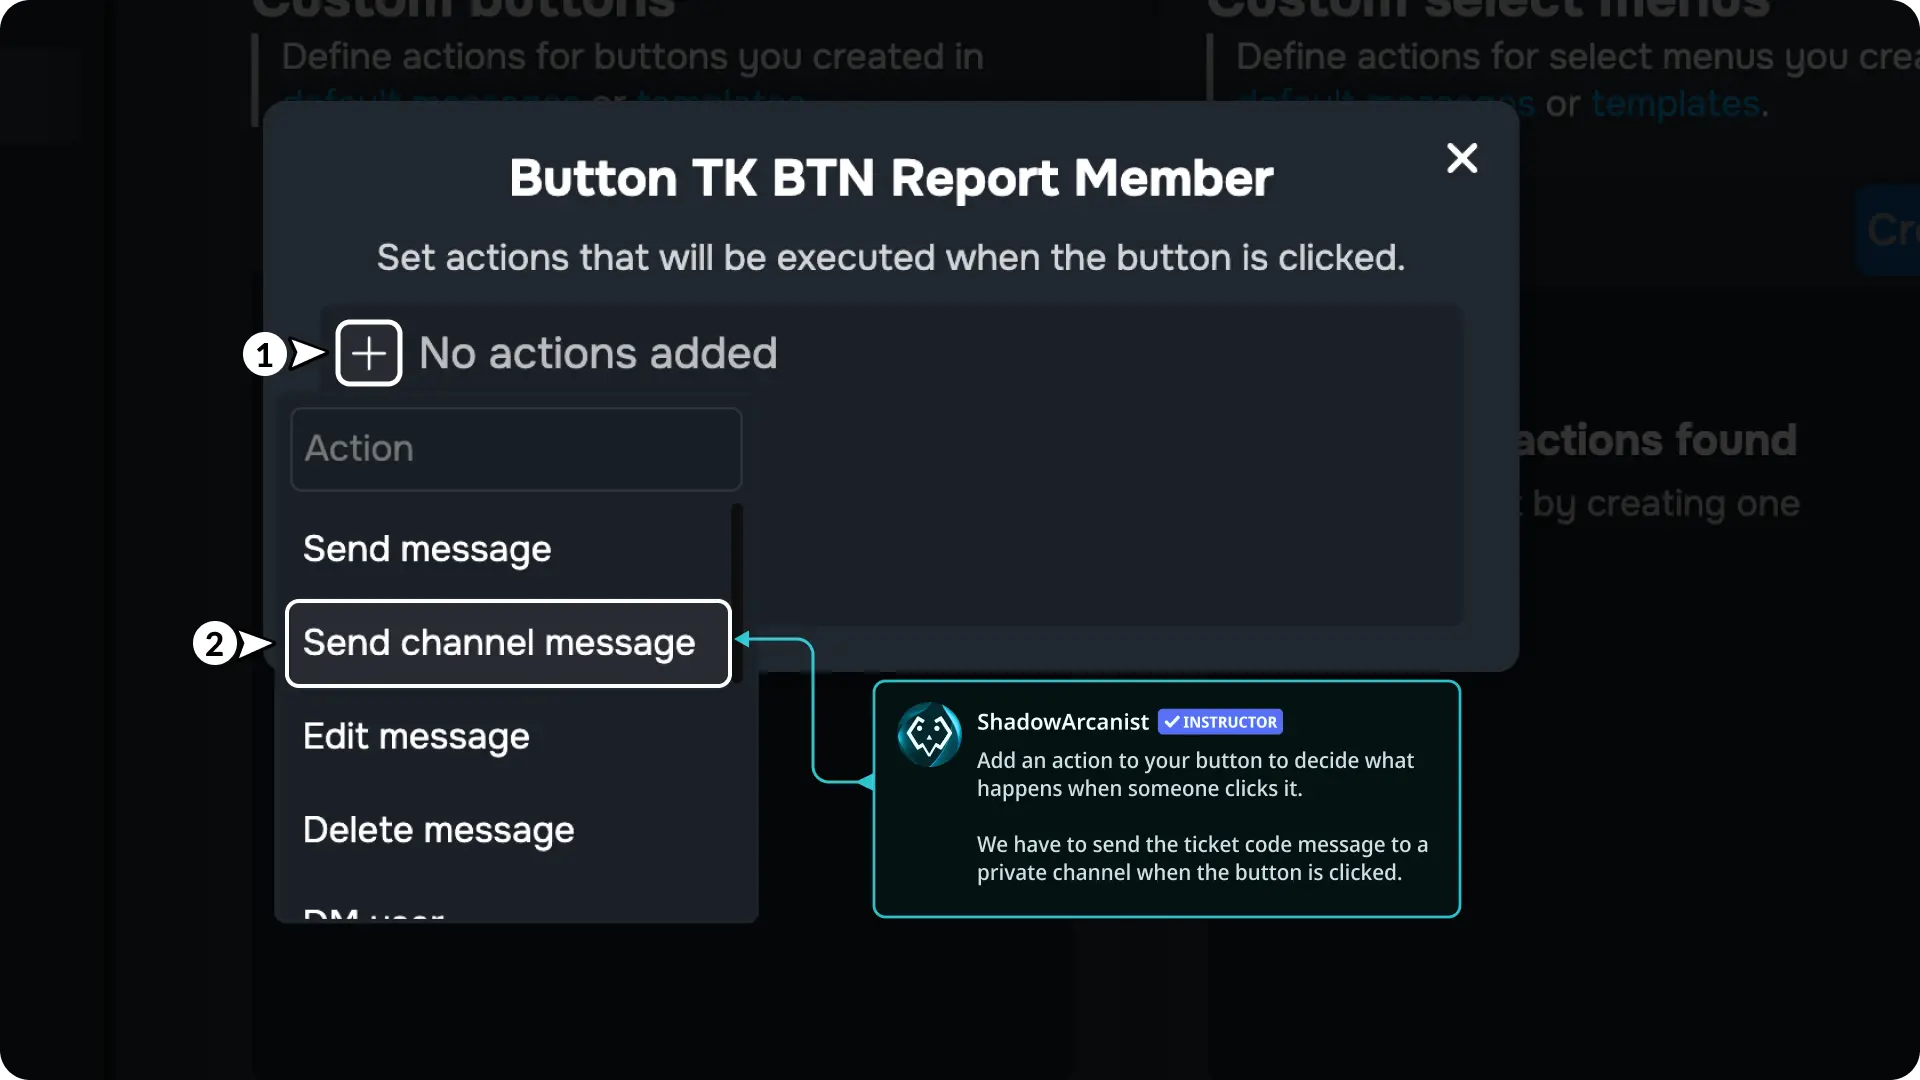
12) Add actions to your button component
Click the + icon and it will show you a list of all actions you can add to your button.
Choose the action Send Channel Message
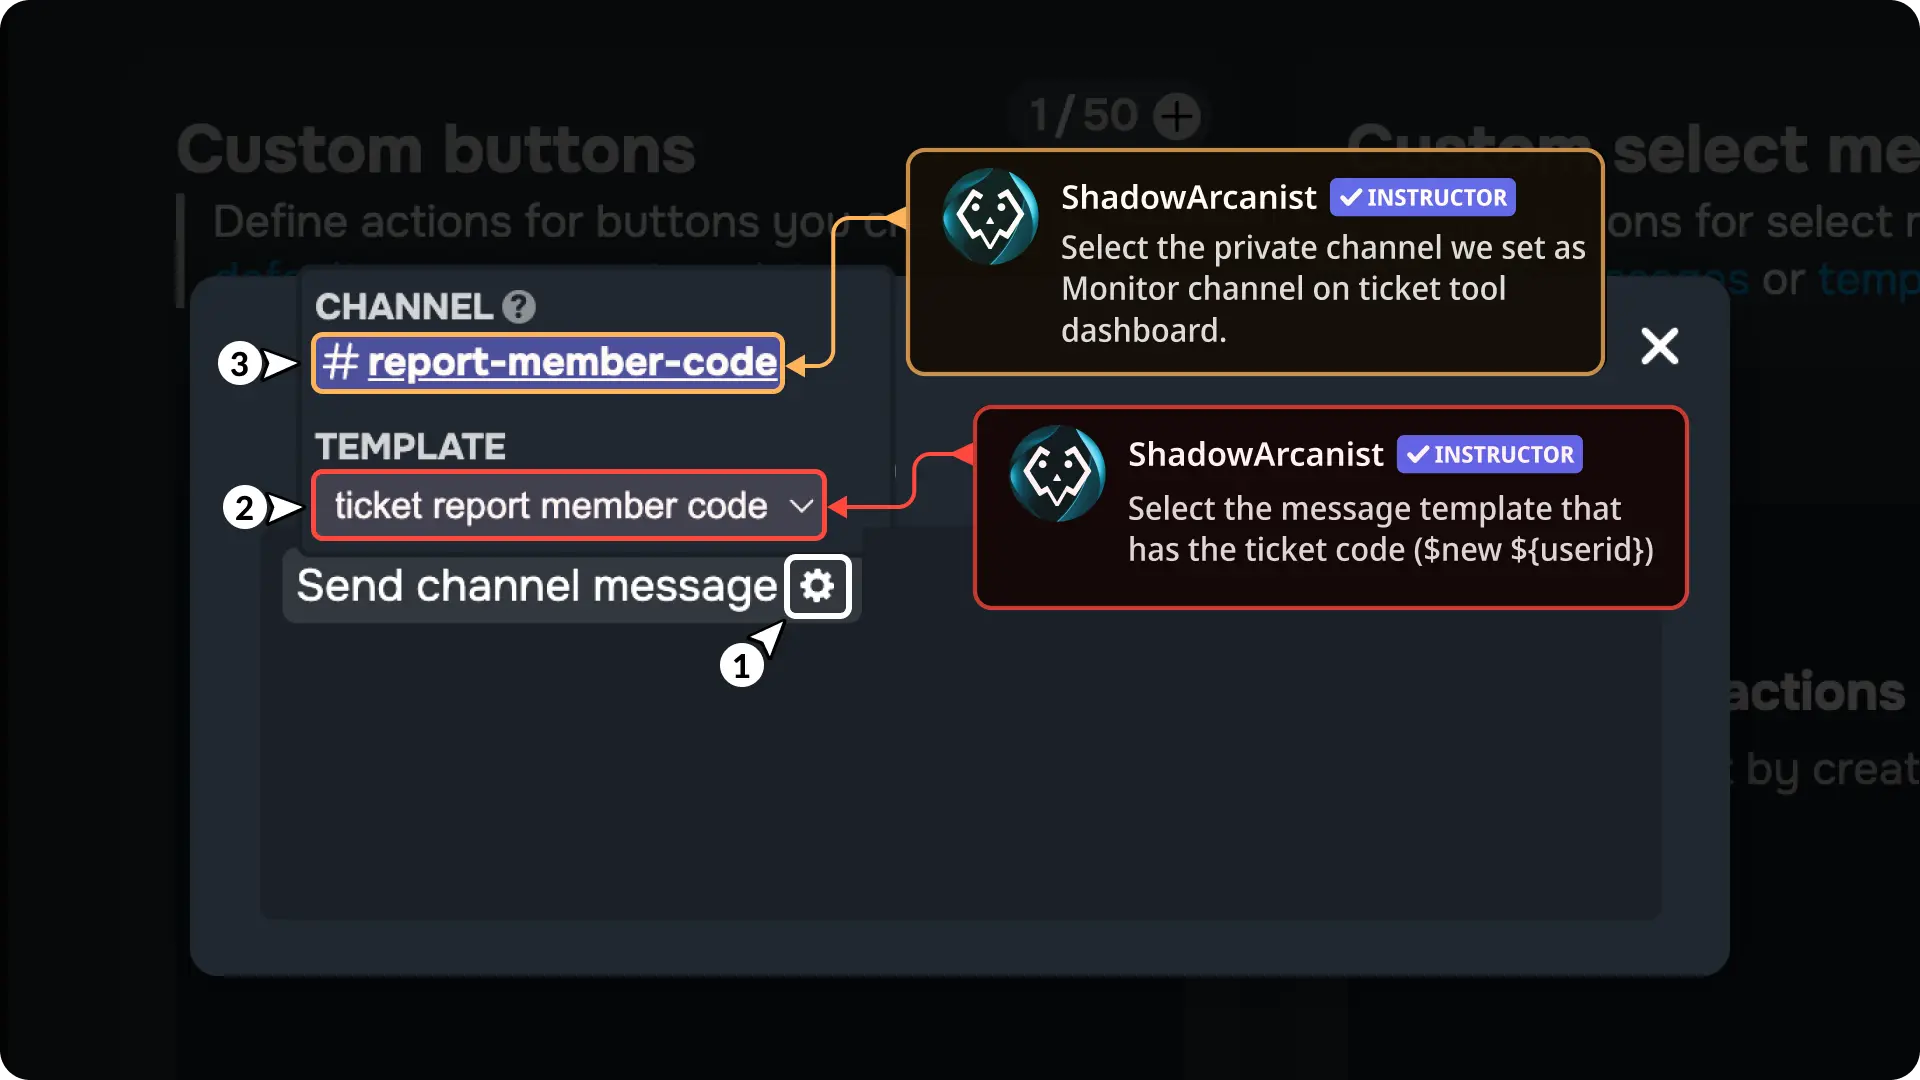
13) Configure the Action of Button Component
Click the ⚙ icon on the Send Channel Message action and choose the template that has the ticket code ($new ${userid}), then choose the Monitor channel we set earlier in the Ticket Tool dashboard.
14 Setup Multi-Choice Ticket Options
So far, we’ve created only one ticket option, "Report Member", in this guide. If you want to add more options, such as "Get VIP role" or "Apply for Staff", for example, you’ll need to repeat the steps outlined in this guide.
The steps to repeat are:
- Create a new panel on the Ticket Tool dashboard
- Create a new private channel on your server and set it as the Monitor Channel on the Ticket Tool dashboard
- Create a new message template on the Sapphire dashboard with the ticket code
- Add a new button to your Ticket Main Message Template (on Sapphire) and configure it to send the ticket code to the new monitor channel you created.
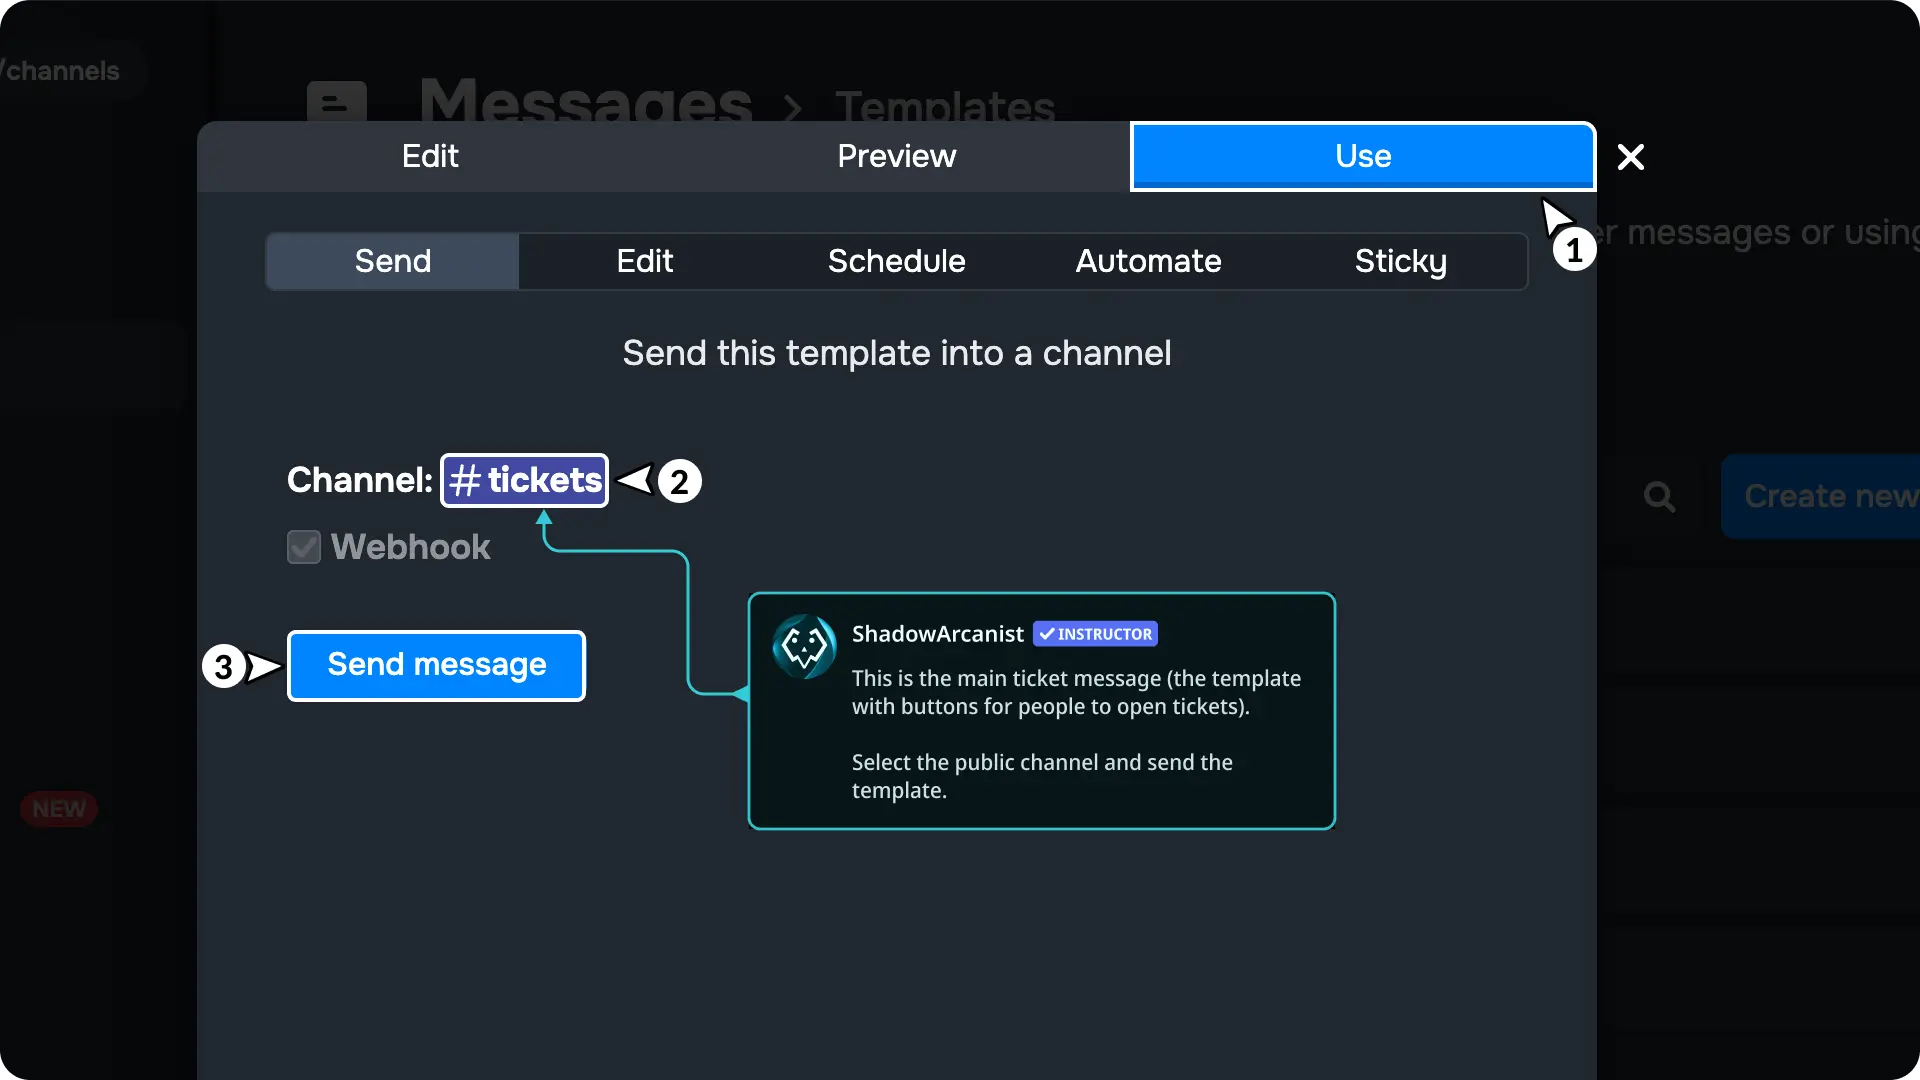
15) Send the Main Message
Go to the Messages page in the sidebar, then go to the Templates module. and open the message template we created on step 4.
Then go to the Use menu on the template editor.
Once you are in the Use menu, select a channel (where you want to send the message with the button) and click the send message button.
Final Result

Troubleshooting
Frequently Asked Questions
Video Tutorial
If any step didn't make sense or you got stuck, you can watch a tutorial video by clicking here
Support
If you need any help then feel free to join our community server or sapphire support server and create a post on the support channel.